Showing posts with label salad. Show all posts

Sunday, August 15, 2010

Gathering Wild Mushrooms in Alaska, Drying Wild Mushrooms, and 5 Recipes for Wild Mushrooms


Perfect 1 pound 10 ounce Boletus edulis

Steve arrived home from work last Friday, a briefcase in one hand and a massive Boletus edulis in the other. A smile of pure joy lit his face. “It’s time to go mushrooming.”

He handed me the mushroom, a king bolete, also known as porcino in Italy and cep in France. I weighed it: 1 pound 10 ounces. When I cut into it, the flesh was firm and pure white, untouched by worm, fly, slug, squirrel, or rot. I’d never seen anything like it. Normally, porcini this big have been heavily predated upon and are chock full of worms.

“Where’d you get this?” “Right in front of the house.” “Whataya mean, right in front of the house?” “Let me show you.” Steve brought me to a spot twenty feet from our front door.

“It’s definitely time to go mushrooming,” I said, thoughts of dinner already a distant memory. “Let’s get changed.”


Leccinum subglabripes

It’s been raining for weeks, so on went rain coats, rain pants, and waterproof hiking boots. Going mushrooming involves tromping through woods, pushing through understory, going up and down hillsides, seeking out terrain where desirable mushrooms thrive. Staying dry is key to maintaining proper enthusiasm.

Mediterranean Cooking in Alaska has moved as of March 2011. To read this post please go to


http://www.laurieconstantino.com/gathering-wild-mushrooms-in-alaska-drying-wild-mushrooms-and-5-recipes-for-wild-mushrooms/


Please click on over and visit my new site. Thank you!


Rules for Gathering and Handling Wild Mushrooms
The first and most important rule for mushroom foragers is: “When in doubt, throw it out.” Do not gather mushrooms that you can’t absolutely, positively identify.
Leave all unknown or questioned mushrooms alone, even if it means walking past many mushrooms of every color and shape before finding one you recognize.

1. The best way to learn about mushrooms is to have someone show you the edible species; spending time studying field guides also helps. The perfect field guide for Alaska doesn’t exist.


The books I like best are...

Mediterranean Cooking in Alaska has moved as of March 2011. To read this post please go to


http://www.laurieconstantino.com/gathering-wild-mushrooms-in-alaska-drying-wild-mushrooms-and-5-recipes-for-wild-mushrooms/


Please click on over and visit my new site. Thank you!


Wild Mushroom Pasta Sauce


Fresh Porcini Salad with Shaved Fennel and Parmesan Cheese


Pasta with Wild Mushroom and Clam Sauce


Wild Mushroom Ragu (Pasta Sauce)


Port Duxelles

Mediterranean Cooking in Alaska has moved as of March 2011. To read this post please go to


http://www.laurieconstantino.com/gathering-wild-mushrooms-in-alaska-drying-wild-mushrooms-and-5-recipes-for-wild-mushrooms/


Please click on over and visit my new site. Thank you!


Sunday, June 27, 2010

A 2 Part Tale of 2 Plants in 2 Countries with 2 Recipes: Purslane-Tomato Salad (Ντομάτα Σαλάτα με Γλιστρίδα) and Beach Lovage-Tomato Salad/Salsa (Ντομάτα Σαλάτα με «Άγριο Σέλινο»)

Introduction

In Greece, friends and relatives are endlessly curious about Alaska. We’re quizzed about daylight, animal life, cost of living, how many thousand miles we live from family. Every exotic Alaskan detail is examined and catalogued.

Back in Alaska, a vast land peopled largely by recent transplants, we describe life on a Greek island in a small village filled with relatives (family roots on the island go beyond reach of transmitted memory). We divert Alaskans with stories of family intrigues, open-handed generosity, and island bureaucratic snafus.

Greece and Alaska could not be more different. Yet, in both places, I shop for groceries, forage for wild edibles, and cook with abandon.

A friend of mine recently asked whether a dish cooked in a Greek kitchen tastes the same when made in Alaska. The simple answer: no.  The same recipe tastes different in Greece and Alaska because the ingredients aren’t the same in the two places.

For example: Greek tomatoes have more flavor, as do Alaska spinach and lettuce. Wild greens available in Greece don’t grow in Alaska and vice versa. American and Greek flour, butter, and eggs all bake up differently. Similar differences are found with virtually every ingredient. In both countries, I use the same basic recipes, but the results always vary, sometimes slightly, sometimes significantly.

No matter where one cooks, the key to a good result is tasting what you are making as you are make it. No one should ever blindly follow a recipe (even mine), no matter how trusted the source. The flavors of vegetables, herbs, spices, meats, cheese, fruits, you name it, all change subtly from purchase to purchase and day to day. The only way to compensate for these changes, and to generally adjust a recipe to please your palate, is to taste.

Two articles with recipes follow that illustrate this point. Part One was written in Greece last summer. It’s about purslane, Portulaca oleracea, a weed growing rampant in much of the world (including North America, but not Alaska). I combined the purslane with tomato to make a cooling salad.

Part Two is about a recent gathering expedition for beach lovage, Ligusticum scoticum, in Alaska. Using the Greek Purslane-Tomato Salad as the starting point, I tweaked the flavors to accommodate my Alaskan ingredients.  I served Beach Lovage-Tomato Salad with grilled king salmon; loaves’ herby freshness and the salad’s tart dressing nicely complimented king salmon’s richness.


Part One: Purslane-Tomato Salad in Greece

For years, our yard in Greece was a wasteland of weeds.  Every year on arrival we whacked down the tangle and borrowed a truck to haul away several loads of debris.

Our messy yard contrasted sharply with the carefully tended gardens of family, friends, and neighbors. Cousin Effie has an especially green thumb.  Most of her yard is paved over, but her narrow strip garden holds an impressive collection of flowering plants.

A couple years ago, Effie was sighing over her lack of a vegetable garden.  Since she lives only a few blocks away, and we are in Alaska for most of the year, we suggested she use our yard.

Now, when we arrive in Greece, we open the gate to a healthy, green garden, both decorative and edible, instead of a jungle. We planted roses and a bottle brush tree.  Effie and cousin Tzani have surrounded them with smaller, flowering plants. Blue jasmine from Tzani and a sweet-smelling white-flowered vine climbs the neighbor’s wall. What were tiny rosemary starts are now bushes.

This year the vegetable garden includes eggplant, okra, green beans, summer squash, tomatoes, mint, and celery.  The eggplants are heavily laden with fruit.  We pick them only when it’s time to cook (or gift eggplants); their texture and flavor are dramatically better than any supermarket eggplant available in Alaska.

While in the village, we take over weeding and watering the garden.  This year, purslane and crab grass were the most dominant weeds. While crab grass is purely an annoyance, purslane makes a tasty edible green.

Purslane has been used in Greece throughout recorded history.  Hippocrates, Galenus, and Dioscurides documented its many medicinal uses.  In the kitchen, it’s used raw in salads, mixed with yogurt, added to soups, served with meat or fish, and pickled for winter salad.

In Greece, purslane is best harvested by June or July, at which time both stem and leaves can be used. In September, stems are too tough to eat, but leaves still taste great.

This year, our first day back on the island, we drove to the main town to shop for basics. The day was a scorcher; we returned home hot and tired.  I wasn’t in the mood to cook and, after a day spent under the relentless Greek sun (at least to an Alaskan), didn’t want to eat more than a salad.

While I cut vegetables, Steve collected a colander full of purslane from the garden. Its succulent, slightly sour leaves, combined with sweet tomatoes and tart lemon juice, made a refreshing salad, perfect for a hot day.

Purslane-Tomato Salad (Ντομάτα Σαλάτα με Γλιστρίδα)
Serves 2 – 4
If you don’t have fresh purslane, see the recipe below for Beach Lovage Salad and follow the recommended substitutions there for a fresh, cooling summer salad.

Dressing:
1/4 cup extra virgin olive oil
2 Tbsp. fresh lemon juice
Salt
Freshly ground black pepper

Salad:
1 1/2 cups diced tomatoes, 1/2” dice
1 1/2 cups cleaned purslane leaves
3/4 cup diced cucumbers, 1/2” dice
3/4 cup diced red onions, 1/2” dice
1/4 cup minced fresh parsley
1 Tbsp. minced fresh mint

Make the dressing: Whisk the olive oil into the lemon juice. Season with salt and freshly ground black pepper to taste.

Make the salad: Toss all the ingredients together. Drizzle with the dressing and toss again. (You may not need all the dressing.) Taste and add salt or freshly ground black pepper, as needed.

Beach Lovage and Chocolate Lilies

Part Two: Beach Lovage-Tomato Salad in Alaska

Nearing the spring equinox, by June’s second week Anchorage was enjoying almost 20 hours of daylight. Winter doldrums were a distant memory; the whole town was in a good mood.

Sunday we woke early. Sun streamed in the window, warming our faces. The sky was clear bright blue. Staying in bed wasn’t possible. We headed out to find a beach where we could harvest wild plants.

After making the circuit of possible foraging sites, we finally came across a field of beach lovage (Ligusticum scoticum).  Also known as Scotch lovage, sea lovage, wild celery, and petrushki, beach lovage grows on sandy beaches along the coasts of Alaska, Canada, and the Northeastern United States.

Beach lovage is easy to identify with its three-lobed leaflets and smooth, reddish-purple stem.  It’s best harvested before flowering.

One caution: Beach lovage is in the Umbelliferae family and its flowers are similar to those of relatives like carrots, parsley, and dill. However, water hemlock, a poisonous plant is also in the Umbelliferae family, and has similar flowers but very different leaves. As with all wild foraging, be certain you know what you’re gathering and be sure to follow the forager’s primary rule: “when in doubt, throw it out.”

The flavor of fresh beach lovage is unique and wonderful. The closest approximation would be to mix celery, parsley, and a little lemon zest, but there is still a missing flavor, the hint of wild bitterness that makes beach lovage special.

Although the flavors of purslane and beach lovage are not at all the same, both have a tart freshness that can't be purchased in a supermarket. As I tossed about ideas for using the beach lovage, I kept thinking about the Purslane-Tomato Salad we'd had last summer. With that in mind, I started mixing and tasting, adding cucumbers, then more mint, then more lemon juice, a little of each at a time, until the balance of flavors was correct for beach lovage - and for our palates.

In the last two weeks, I’ve used beach lovage in a risotto that was devoured by guests, a lovely topping for pan-fried halibut, and delicious halibut cakes.  The best way I served beach lovage was in the modified version of my Greek Purslane-Tomato Salad.

Beach Lovage-Tomato Salad/Salsa (Ντομάτα Σαλάτα με «Άγριο Σέλινο»)
Serves 4 as a salad, or 8 as salsa for serving with fish
If you don’t have beach lovage, substitute 1/4 cup minced parsley, 1/4 cup minced celery leaves, and 1/2 tsp. finely grated lemon zest (or 3 Tbsp. minced parsley, 1 Tbsp. minced lovage, and 1/2 tsp. finely grated lemon zest).

Dressing:
1/4 cup extra virgin olive oil
3 Tbsp. fresh lemon juice
Salt
Freshly ground black pepper

Salad:
1 1/2 cups diced tomatoes, 1/2” dice
1 1/2 cups diced cucumbers, 1/2” dice
3/4 cup diced red onions, 1/2” dice
1/2 cup minced fresh beach lovage leaves
3 Tbsp. minced fresh mint

Make the dressing: Whisk the olive oil into the lemon juice. Season with salt and freshly ground black pepper to taste.

Make the salad: Toss all the ingredients together. Drizzle with the dressing and toss again. (You may not need all the dressing.) Taste and add salt or freshly ground black pepper, as needed. 
~~~~~~~~~~~~~~~~~~~~~~~~~~~~~

This post is included in Weekend Herb Blogging compiled by Chris from Mele Cotte.

Tuesday, March 24, 2009

Recipes: Pan-Fried Salmon with Curly Endive and Christmas Lima Beans & Christmas Lima Bean Salad

Christmas lima beans, with their speckled, swirled coats of maroon and cream, are one of the world’s most beautiful dried beans. When properly cooked, their texture is firm and their taste nutty.

Christmas limas are a perfect foil for strong, spicy flavors and are robust enough to serve on their own as a salad, spread, side dish, or main course. They go particularly well with wild mushrooms, bitter greens, and strong-flavored fish like salmon or mackerel.

Christmas Lima BeansThe

Ark of Taste is a list of endangered food plants and animals that the Slow Food Foundation for Biodiversity seeks to protect and defend. Christmas limas (Phaseolus lunatus), also known as chestnut limas, are now on the Ark of Taste list for the United States.

According to the
Ark of Taste website, “gastronomic accounts date the Christmas Lima Bean to the 1840s when it was especially popular in the southwestern region of the US. … It is used in both its mature green state as a shelled Lima for eating fresh, freezing or canning as well as used dried, and cooked into stews and casseroles. The Christmas Lima is very successful in the high desert environments of the southwest. They are hardy, heat tolerant and very productive—a bean known for its yield and versatility.”

A couple days ago, I found myself with time to kill at
Natural Pantry, an Anchorage store that started as a health food/vitamin store. Over the years, without my noticing it, Natural Pantry has added an extensive line of gourmet and specialty food products. Each aisle brought new surprises. I left with two full bags of hard-to-find-in-Anchorage ingredients, including a package of Christmas Lima Beans. I’ll definitely return to Natural Pantry, sooner rather than later.

One final, but important, note: Dried Christmas lima beans are delicious. Other than genes, they have nothing in common with the nasty green limas I remember from childhood.

Pan-Fried Salmon with Curly Endive and Christmas Lima Beans
Serves 4
Christmas Lima Bean Salad may be made well-ahead. If it is, this dish makes a quick weekday meal. Before serving refrigerated bean salad, remove it from the refrigerator at least 1 hour, or put it in the microwave on medium for approximately 2 minutes.

1 pound wild-caught salmon fillets
Salt
Freshly ground black pepper
1 head curly endive
(approximately 8 cups cleaned and chopped)
1/4 cup
chiffonade-cut fresh mint
1 recipe Christmas Lima Bean Salad (see recipe below)

Wash the salmon and dry it well. Using needle-nosed pliers, remove as many pin-bones from the fillet as possible. Skin the fish, if necessary, and cut it into 4 even pieces. Season the fillets on both sides with salt and freshly ground black pepper. Let the seasoned fish rest for 30 minutes at room temperature before cooking.

While the fish is resting, wash the curly endive, dry it well, and roughly chop it into bite-sized pieces. In a large bowl, toss the curly endive with the mint and Christmas Lima Bean Salad. Taste and add salt or freshly ground black pepper, as needed. Divide the endive and bean mix between 4 plates.Heat the olive oil in a pan until it is hot, but not smoking. Turn the heat to medium high, and add the salmon. Cook for 3 – 5 minutes, or until the pan side of the salmon is lightly browned. Turn over and cook for 1 - 3 minutes, or until the salmon is done to your taste. The exact cooking time depends on the fillets’ thickness; keep in mind that salmon tastes better slightly underdone than it does when it's overdone.

Place the hot salmon fillets on top of the endive and bean beds. Serve immediately.

Christmas Lima Bean SaladChristmas Lima Bean Salad
Serves 4-6

The amount of jalapeño in the dressing, and whether you include the jalapeños’ seeds (which add heat), depends on how spicy you like your food. I last made this with 2 jalapeños including the seeds, and it was pleasantly spicy. My husband would’ve preferred it with 3 whole jalapeños. If you don’t like spicy food, remove the seeds before adding the jalapeños. Keep in mind that jalapeños are not uniformly hot. If your jalapeños are too mild, add a little
sambal oelek or crushed red pepper flakes to make a spicier dressing. I prefer the taste of capers preserved in salt to those preserved in brine (although either works here), and usually rinse and soak the capers to remove excess salt. However, for this dressing, I used the capers salt and all, and didn’t separately add salt to the dressing.

Beans:
1 cup dried Christmas lima beans (6 ounces dried or 2 1/2 cups cooked)
5 bay leaves
Water

Dressing:
2-3 red or green jalapeño peppers
4 tsp. capers, preferably salted
2 garlic cloves
1/4 cup red wine vinegar
3/4 cup olive oil
Salt
Freshly ground black pepper

Salad:
1 cup thinly sliced red onion
1/2 cup
chiffonade-cut fresh mint

Cook the Beans: Place the beans in a large pot, cover them with lots of water, and let soak overnight. The next day, drain and rinse the beans. Return them to the pot; add the bay leaves and enough water to cover the beans by 3 inches. Bring to a boil, cover, turn down the heat to low, and simmer the beans for 60-90 minutes, just until the flesh is tender (be careful not to cook the beans until they are mushy). Drain the beans, reserving the bean cooking water (see Note below).

Make the Dressing: While the beans are cooking, purée the jalapeños, capers, garlic, and red wine vinegar in a blender. Add the oil to the other ingredients slowly, while the blender is running. Season to taste with salt and freshly ground black pepper.

Make the Salad: Mix the cooked Christmas lima beans with the dressing, red onions, and fresh mint. Serve warm or at room temperature.

Note on Bean Cooking Water: If I’m not using it right away, I freeze bags of bean cooking water and use it instead of stock in soup and stew recipes. The cooking water from Christmas lima beans tastes particularly good, and is definitely worth saving.

~~~~~~~~~~~~~~~~~~~~~~~~~~~~~~~~~~~~~

This is my entry for My Legume Love Affair – 9th Edition (MLLA9) which I am hosting this month and which was created by Susan of The Well-Seasoned Cook.

Thursday, February 19, 2009

Recipe for Salad of Bitter Greens with Sherry Truffle Vinaigrette (Σαλάτα για Τσικνοπέμπτη)

With 11 days to go, Greek Orthodox Easter Lent is fast approaching. For the devout, Lent is a time of spiritual cleansing, and includes fasting from meat and most animal products. Lent ends with the arrival of Easter, which this year is April 19.

Today, however, thoughts of fasting are far, far away. Today is
Tsiknopempti (Τσικνοπέμπτη, pronounced “tseek-no-PEMP-tee”), the day Greeks celebrate grilled meat in all its glory. The magnificent smell of meat on the grill wafts through the air of cities, towns, and villages across Greece, and gives the holiday its name: Burnt Meat Smell Thursday.

In Alaska, we’ll cook our grilled meat
in the fireplace. To accompany it, I’m making a celebratory Salad of Bitter Greens with Sherry Truffle Vinaigrette.

The Vinaigrette is unusual, but it’s a surprisingly good partner for meat of all kinds. When mixed together, tart sherry vinegar and pungent white truffle oil form an entirely new flavor that tames greens’ bitterness and helps balance meat’s richness.

Happy Tsiknopempti!

Radicchio Frisee and Arugula SaladSalad of Bitter Greens with Sherry Truffle Vinaigrette
Serves 8
To preserve the greens’ crispness, dress the salad right before serving. Extra Sherry Truffle Vinaigrette keeps in the refrigerator about a week.

Vinaigrette:
1/4 cup sherry vinegar
1/3 cup extra virgin olive oil
1 Tbsp. white truffle oil
Salt
Freshly ground black pepper

Salad:
1 small head
frisée (curly endive)
1 small head
Chioggia radicchio (round-head radicchio)
1 bunch arugula
1 bunch green onions
1/2 cup fresh Italian parsley leaves

Make the Vinaigrette: Put all the ingredients in a jar with a tight fitting lid and close tightly. Vigorously shake the jar until the ingredients are thoroughly combined and emulsified. Taste and add salt or freshly ground black pepper, as needed. If the oil and vinegar separate, shake the Vinaigrette right before dressing the salad.

Make the Salad: Wash the greens and onions, remove any damaged parts, and spin dry. Slice green onions very thinly on the
diagonal. Tear the frisée, radicchio, and arugula into bite sized pieces, and mix with the parsley leaves and green onion slices in a large salad bowl.

Just before serving, lightly sprinkle the greens with salt and freshly ground black pepper. Toss the salad with an appropriate amount of Sherry Truffle Vinaigrette (there will likely be dressing left over). Serve immediately.
~~~~~~~~~~~~~~~~~~~~~~
This is my entry for
Weekend Herb Blogging, hosted this week by Susan from The Well-Seasoned Cook.

Tuesday, September 9, 2008

Greek Cookbooks: Summer Tomatoes in Greece with Historical Information and Recipe for Strapatsada (Greek Scrambled Eggs and Tomatoes) (Στραπατσάδα)

(From Greece)

Summer tomatoes are a glory of Greece. Red and juicy, warmed by the sun and simply seasoned with salt, Greek tomatoes explode with flavor, bathing taste buds in their sweet-yet-tart goodness.

We arrived in Greece this (and every) year during tomato season. Our relatives, friends, and neighbors greet us with food, which always includes lots of luscious fresh tomatoes. Right now, there are at least ten pounds of gorgeous tomatoes sitting on the counter, and the refrigerator is packed with grapes, okra, peppers, and other seasonal vegetables. It’s the best possible welcome home gift. We happily use the bounty.


Horiatiki Salata and KebabOne of the best ways to eat summer tomatoes is in Horiatiki Salata (Village Salad), a mix of tomatoes, cucumbers, onions, green pepper, and feta cheese, dressed only with olive oil and salt. This most beloved of Greek salads appears on taverna menus throughout the country. During tomato season in Greece, we eat a variation of Horiatiki Salata every day.

Many Greeks like salad tomatoes when they’re still slightly green. I prefer them at their peak of ripeness. When I’m eating salad with Greek relatives, this balances out perfectly. I snag the reddest tomato bits. They go for the greener parts.

It’s hot on the island during tomato days. I’m not a hot weather aficionado, but appreciate that heat helps give Greek tomatoes their superior flavor.

At this time of year, light, flavorful, quick-cooked foods are welcome. They help avoid spending too much time in hot kitchens. One favorite such Greek dish is Scrambled Eggs and Tomatoes. In some places it’s called Strapatsada, in others Kayianas, Menemeni or Sfoungato Politiko, and in many it’s simply Eggs and Tomatoes (Avga me Domates/Αυγά με Ντομάτες).

Sliced TomatoesThe Greek name “Strapatsada” derives from the Italian for “scrambled eggs” (“uova strapazzate”).
Some say the dish was originally brought to Greece by Sephardic Jews. If true, given the Italian name, a plausible route is via the Venetian Jews to the Jews in Corfu and the significant Jewish population that used to exist in Thessaloniki. (Most Greek Jews died in German concentration camps during World War II; today the entire Jewish population of Greece is about 5000.) Certainly, Strapatsada is consistent with Jewish dietary restrictions.

Although
some debate the Jewish connection, it’s commonly accepted that Strapatsada as a Greek name for Scrambled Eggs and Tomatoes originated in the Ionian Islands (including Corfu) during their years of Venetian rule (1401 – 1797). See also Voice of Corfu: “… tomatoes … were brought to Corfu by the Venetians.” It’s documented that after the Venetian conquest, Corfiot Jews developed close relations with the Venetian Jewish community and its many international merchants and traders. Cookbook of the Jews of Greece, Nicholas Stavroulakis (Lycabettus Press 1986).

According to food historian
Claudia Roden, the 16th and 17th century Jewish merchants of Venice “traded with their relatives and co-religionists around the Mediterranean … [and others] in South America.” Roden says the Jewish merchants “introduced New World food products such as tomatoes…” throughout the entire Mediterranean Jewish community.

Roden points out “a tomato sauce in Venice is called ‘alia giudia’” (Jewish Style). In her history of Italian Jewish cooking, The Classic Cuisine of the Italian Jews: Traditional Recipes and Menus and a Memoir of a Vanished Way of Life (Giro Press 1993), Edda Servi Machlin says: “In the 18th century, the first people who used tomatoes in their cooking were Jews.”

See also, “[S]ome of the [Sephardim] … traveled as merchants to the New World, bringing back a whole new range of vegetables which were quickly adopted into the Sephardic kitchen. These were adopted, in turn, by the others among whom they lived, especially as the Sephardim were dispersed through the Mediterranean basin, into the Balkans, and parts of Western Europe.”

The Jews were also among the first to bring tomatoes to England and America. In his 1753 supplement to A History of Plantes (Thomas Osborne 1751), John Hill documented the use of tomatoes “eaten stewed or raw” by Jewish families in England. The tomato-eating 18th century English Jews “were of Portuguese or Spanish descent and … maintained contact with Jewish communities in the New World who consumed tomatoes.” The Tomato in America, Andrew F. Smith (University of South Carolina Press 1994). Smith says “at least one English-born Jewish physician introduced tomatoes into Virginia during the mid-18th century.”

If the conventional wisdom is correct that Strapatsada came to Corfu during the Venetian years, and we accept the historical record that Jews adopted tomatoes into their diets by at least the mid-18th century (and probably earlier), it isn’t too far-fetched to believe that Strapatsada was originally a Jewish creation. Indeed,
Cookbook of the Jews of Greece and Γεύση από Σεφαραδιτική Θεσσαλονίκη: Συνταγές των Εβραίων της Θεσσαλονίκης (Tastes of Sephardic Thessaloniki: Recipes of the Jews of Thessaloniki), Νίνα Μπενρουμπή (Φυτράκη 2002), which document the traditional foods of Greek Jews, both have recipes for Strapatsada.

It could be that tomatoes weren’t used anywhere in Greece
until the 19th century. And, as with all simple food combinations, it’s entirely possible that each version of Scrambled Eggs and Tomatoes was created independently and spontaneously by creative cooks making use of seasonally fresh foods.

No matter its origin or name, Scrambled Eggs and Tomatoes is easy to make and very flavorful. It’s especially good when made with sun-ripened summer tomatoes.

StrapatsadaScrambled Eggs and Tomatoes (Strapatsada – Στραπατσάδα)
Serves 2
When I make Strapatsada with fresh sweet summer tomatoes, I use mint to season it. Mint’s flavor enhances the tomatoes’ sweetness and goes well with eggs. Made with canned tomatoes, dried oregano makes a better seasoning for Strapatsada. In our house, three eggs are plenty for two people, but eaters with hearty appetites may prefer four eggs. I like the finished egg curds to be smooth-textured so skin the tomatoes. Skinning is not necessary; the Strapatsada will taste great if you leave on the skins. To make the simplest version of Strapatsada, cook tomatoes in olive oil until their water evaporates, then scramble in the eggs, seasoning only with salt and pepper.

2 cups diced tomatoes (1 pound tomatoes) or 14.5-ounce can diced tomatoes
1/2 cup diced yellow onion, 1/8” dice (optional)
1/4 cup olive oil
Salt
Freshly ground black pepper
2 cloves garlic, grated or minced (optional)
1 tsp. sugar (use only if needed)
3 - 4 eggs
1/2 cup crumbled feta (optional)
1 Tbsp. minced fresh mint (or oregano, dill, basil, or parsley) (optional)

If starting with fresh tomatoes and you want to skin them, cut a shallow “X” on the bottom of the tomato. Drop the tomatoes in boiling water for 20 seconds. Remove the tomatoes and drop them in cold water. Drain and slip off the peels. Cut the tomatoes in 1/2” dice.

Peeling TomatoesSauté the onions, lightly seasoned with salt and freshly ground black pepper, in olive oil until they soften and start to turn golden. Stir in the diced tomatoes, bring to a boil, turn down the heat to medium, and cook for 15 minutes or until most of the water in the tomatoes has evaporated, stirring regularly to prevent scorching and to break up the tomatoes. Stir in the garlic and cook for 5 minutes. Taste; if the tomatoes are too acidic, add 1 teaspoon sugar.

Whisk together the eggs. Stir eggs, cheese, and mint into the cooked tomatoes, and continue to cook over medium-low heat, stirring regularly, until the eggs are cooked and form small curds; the eggs should be served when they’re still a little juicy. Eggs cook faster at a higher temperature, but taste better if cooked over lower heat for a longer time.

Variations:
- Use grated kefalotyri, kasseri, or parmesan instead of feta.
- Add chopped sausage, smoked pork, or ham.
- Add diced green peppers.
- Substitute puréed roasted red peppers for half the tomatoes.
- Substitute green onions for the yellow onion.
- Add Aleppo or crushed red pepper flakes.
- Add cinnamon stick to the sauce and omit the herbs.
- Add cumin or allspice to the sauce and omit the herbs.
- After mixing in the eggs and tomatoes, quit stirring and let the eggs set, then flip and cook on the second side (as for a frittata).
- When the tomatoes are cooked and saucy, turn the heat to low, make indentations in the sauce, crack an egg into each indentation, cover, and cook just until the egg whites set and the yolks are still juicy.
~~~~~~~~~~~~~~~~~~~~~~~~~
This is my entry for
Weekend Herb Blogging, hosted this week by Gretchen from Canela & Comino.

Tuesday, July 29, 2008

Garden Treasure with 4 Recipes for Arugula: with Eggs, in Salads, and in Pasta Sauce (4 Συνταγές για Ρόκα)

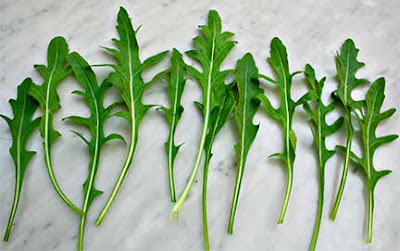
Arugula SelveticaArugula (also known as Roka, Roquette, and Rocket) wins my garden’s miracle plant of the year award.

We’ve grown arugula often over the years. We usually get a salad or two before it bolts; a common problem in Alaska. With our long days, nearly 20 hours of daylight at the solstice, many herbs and green vegetables go to seed prematurely.

Despite its tendency to bolt, we grow arugula because we enjoy its bite in salads. Last year, the arugula followed its typical pattern: two salads at the beginning of summer and it bolted. I assumed that was it. I was wrong.

This spring, after the snow melted, we noticed radicchio we’d harvested last year, but hadn’t pulled up, coming back. In the same bed, mystery plants were emerging; they had tiny green leaves growing around slender dead stalks.

We had no idea what they were (I guessed domesticated Italian dandelions we grew last year in the same bed), but let them grow so we could find out. As the plants grew larger, I realized last year’s arugula had wintered over.

I was initially confused, as I’d thought arugula was an annual (Eruca vesicaria subspecies sativa). Although I'd only grown annual arugula, it turns out “arugula,” actually refers to three separate plants: E. vesicaria ssp. sativa, Diplotaxis tenuifolia, and Diplotaxis muralis.

Last year we planted arugula seeds brought back from Greece. When I dug out the seed packet, I discovered it was Diplotaxis tenuifola, also known as wild arugula or Selvetica, an extremely cold hardy perennial (as plants must be to survive Alaskan winters). I’m thrilled to have stumbled upon it, and will give it a permanent place in my garden.

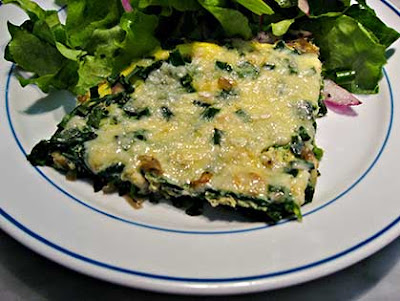
Arugula in the GardenMost commonly I use arugula in mixed green salads, or on its own with blue cheese and best quality balsamic vinegar. This year the arugula was so prolific I branched out. Arugula, briefly sautéed with shallots, adds a nice bite to omelets and frittatas. Mixed with tomatoes and anchovies, it makes a delicious pasta sauce.

My mother, upon hearing of my arugula glut, recommended the wonderful Arugula and Tomato Salad from Carol Field’s
In Nonna’s Kitchen: Recipes and Traditions from Italy’s Grandmothers. Mother was right; arugula goes really well with tomatoes.

Anchovies are the secret ingredient that makes both the salad and pasta sauce special. When minced and incorporated into other ingredients, anchovies add flavor without overwhelming the taste buds.

More Arugula Recipes:
Grilled Radicchio and Arugula Salad with Parmesan Shavings
Watermelon, Feta, and Arugula Salad

Arugula and Eggs
Arugula and Eggs
Serves 2 – 4


4 large eggs
1 cup diced shallots, 1/4” dice
Salt
Freshly ground black pepper
1 Tbsp. olive oil
4 packed cups cleaned arugula
3/4 grated kasseri or fontina cheese
1/4 cup minced chives

Crack the eggs in a bowl, season lightly with salt and freshly ground black pepper, and whisk to combine.

Sauté the shallots, lightly seasoned with salt and freshly ground black pepper, in olive oil until they soften and start to turn golden. Add the arugula, in batches if necessary, and cook just until all the arugula has wilted.

Evenly distribute the arugula in the pan and pour the eggs over. Cover and turn the heat down to low. Keep checking the eggs and when they’re almost-but-not-quite set, sprinkle the cheese and minced chives over, cover, and cook until the cheese melts.

Sprinkle with freshly ground black pepper, cut into wedges, and serve.

Arugula and Tomato Salad
Serves 4

Adapted from In Nonna’s Kitchen: Recipes and Traditions from Italy’s Grandmothers by Carol Field (HarperCollins 1997)
Lightly salting the tomatoes helps bring out their flavor, but be careful not to overdo as anchovies can be quite salty. I made this with the smaller amount of anchovies, but we both thought it would benefit from more; next time I’ll use the larger amount. I originally made this with whole anchovies, as shown in the picture, but we prefer the salad when the anchovies are minced in the dressing. Either way, it's tasty.

8 medium tomatoes, sliced 1/2” thick
Salt
1/4 cup olive oil
2 Tbsp. red wine vinegar
Freshly ground black pepper
8 - 16 anchovy fillets (1 - 2 ounces)
2 cups thinly cut shreds of arugula

Divide the tomato slices between 4 salad plates and salt lightly. Whisk the olive oil into the red wine vinegar and season with freshly ground black pepper. Mince the anchovy fillets and mix them into the dressing. Taste and add freshly ground black pepper or salt as needed. Toss the dressing and arugula (there may be leftover dressing), and mound on the tomatoes. Serve immediately.

Arugula, Blue Cheese, and Balsamic Salad
Serves 4

I never tire of this tasty salad. Because there are so few ingredients, it’s important to use best quality balsamic vinegar.

4 packed cups arugula
1/2 cup thinly sliced red onion
1/4 crumbled Roquefort or other blue cheese
2 Tbsp. extra virgin olive oil
1 Tbsp. best quality balsamic vinegar
Salt
Freshly ground black pepper

Wash and dry the arugula and tear large leaves into pieces. Add the arugula, red onion, and half the blue cheese to a salad bowl. Whisk together the olive oil, balsamic vinegar, salt, and freshly ground black pepper. Toss the dressing with the salad ingredients. Taste and add more balsamic vinegar, if needed. Sprinkle with the remaining blue cheese, grate freshly ground black pepper over the salad, and serve.

Arugula, Anchovy, and Tomato with OrecchietteArugula, Anchovy, and Tomato Sauce with Orecchiette
Serves 4
This recipe calls for a large quantity of arugula, which I measured after it had been cleaned and roughly chopped. If you don’t have arugula, dandelions or other wild greens are the best substitute; the dish may also be made with radicchio, Swiss chard or spinach. Toast the pine nuts in a 350°F oven or dry frying pan. In either case, pine nuts burn easily and must be watched carefully as they cook. Onions cook more evenly when lightly salted before sautéing, however, anchovies are salty so be sure not to over-salt the onions.

1/2 pound dried
orecchiette or any other pasta
2 cups diced onion, 1/2” dice
2 Tbsp. extra virgin olive oil
Salt
Freshly ground black pepper
16 anchovy fillets (2 ounces)
1 Tbsp. minced garlic
1 tsp. Aleppo pepper or 1/2 tsp. red pepper flakes
1/2 pound cleaned and roughly chopped arugula or other strong-flavored greens
2 cups diced fresh tomato, 3/4” dice
1/3 cup water
1 cup chopped green onions
3/4 - 1 cup freshly grated parmesan cheese
1/4 cup toasted pine nuts

Cook the pasta in boiling, salted water and cook until it is al dente. Drain the pasta and toss with a little olive oil.

Sauté the onions, lightly seasoned with salt and freshly ground black pepper, in olive oil until they soften and start to turn golden. Add the anchovies, garlic, and Aleppo pepper and cook for one minute. Stir in the arugula, tomatoes, and water, and cook for 3 minutes. Add the cooked pasta and green onions, and cook just until the pasta is warmed through. Toss with 1/2 cup cheese and half the pine nuts. Sprinkle with the remaining cheese and pine nuts and serve immediately.

~~~~~~~~~~~~~~~~~~~~~~~~~~~~~~
This is my entry for Weekend Herb Blogging, hosted this week by Kelly from Sounding My Barbaric Gulp.

Sunday, July 27, 2008

Recipes for Crispy Zucchini Flowers with Cheesy Potato-Basil Stuffing & Radish Horta (Κολοκυθοανθοί Γεμιστοί με Τύρι, Πατάτες, και Βασιλικός & Χόρτα)

Stuffed Zucchini FlowersZucchini flowers are a seasonal treat that appear only briefly. Every year, I look forward to their arrival.

The flowers are fragile so must be used soon after picking. As a result, the only zucchini flowers available in Alaska are sold at farmer’s markets or grown in home gardens.

I was thrilled to arrive at the farmer’s market this morning and find a profusion of zucchini flowers. I immediately grabbed a bag and started picking out perfect specimens.

While I was making my selection, three different people asked me how to use the flowers. “Fry them in tempura batter, stuff them and fry them, cook them like stuffed grape leaves, cut them up and put in frittatas or omelets…,” I drifted off as the questioners’ eyes glazed over.

Besides the zucchini flowers, I also bought fresh basil. Waiting in line to pay, I imagined a stuffing for the flowers flavored with basil and cheese. The flavor of this stuffing was crystal clear in my imagination; I couldn’t wait to try it out.

The result was worthy of the year’s first zucchini flowers. The beer batter was light and very crispy, and contrasted wonderfully with the creamy potato-based stuffing. Basil contributed its herby essence, while the cheese tied all the flavors together.

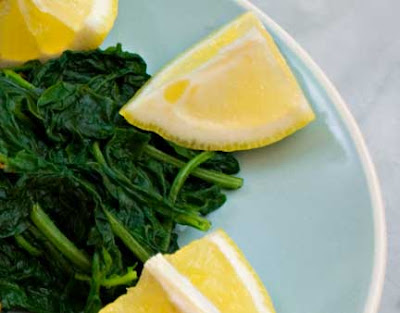
To round out the meal, I made Horta, a traditional Greek dish of boiled greens dressed with olive oil and lemon. Any variety of edible greens may be cooked as Horta. Tonight I used fresh radish leaves, a tasty green that too often ends up in the garbage.

Part of the reason radish greens aren’t often eaten may be their fuzzy surface. I suspect a more important reason is the leaves of supermarket radishes are usually so beat up they’re no longer worth eating.

Garden fresh radish greens are definitely worth eating. When they’re tiny, and before they get too fuzzy, radish greens make a spicy addition to fresh salads. Once they get older, I prefer cooking the greens to improve their texture and mouth feel.

For more information about cooking with zucchini flowers, my friend Maria of
Organically Cooked in Hania, Crete, uses them often: baked in the oven, stuffed and cooked with grape leaves, stuffed and cooked with stuffed tomatoes and peppers, and added to a green onion pie.

Crispy Stuffed Zucchini FlowersCrispy Zucchini Flowers with Cheesy Potato-Basil Stuffing (Κολοκυθοανθοί Γεμιστοί με Τύρι, Πατάτες, και Βασιλικός)
Serves 4 as an appetizer or 2 as a main course
Bringing frying oil to the correct temperature helps protects against greasy food. To keep the oil at temperature, don’t fry more than four stuffed flowers at a time.

Batter:
1 1/2 cups all-purpose flour
1 tsp. baking powder
1/4 tsp. salt
2 cups beer

Stuffing:
3/4 pound potatoes (1 large)
1/2 cup freshly grated kasseri or fontina cheese
1/4 cup freshly grated kefalotyri or parmesan cheese
1/4 cup milk or half-and-half
1/4 cup basil
chiffonade (cut in thin shreds)
Salt
Freshly ground black pepper

8 large zucchini flowers
Oil for frying (I use canola oil)

Make the Batter: Mix the batter ingredients until they are smooth. Refrigerate while you make the stuffing and fill the zucchini flowers.

Make the Stuffing: Wash the potatoes and boil in salted water until you can easily pierce them with a fork. Drain well. Mash the potatoes with a fork and add the remaining stuffing ingredients. Mash again until the stuffing is creamy and the ingredients well-mixed.

Prepare the Zucchini Flowers: Gently brush any dirt off the flowers; don’t get them wet or they’ll be impossible to handle. Stand one zucchini flower up in a small glass, jar, or vase. Open the zucchini flowers and remove any garden hitchhikers inside. Leave the stem attached; it makes dipping the stuffed flowers in batter and adding them to the hot oil easier. I used to remove the stamens, as many people do, but now I leave them in and think they add good flavor.


How to Stuff Zucchini FlowersStuff the Zucchini Flowers: Spread the flower opening so it’s wide enough to accept the large tip of a pastry bag or the cut-off corner of a sturdy plastic bag. Fill the bag with stuffing mix and pipe it into the zucchini flower. Fold three of the five flower points over the stuffing, leaving the remaining two points loose. Repeat with the remaining zucchini flowers. The flowers can be made several hours ahead to this point and refrigerated until ready to cook.

Fry the Stuffed Flowers: Heat 3/4” of oil in a Dutch oven until it is 350°F – 360°F. Dip the stuffed zucchini flowers in batter and fry until the flowers are nicely browned on both sides, turning them halfway through. Drain on paper towels. Serve immediately.

Radish HortaRadish Horta (Χόρτα)
Serves 1
Multiply the recipe as many times as you like; the point is greens from one bunch of radishes only serve one person. Any edible green may be cooked and served this way. The greens will taste fresher if you add lemon juice at the last minute.

Greens from one bunch of radishes
Olive Oil
Fresh lemon juice
Salt

Wash the greens very carefully, discarding any damaged leaves or stems. Cook the greens in boiling salted water for 3 – 5 minutes, or until they are just tender. The cooking time varies depending on the age of the greens, so don’t overcook.

Drain well. While the greens are hot, dress them with extra virgin olive oil and salt to taste; this helps merge the flavors of greens and olive oil. Just before serving, drizzle fresh lemon juice over the greens and toss well. Serve hot or at room temperature.

Wednesday, July 23, 2008

Summer Doldrums with Recipe for Three Bean and Macaroni Salad with Green Olive Dressing (Φασόλια Σαλάτα με Μακαρονάκι Κοφτό και Πράσινες Ελιές)

Three Bean and Pasta SaladI could come up with a million reasons why I haven’t been blogging. My computer died. Presidential politics captured my attention. Microsoft Vista is the spawn of hell.

All the excuses are true, but the real reason for my absence is that it’s summer in Alaska. The days are long, the garden is gorgeous, and I’m feeling lazy.

The worst part of not blogging is the resulting guilt keeps me from reading my friends’ blogs. Irrational? Definitely. When I was a kid I had to clean my room before I could go out with friends; I learned early that prevarication and deprivation go hand in hand. Now, my need to read favorite blogs has forced me back to the computer.

I'm also backlogged with recipes to write about. Naturally, since I have a giant backlog, I’m ignoring it and writing about the amazing bean and pasta salad I made two days ago.

Generally speaking, I hate pasta salads and think green olives are disgusting. I started making Three Bean and Macaroni Salad solely as a treat for my husband, planning not to eat any of it. But when I tasted the salad for seasoning, I loved it immediately. The dressing is uniquely tangy and delicious, while the beans and pasta balance the dressing’s strong flavors.

Summer Morsels

Our garden greens are growing like crazy and we’ve been enjoying their fresh flavors. I recently made
Plasto, a Greek greens pie with cornbread crust, and enjoyed every bite. If you’re looking for an interesting greens recipe, I highly recommend it.

The salmon run has started and we’ve started restocking our freezer.
Dukkah, an Egyptian spice mix, is great sprinkled over hot-off-the-grill salmon. I also use Dukkah to perk up salmon salad: crumble leftover salmon and mix it with minced onions, minced celery, minced garlic, a little mayonnaise, and a healthy dose of Dukkah. Delicious.

This weekend Costco was selling flats of perfectly ripe figs. Yesterday I quartered and wrapped them in prosciutto for a quick, easy, and addictively good appetizer. If I were alone, I’d have it for dinner.

Three Bean and Pasta SaladThree-Bean and Macaroni Salad with Green Olive Dressing (Φασόλια Σαλάτα με Μακαρονάκι Κοφτό και Πράσινες Ελιές)
Serves 12

Adapted from
Pasta & Co. By Request by Marcella Rosene (Sasquatch Books 1991)
A 10-ounce jar of green olives stuffed with jalapeños has about 25 olives in it. Since the salad is dressed with olive oil rather than mayonnaise, it’s a great salad for bringing to summer potlucks.


1/2 cup dry flageolet beans (or 10 ounces frozen shelled edamame beans)
1/2 cup dry cannellini beans (or 1 15-ounce can cannellini or great northern beans)
1/2 cup dry red kidney beans (or 1 15-ounce can red kidney beans)
2 tsp. salt
8 cloves garlic
40 jalapeño-stuffed green olives or a mixture of jalapeño and plain green olives
3 Tbsp. crushed dried oregano
1 Tbsp. crushed dried thyme
1/4 cup white wine vinegar plus 1-3 Tbsp. as needed
1 cup extra virgin olive oil
1 cup diced red onion, 1/8” dice
1 cup diced celery, 1/8” dice (preferably
leaf celery)
1/2 pound tubetti, mini-penne, elbow macaroni, or other salad macaroni
Salt
Freshly ground black pepper

If using dried beans, spread them out in a pan and inspect carefully, removing any pebbles or debris. Soak the three kinds of dried beans in cold water overnight. Drain the soaked beans and rinse with cold water. Add the soaked beans to a large pot of water, bring to a boil, cover, turn down the heat, and simmer for 30 minutes. Add 2 tsp. salt and continue to simmer until the beans are tender but not mushy. When the beans are done, drain and put them in a large bowl.

If using canned beans, rinse well, drain, and put them in a large bowl. Thaw the edamame beans and add them to the bowl.

While the beans are cooking, pulse the garlic in a food processor to mince. Add the olives, oregano, thyme, and 1/4 cup vinegar, and pulse to mince the olives. Add the olive mix, olive oil, onion, and celery to the beans and mix well.

Bring a pot of salted water to a bowl, add the pasta and cook until the pasta is al dente. Drain the pasta, add it to the beans, season with salt and freshly ground black pepper, and mix well. Taste and add the remaining vinegar, salt, and freshly ground black pepper, as needed.

Serve at room temperature. If plating the salad, serve on a bed of greens.

~~~~~~~~~~~~~~~~~~~~~~~~~~~~~~~~
This is my entry for Heart of the Matter: Picnics hosted this month by Joanna of Joanna's Food.