Showing posts with label pork. Show all posts

Sunday, April 19, 2009

Recipes: Home-Cured Flat Pancetta & Edamame and Mushroom Risotto with Pancetta

Bacon’s smell wafting through the air is so enticing that even committed vegetarians are sometimes tempted to stray from their virtuous path. These days I mainly use bacon and pancetta as flavor-boosting ingredients; it’s been years since I ate it on its own.

Since I use bacon to boost flavor, I buy the best available. So I was intrigued to read on
Kits Chow, that Christine’s Home-Cured Bacon was so good, her husband asked her not to buy bacon from the store anymore. I had to try it.

Although I’ve visited
Kits Chow more than once over the past year, I was there recently because I was paired with Christine for March’s Taste and Create. Invented by Nicole of For the Love of Food, Taste and Create is one of my favorite food writing events. Every month Nicole pairs participating food writers; each is responsible for trying one recipe from the other’s blog and writing about it.

Some months it can be a challenge to find something I want to write about on my partner’s blog (although I’ve always found something delicious to make). Other months there’s an abundance of recipes I can’t wait to try; this was an abundant month. I haven’t made it yet, but Christine’s simple
Ginger Custard will appear on our table shortly after I next go shopping.

Christine writes from an Asian perspective, while I focus on Mediterranean foods, but there are many similarities in our cooking styles. We both emphasize foods made with fresh, locally available products, and enjoy making ingredients from scratch.

Christine shares my passion for creating variations on a theme. For example, she recently wrote about and photographed a
series of grilled cheese sandwiches; every time I look at this post, I crave an immediate grilled cheese fix. I also appreciate Christine’s creative Asian-Hellenic fusion cooking.

But back to the bacon.

Christine used a
Hugh Fearnley-Whittingstall recipe from the Guardian to make her bacon. The recipe is simple: pork belly is liberally coated with a dry-rub of salt, sugar, and spices, and then cured in the refrigerator for several days.

The result was delicious: meaty, juicy, and mouth-watering. I’m calling it flat pancetta rather than bacon because it isn’t smoked (a hallmark of American bacon). And since I renamed it pancetta, I used the meat to flavor a wonderful risotto made with edamame beans and garlicky sautéed mushrooms. I’m only sorry there isn’t any leftover risotto; writing the recipe has left me wanting more.

Homemade PancettaHome-made Flat Pancetta
Adapted from
Hugh Fearnley-Whittingstall via Kits Chow
The original recipe recommended curing the meat at least 4 days, or as long as 10, draining the juices and applying more cure every 24 hours. I stopped the process on the fourth day because the pancetta was getting too salty for my taste. Since I cured it for shorter than called for in the original recipe, and because the recipe doesn’t include nitrites or nitrates, I froze all the pancetta I didn’t use right away rather than worrying about spoilage. The best place to buy meaty pork belly is in Asian markets (in Anchorage, Sagaya is the best source). Be sure to look the pork over carefully and buy the meatiest piece you can find. Once, in desperation, I bought a frozen piece of pork belly wrapped in freezer paper. The butcher repeatedly assured me the meat was skin-on; it wasn’t, plus the “meat” was 90% fat. The fault was my own for buying meat sight unseen.

Curing mix:
2 Tbsp. black peppercorns
2 Tbsp. coriander seeds
1 tsp. juniper berries
5 bay leaves
1 1/3 cup kosher salt (3/4 pound)
3/4 cup (packed) brown sugar (1/4 pound)

2 pieces meaty pork belly, with skin, 1 1/2 – 2 pounds each

Make the Curing Mix: Grind the peppercorns, coriander seeds, juniper berries, and bay leaves in a spice grinder, or pound them in a mortar and pestle until they are finely crushed. Mix the ground spices with the salt and brown sugar.

Curing Pancetta - Day 1Day 1: Rub each piece of pork belly with the curing mix until the meat is well coated and every nook and cranny is covered with the mix. Put the meat in a glass or other non-metallic container. Cover with plastic wrap and refrigerate.

Curing Pancetta - Day 2Day 2: After 24 hours, pour off all the liquid that has leached out of the pork and rub the meat with more curing mix until it is once again well coated.

Day 3: Repeat Day 2.

Day 4: Rinse off all the cure under cold running water. Dry the meat very thoroughly. Wrap in wax paper, parchment paper, or cheesecloth and refrigerate or freeze until ready to use (before choosing storage method, read the above headnote).

Edamame and Mushroom Risotto with PancettaEdamame and Mushroom Risotto with Pancetta
Serves 4
The mushrooms need to be sautéed in batches to ensure they brown properly; if you try to brown all the mushrooms at one time, they’ll steam rather than brown. Because home-cured pancetta can be salty, be sure to lightly salt the mushrooms or the finished dish may be too salty (the mushrooms need some salt to ensure they cook properly). Pancetta is often sold in packages of very thinly cut pre-sliced meat. Although I use pre-sliced pancetta in a pinch, I mostly buy pancetta direct from the deli counter (if I’m not making my own at home). I ask for either a chunk of pancetta, which I hand slice and dice at home, or have the deli staff cut the pancetta into slices the thickness of thick bacon. With thicker slices, eaters enjoy bursts of pancetta flavor when devouring the risotto; thinner slices tend to melt into the other flavors.

Mushrooms:
1/2 pound fresh cremini mushrooms, cut in 1/4” slices (about 2 cups sliced)
1/2 pound fresh shiitake mushrooms, stems removed and cut in 1/4” slices (about 2 cups sliced)
2 Tbsp. butter, divided
2 Tbsp. olive oil, divided
Salt
Freshly ground black pepper
1 Tbsp. minced garlic, divided

Risotto:
3/4 cup diced home-cured or store-bought pancetta (rind removed), 1/4” dice
2 Tbsp. olive oil
1 1/2 cups diced onions, 1/4” dice
Freshly ground black pepper
1 1/3 cups Arborio rice
1 cup dry white wine
10 ounces shelled edamame beans, blanched if fresh or thawed if frozen
6 Tbsp. minced fresh mint, divided
6 – 7 cups vegetable or chicken stock
1 cup freshly (and finely) grated parmesan cheese

Cook the Mushrooms: Sauté the cremini mushrooms, lightly seasoned with salt and freshly ground black pepper, in 1 Tbsp. butter and 1 Tbsp. olive oil, until the mushrooms are nicely browned. Stir in half the garlic and cook for 1 minute. Remove the browned mushrooms from the pan with a slotted spoon and set aside. Repeat with the shiitake mushrooms, using the remaining olive oil, butter, and garlic.

Make the Risotto: In a sauté pan large enough to hold the finished risotto, sauté the pancetta until the fat renders and the pancetta begins to brown. Stir in the onions, lightly seasoned with freshly ground black pepper, and sauté until the onions soften and begin to turn golden. Stir in the rice to completely coat it with oil and cook, stirring, for 1 minute. Add the wine, bring to a medium boil, and cook, stirring, until the wine is almost all absorbed.

Add 1/2 cup of stock and cook over moderate heat, stirring constantly, until the stock is almost all absorbed. Keep adding stock, 1/2 cup at a time, and stirring until each addition of stock is almost absorbed. When the rice is half done, stir in the edamame beans and 5 Tbsp. mint. (The recipe can be made ahead to this point, and finished right before serving. If you make it ahead, after you take the rice off the burner, stir it until it cools down before adding the edamame and mint.)

Continue adding stock, 1/2 cup at a time, and stirring until the rice is tender, but still firm in the center (this takes 18 – 22 minutes total). There may be stock left over. Stir in the reserved mushrooms, remaining 1 Tbsp. mint, and 1/2 cup grated parmesan. If necessary, add stock until the risotto is the consistency you desire; it should be moist and creamy, not thick and dry. Taste and add salt and freshly ground black pepper, as needed.

Serve immediately with the remaining grated parmesan on the side for sprinkling on top.
~~~~~~~~~~~~~~~~~~~~~~~~~~~~~
This is an entry for My Legume Love Affair – 9th Helping (MLLA9), created by Susan of The Well-Seasoned Cook, which I hosted in March 2009. My Legume Love Affair - 10th Helping for April 2009 is being hosted by Courtney of Coco Cooks.

Monday, March 23, 2009

Recipes: Split Pea Soup with Ham Hocks & Garlic Yogurt

As many of you know, my 88-year-old father is nearing the end of his happy and fortunate life. For the past couple months, as his health has gone downhill, I’ve been spending lots of time with my parents in the Pacific Northwest, hence my lack of blog posting.

I’m heading back down to Washington again on Wednesday. At home in Alaska, I’ve been making lots of freezer food so my husband can have quick and easy meals while I’m gone. This weekend, I spent a lazy Saturday afternoon making a giant pot of Split Pea Soup, comfort food at its most basic.

I started making Split Pea Soup 35 years ago as a college student living on work study wages. In those days, I ate it because it was cheap, filling, and very tasty. Now, I eat Split Pea Soup just because it tastes good. As it has evolved over the years, my Split Pea Soup recipe is one of my favorites.

Ham HocksThere are two keys to making wonderful split pea soup: the soup must cook at low temperature for a long time and the ham hock (or leftover ham-bone) must be meaty and of best quality. Low and slow cooking allows the flavors to meld seamlessly into one another, and the cartilage in the hock to dissolve and give the soup a silky mouth feel.

In Anchorage, Mr. Prime Beef on the Old Seward Highway sells beautifully meaty smoked ham hocks; make sure to have the butcher cut them into thirds for ease of cooking and better tasting soup. The other day, I also say nice-looking whole ham hocks at Natural Pantry; sadly, this store doesn't have an in-store butcher to cut them up.

Split Pea Soup with Ham HocksSplit Pea Soup with Ham Hocks
Serves 12
Finish Split Pea Soup with a dollop of Garlic Yogurt (see recipe below) or a drizzle of extra virgin olive oil. Whether to purée split pea soup is a personal decision, and isn’t necessary. I’ve served and enjoyed the soup both ways. Lately, I’m liking the more refined puréed version; its flavors seem to be better balanced. Split Pea Soup freezes really well and a quart freezer bag easily holds enough Split Pea Soup for two. Of course, you can always cut the recipe in half if you aren’t serving a crowd or stocking your freezer or don’t have a large enough pot (a Dutch oven is only big enough to make half a recipe). I use a mortar and pestle for crushing the peppercorns, but you can also crush them with the bottom of a saucepan.

2 pounds dried green split peas
4 cups diced onion, 1/4” dice (about 2 large)
2 cups diced garnet yams (sweet potatoes), 1/4” dice (about 3 medium)
1 1/2 cups diced celery, 1/4” dice (about 3 stalks)
1 cup diced carrots, 1/4” dice (about 3 medium)
1 Tbsp. freshly crushed black peppercorns
1 Tbsp. freshly crushed dried thyme
2 cups white wine
5 bay leaves
2 - 2 1/2 pounds smoked ham hock, cut in thirds
Water
1 Tbsp. Worcestershire sauce

Spread out the split peas on a tray or flat pan and inspect carefully, removing any pebbles or debris. Rinse and drain the split peas.

Put the split peas, onions, garnet yams, celery, carrots, crushed peppercorns, crushed thyme, white wine, bay leaves, and ham hocks in a very large stock pot. Add water to cover the ingredients by 6 inches (3 inches if you cut the recipe in half). Bring the mixture to a boil, cover, turn the heat down to low, and simmer for 2 hours. Remove the cover and simmer for 1-3 more hours until the split peas are very soft, the meat is falling off the bone, and the liquid is reduced to your liking.

Using a slotted spoon or tongs, remove the bay leaves and the ham hocks, including all the bones and chunks of fat. If you are puréeing the soup, process it with a
stick blender (or in a blender or food processor) until it is very smooth.

Remove and discard all the fat and bones from the ham hocks. Dice the meat into bite sized pieces and add it back to the soup. If the soup is too thin, simmer it longer. If it is too thick, thin it with water and simmer for 15 minutes before serving.

Garlic Yogurt
When I’m in a hurry,
or have strained Greek yogurt on hand, I don’t bother with straining the yogurt. It tastes fine if you just mix all the ingredients and serve immediately, though the texture is better if you strain the yogurt. This recipe makes enough for about 6 servings of soup, so double the recipe if you’re serving Split Pea Soup to a crowd.

1 cup whole-milk yogurt

1-2 cloves garlic
1/2 tsp. Kosher or coarse-grained salt
Freshly ground black pepper

Line a colander with paper towels. Dump the yogurt into the lined colander and let the liquid drain out of the yogurt for 30 – 60 minutes. Puree the garlic by mashing it into the salt. Mix together the drained yogurt, mashed salted garlic, and freshly ground black pepper. Taste and adjust the seasoning by adding garlic, salt, or pepper, as needed.

~~~~~~~~~~~~~~~~~~~~~~~~~~~~~~~~~

This is my entry for My Legume Love Affair – 9th Edition (MLLA9) which I am hosting this month and which was created by Susan of The Well-Seasoned Cook.

Friday, February 27, 2009

All About Za'atar with Recipe for Za'atar Herb Blend and 5 Recipes for Using Za'atar

Za'atar Bread and LabnehIf za’atar is within reach, anyone can make delicious food at the drop of a hat. The possibilities are endless: Za’atar Olives, Za’atar and Labneh, Za’atar Tomato Sauce with Grilled Meat, Za’atar Bread, and Za’atar Pizza are only a few ways to use this versatile ingredient. I almost have my Za'atar Chicken recipe ready to post.

Za’atar is
valued for more than great taste. “Who for forty days eats powdered dried leaves of za'tar fasting can be harmed by no serpent.” If the worst happens and you’re bitten by an asp or stung by a scorpion, za’atar cures “the bitings and the stings of venomous beasts." A Bethlehem proverb teaches, “Thyme and oil lead to the prosperity of the home.” Even more importantly, “eating za'atar improves your memory and makes you more intelligent.”

So what is za’atar?
A. An herb blend
B. Savory
C. Thyme
D. Oregano
E. Biblical hyssop
F. All of the above

The answer is “(F) All of the above.”

Za’atar (ZAHT-ar) is a class of herbs, and includes members of the thyme, oregano, and savory families. Za’atar is also a Middle Eastern herb blend, containing one or more of the za’atar herbs. As with many centuries-old dishes, za’atar blend has many regional and familial variations.

Disparity in za’atar’s spelling is pervasive; za’atar, za’tar, zatar, zahtar, satar, zahatar, and za’ater are all used. The spelling confusion is easy to explain. Za’atar is an Arabic word (الزعتر). Like Greek and other languages that don’t use the Roman alphabet, Arabic is inconsistently transliterated into English.

Some experts claim the herb za’atar is only one specific type of savory; others claim with equal vehemence it’s one specific type of oregano. Both may be right, but only for the region or family they’re writing about.

No matter its local or historical usage, “za’atar” has come to be a generic term used in the Middle East for a group of similarly-flavored members of the herb genus
Lamiaceae. Za’atar herbs grow in the same habitat and have similar appearances. These practical factors may have led Middle Easterners to use one word for all the plants.

Linguistic confusion over “za’atar” is not unique to Arabic.
In Turkish, the plant groups Origanum, Thymbra, Coridothymus, Satureja, and Thymus, generically called za’atar in Arabic, are all referred to as “kekik.”

Scientific analysis supports the pragmatic use of one word to refer to a plant group rather than a single plant. Gas chromatography and mass spectrometry show “the chemical profiles of the specific chemotypes of Satureja thymbra L. and Thymbra spicata L [a]re very similar. They are also very similar to those of the chemotypes of Coridothymus capitatus and Origanum syriacum.” [These four herb species are all called za’atar.]

Adding to the confusion, each za’atar herb is known by more than one name:

· Coridothymus capitatus aka Thymus capitatus aka Satureia/Satureja capitata (conehead thyme, headed savory, Persian hyssop, za’atar parsi, Spanish oregano)
· Origanum maru aka Origanum syriacum/cyriacum aka Marjorana syriaca (Biblical hyssop, Lebanese oregano, Syrian oregano, Egyptian marjoram)
· Satureja/Satureia thymbra (Roman za’atar, za’atar rumi, pink savory, barrel sweetener; in Greek, Θρούμπι, Τραγορίγανη)
· Thymbra spicata (spiked thyme, donkey hyssop, desert hyssop)

There are also several varieties of commercially available za’atar blends. For example,
according to Paula Wolfert, “The taste of a za’atar mixture can be herbal, nutty, or toasty. …’Israeli’ is a pale green blend of pungent herbs that includes the biblical hyssop, along with toasted sesame seeds and sumac. The ‘Syrian’ blend, the color of sand, has a decidedly toasty flavor. The ‘Jordanian’ blend is dark green and very herbal, with some turmeric.” These aren’t the only za’atar blends; each spice merchant and family has a unique formula.

Before creating my own za’atar blend, I bought and tasted several commercially available varieties. I experimented with diverse combinations of herbs trying to best approximate the flavor of my favorite commercial brand. I also read as many English-language za’atar recipes as I could find.

For the herbal flavor in za'atar blend, many North American recipes use only dried domestic thyme, or a mixture of domestic thyme and domestic marjoram. These recipes, when tasted side by side with imported za’atar blends, tasted bland to me. I discovered that Greek oregano (preferably, but not necessarily, wild-harvested and sold on the stem) is key to creating flavorful za’atar in Alaska. Greek oregano’s spicy flavor, when tempered by combining it with dried wild or domestic thyme, approximates the flavor of authentic za’atar blend.

For anyone interested in growing their own, the various plants referred to as za’atar can be purchased from
Well Sweep Herb Farm or Mountain Valley Growers. Although they’re tasty, keep in mind that most domestically grown herbs don’t have the flavor of their wild progenitors. There’s nothing like scarce water, poor soil, and hot sun for developing flavor.

For those who live where there are Middle Eastern markets or specialty stores, by all means buy ready-made, preferably imported, za’atar. You can also
order za’atar blends online.

In Anchorage, you can buy sumac, a key ingredient in my za’atar blend, at
Sagaya, City Market, and Summit Spice. Summit Spice sells its own Anchorage-made za’atar blend in tiny packets using marjoram, thyme, sumac, and sesame seeds. Summit also has a product labeled “Greek oregano,” which they tell me may be grown on farms in Greece or Turkey, depending on the shipment.

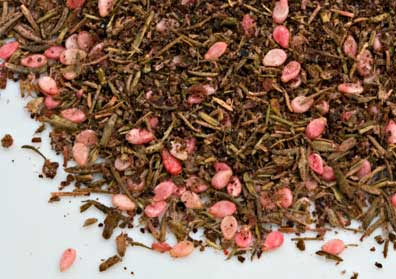
Za'atarZa’atar Herb Blend
Because za’atar has so many uses, I make a lot at one time: 1/2 cup oregano, thyme, and sumac, 1/4 cup sesame seeds, and 1 Tbsp. salt. The sumac, which has a sour taste akin to lemon, is what gives za'atar its red color.

1 part dried Greek oregano, preferably wild-harvested
1 part dried thyme
1 part ground sumac
1/2 part white sesame seeds
Salt to taste

Grind the oregano and thyme in a spice grinder or blender, making sure it’s free of sticks and stems. Put the herbs in a glass jar with a tight sealing lid. Add the sumac, sesame seeds, and salt and shake well to thoroughly combine. Put on the lid and close it tightly. Store away from heat and light.

Za'atar OlivesZa’atar Olives
Made entirely with pantry staples, Za’atar Olives are easy to prepare and make a great last-minute appetizer. Especially when warm, Za’atar Olives are an addictive treat.

2 cups Kalamata olives
1/2 cup olive oil
3 Tbsp. Za’atar Herb Blend (see recipe above)

Rinse the olives and dry them well. Put the olives and olive oil in a small saucepan, bring the olive oil to a simmer, and simmer the olives for 15 minutes. Stir in the Za’atar Herb Blend and simmer for 5 minutes. Serve warm or at room temperature.

Za'atar Bread - Mana'eeshZa’atar Flatbread (Mana’eesh bi Za’atar)
Makes 12 6” flatbreads
When I have breakfast with Marie, an Armenian friend who was born and raised in Beirut, she always serves Mana’eesh, olives, tomatoes, cucumbers, and cheese. Breakfast at Marie’s was my first introduction to za’atar; it's been a part of my repertoire. To make it from scratch, I use my Palestinian friend Salwa’s recipe for pita bread, and top it with Za’atar Herb Blend and olive oil. Although Marie serves this for breakfast, we eat it for a snack, for lunch, or as part of an appetizer spread. If you’re cooking for a small family, like I do, use half the dough for Mana’eesh and the second half for Za’atar pizza (see recipe below).

Dough:
2 1/2 cups lukewarm water
1 Tbsp. yeast (1 packet)
1 tsp. sugar
1 Tbsp. salt
6 – 7 cups all-purpose or bread flour

Topping:
1/2 cup olive oil
1/2 cup Za’atar Herb Blend (see recipe above)

Make the Dough: Place the water in a large bowl. Sprinkle the yeast over the water, sprinkle the sugar on top and let sit for 10 minutes, or until the yeast begins to foam. Mix in the salt and half the flour. Add the rest of the flour one cup at a time, just until the dough holds together. Knead the dough well (either by hand or in a standing mixer), adding flour as necessary until the dough is smooth and shiny. You may need more or less flour than called for in the recipe.

Put the kneaded dough in an oiled bowl to rise, cover the bowl with plastic wrap and a dish towel, and put it in a warm spot. Let the dough rise for 1 hour, or until it has doubled in size.


Preheat the oven to 500°F.

Divide the dough into 12 pieces and pat each piece into a 6” round flatbread. Place the flatbreads on baking sheets with rims; 6 dough rounds fit on a half-sheet pan. Use your fingers to dimple the tops of each flatbread. Let the flatbreads rest for 20 minutes.

Make the Topping: Mix together the olive oil and Za’atar Herb Blend.

Assemble and Bake the Flatbreads: Dimple the flatbreads one more time. Divide the topping between the flatbreads, about 1 Tbsp. each, and spread it evenly over the flatbreads’ tops. Bake the flatbreads, one baking sheet at a time, for 8-10 minutes, or until the flatbreads are golden. Serve immediately.

Note: Mana’eesh can be made ahead and rewarmed just before serving. To rewarm, stack the Mana’eesh, topping side to topping side, and wrap in aluminum foil. Put in a 300°F oven for 5-10 minutes, or until they are warmed through.

Za'atar with LabnehZa’atar with Labneh (Yogurt Cheese)
Makes 3/4 cup

Plain Labneh goes really well with Za’atar Flatbreads. For garlic fans, mix 1-2 cloves puréed garlic into the cheese (an easy way to purée the garlic is with a
standard Microplane rasp grater). Usually, I let the yogurt drain into the sink. If I’m feeling ambitious, I let it drain into a bowl and use the liquid to replace some of the water when I’m making bread dough.

2 cups plain yogurt, preferably whole milk
Pinch of salt
Za’atar Herb Blend (see recipe above)
Olive oil (optional)

Line a strainer with a paper towel. Mix a little salt into the yogurt and dump the salted yogurt into the paper-towel-lined strainer. Let the yogurt drain for 4 hours or overnight.

Spread the yogurt on a plate, sprinkle with Za’atar Herb Blend to taste, and drizzle with olive oil (if using). Serve with crackers, pita chips, or triangles of pita bread.

Za'atar PizzaZa’atar Pizza
Makes 12”-15” pizza
Extra Za’atar Tomato Sauce is a great way to dress up grilled chicken, lamb, or pork (see recipe below); it also may be frozen for future pizzas. The amount of Aleppo or red pepper depends on how spicy you like your food. Pick either Topping#1 or Topping #2 or, if you want to try them both, make the full amount of Za’atar Flatbread dough.

1/2 recipe Za’atar Flatbread dough (see recipe above)

Za’atar Onion Topping (Topping #1):
1/2 cup thinly sliced onions
1/4 cup chopped parsley
2 Tbsp. olive oil
2 Tbsp. Za’atar Herb Blend (see recipe above)
2 tsp. minced garlic
1/4 – 1/2 tsp. Aleppo pepper or 1/8 – 1/4 tsp. crushed red pepper (optional)
1/2 cup crumbled feta cheese

Za’atar Tomato Sauce (Topping #2) (makes enough sauce for 2 pizzas):
1 14.5 ounce can diced tomatoes, preferably fire-roasted
2 tsp. finely minced or puréed garlic
2 Tbsp. Za’atar Herb Blend (see recipe above)
1/2 – 1 tsp. Aleppo pepper or 1/4 – 1/2 crushed red pepper (optional)
1 Tbsp. olive oil
1/2 cup water or white wine
Salt
Freshly ground black pepper
1/2 cup thinly sliced onions
1/2 cup crumbled feta cheese

Shape the Pizzas: Shape the dough into a 12-15” round; the exact size depends on how thick you like your pizza crust. Place the dough on a pizza pan or baking sheet with rims. Use your fingers to dimple the top of the pizza, and let it rest for 20-30 minutes.

Preheat the oven to 500°F.

To Make Topping #1: Mix together all the topping ingredients except the crumbled feta.

To Assemble Pizza with Topping #1: Spread the topping mix over the pizza. Sprinkle the crumbled feta over the topping.

To Make Topping #2: In a saucepan, mix together the tomatoes, garlic, Za’atar Herb Blend, Aleppo pepper, olive oil, and water or wine. Bring to a boil, turn down the heat, and simmer for 15 – 20 minutes, or until the sauce is very thick. Taste and add salt or freshly ground black pepper, as needed.

To Assemble Pizza with Topping #2: Spread half the tomato sauce over the pizza to cover it (use more if you like saucy pizzas). Save any extra tomato sauce for another purpose. Evenly distribute the onions over the tomato sauce and sprinkle with crumbled feta.

Bake the Pizza: Turn the oven down to 450°F. Bake the pizza for 25-30 minutes or until the crust is nicely golden. Serve immediately.

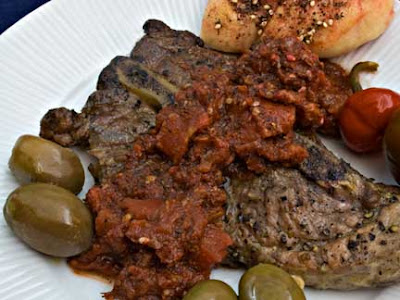
Za'atar Tomato Sauce and Grilled PorkGrilled Pork Steak with Za’atar Tomato Sauce
Serves 4

Za’atar Tomato Sauce goes equally well with grilled lamb or chicken. The sauce is identical to the one used for Za’atar Pizza (see recipe above). For the same reason that brining improves the flavor of pork chops, salting meats well in advance of grilling makes them taste much better. If you can only find large pork steaks, buy 2 and cut them in half.

Meat:
4 pork steaks
Salt
Freshly ground black pepper

Za’atar Tomato Sauce:
1 14.5 ounce can diced tomatoes, preferably fire-roasted
2 tsp. finely minced or puréed garlic
2 Tbsp. Za’atar Herb Blend (see recipe above)
1/2 – 1 tsp. Aleppo pepper or 1/4 – 1/2 crushed red pepper (optional)
1 Tbsp. olive oil
1/2 cup water or white wine
Salt
Freshly ground black pepper

Prepare the Meat: Rinse the steaks and dry well. Season both sides with salt and plenty of freshly ground black pepper. Let sit at room temperature while you make the sauce.

Make the Tomato Sauce: In a saucepan, mix together the tomatoes, garlic, Za’atar Herb Blend, Aleppo pepper, olive oil, and water or wine. Bring to a boil, turn down the heat, and simmer for 15 – 20 minutes or until the sauce is the thickness you prefer. Taste and add salt or freshly ground black pepper, as needed.

Cook the Meat: Grill the pork steak over a medium hot fire or in a grill pan on top of the stove. Turn the meat regularly until it is just done; be careful not to overcook it. Serve immediately with Za’atar Tomato Sauce spooned over.
~~~~~~~~~~~~~~~~~~~~~
This is my entry for
Weekend Herb Blogging, which I am hosting this week at Mediterranean Cooking in Alaska.

Sunday, January 11, 2009

About Pancetta with Recipes for Pasta with Squash, Arugula, and Pancetta & Pasta with Pork in Garlic-Wine Sauce (Ιταλική Πανσέτα με Ζυμαρικά)

Alaska has been having a cold snap.

I imagine many of you thinking, “So what else is new?” Even though Alaskans expect and are used to cold weather, the last couple weeks really have been colder than usual. To see what cold weather looks like, check out Marc Lester's
lovely photo-essay showing Southcentral Alaska’s chilly wonderland.

Hearty food, including pasta, is a good antidote for cold weather blues. One of my favorite ways to boost the flavor of winter pasta sauces is adding pancetta (cured Italian pork belly). Only a small amount of pancetta is needed improve the taste of savory sauces (a corollary to the principle that everything tastes better with bacon).

Salumi's hand-crafted pancetta

Pancetta is often sold in packages of very thinly cut pre-sliced meat. Although I use pre-sliced pancetta in a pinch, I mostly buy pancetta direct from the deli counter. I ask for either a chunk of pancetta, which I hand slice and dice at home, or have the deli staff cut the pancetta into slices the thickness of regular bacon. With thicker slices, eaters enjoy bursts of pancetta flavor when devouring the sauce; thinner slices tend to melt into the other flavors.

I was recently at Seattle’s
Metropolitan Market where I bought several pounds of hand-crafted pancetta from Salumi Artisan-Cured Meats. This is far and away the best pancetta I’ve ever eaten; Salumi’s hand-rolled pancetta is meaty, with superior texture and flavor. Although more expensive than pre-sliced pancetta, Salumi’s product is well worth the price, and may be ordered online.

Two delicious pasta sauces that benefit from pancetta are Pasta with Squash, Arugula, and Pancetta and Pasta with Pork in Garlic-Wine Sauce. Either is just right for even the coldest winter day.

Pasta with Squash, Arugula, and Pancetta
Serves 4

Inspired by Cookthink
If using artisan-cured pancetta, it may be quite salty, so be careful not to over-salt the other components of the dish.

Squash:
1 small Kabocha, butternut, or other winter squash, peeled and cut into 3/4” chunks (4 cups)
1/4 cup olive oil
Salt
Freshly ground black pepper

Pancetta and Onions:
3 thick slices pancetta, cut in 1/2” dice (1/2 cup)
2 Tbsp. olive oil
3 cups diced onion, 1/2” dice
Freshly ground black pepper
1 Tbsp. minced fresh garlic
2 Tbsp. minced fresh sage

Pasta:
1/2 pound casarecci or similarly shaped pasta
4 cups arugula, cleaned and roughly chopped
1 cup freshly grated parmesan cheese

Make the Squash: Preheat the oven to 515°F. On a baking sheet with rims, toss the squash cubes with olive oil, salt, and freshly ground black pepper. Put the squash in the oven and immediately turn the heat down to 475°F. Bake for 20 to 25 minutes, turning the squash cubes halfway though, until the squash is cooked through and lightly browned.

Put a large pot of salted water on a burner over high heat.

Make the Onions and Pancetta: Sauté the pancetta in olive oil until it begins to brown. Stir in the onions and freshly ground black pepper, scraping up any browned bits on the bottom of the pan, and sauté until the onions soften. If the onions start sticking to the bottom of the pan, add 1/4 – 1/2 cup water. When the onions are lightly browned, stir in the garlic and sage and keep warm over very low heat.

Make the Pasta: Add the pasta to the boiling salted water and cook until it is al dente. While the pasta is cooking, put the arugula in a large bowl. When the pasta is done, remove 1 cup of pasta cooking water, drain the pasta well, and put the drained pasta on top of the arugula in the bowl. Add the roasted squash and cooked onions to the bowl and toss all the ingredients well. If the dish is too dry, add as much of the pasta cooking water as necessary (usually 1/4 - 1/2 cup). Taste and add freshly ground black pepper or salt, as needed.

Serve sprinkled with freshly grated parmesan cheese.

Pasta with Pork in Garlic-Wine Sauce
Serves 4
Spruce vinegar and salt-cured spruce buds add interesting highlights to the sauce, but aren’t necessary to the success of the dish. If you’re among the 99.99% of people who don’t have either ingredient, red wine vinegar and capers work equally well. For capers, I prefer the taste of salt-cured; when I can’t find salt-cured, I use capers in brine. If using artisan-cured pancetta or salt-cured capers, they may be quite salty, so be careful not to over-salt. Bacon may be substituted for pancetta; it adds a pleasant smoky flavor.

Sauce:
1 pork tenderloin (about 1 pound), cut in 3/4” dice
1 Tbsp. minced garlic
1/2 tsp. black peppercorns, crushed
1 Tbsp. spruce vinegar or red wine vinegar
3 thick slices pancetta, cut in 1/4” dice (1/2 cup)
2 Tbsp. olive oil
1 cup finely diced onion, 1/8” dice
1/4 cup sun-dried or regular tomato paste
1 Tbsp. salt-cured spruce buds or capers, well-rinsed and minced
3/4 cup dry red wine
2 cups chicken stock

Pasta:
1/2 pound
gemelli or similarly shaped pasta
1/2 cup freshly grated parmesan cheese

Mix the pork, garlic, peppercorns, and vinegar and let marinate at least 1 hour (overnight is fine).

Sauté the pancetta in olive oil until it begins to brown. Add the pork mixture and cook until the pork is browned on all sides. Stir in the onion, using the moisture in the onions to scrape up any browned bits on the bottom of the pan. Continue cooking until the onions soften and begin to turn golden. Stir in the tomato paste until it is thoroughly combined. Mix in the wine and cook until it is reduced by half. Stir in the chicken stock and bring to a boil. Turn down the heat and simmer for 40 - 45 minutes, until the sauce slightly thickens. Taste and add salt or freshly ground black pepper, as needed.

Cook the pasta in boiling salted water until it is al dente. Drain the pasta and toss it with the pork sauce. Serve sprinkled with freshly grated parmesan cheese.

The road we live on

Friday, November 21, 2008

Quince with Recipe for Pork and Quince Stew – Kydonato (Χοιρινό Kυδωνάτο)

Halfway through daily errands, I bought two quinces, a new-to-me fruit. When I got back in the car after the next stop, the air inside was perfumed with a powerful aroma, reminiscent of pineapple and very ripe apples combined.

I planned on cooking the quince that night. When I got home, I left them on the kitchen counter. Soon, their lovely fragrance permeated the kitchen. I couldn’t wait to cook with quince.

For several years, I’ve been meaning to make Pork and Quince Stew, an old-time recipe on the Northern Aegean island we call home. It wasn’t until I read, in quick succession, Mariana’s recipe for
Stuffed Quince and Ioanna’s recipe for Beef and Quince Stew that I was inspired to set out on a quest for quince (found in Carr’s specialty produce section).

When I cut the quince open and tasted a thin slice, I was disappointed. The flesh was firm and disagreeably woody, and its flavor was astringent and unpleasant. I was confused. How could fruit with such an amazing aroma taste so bad?

For advice, I turned to the ever-reliable Elizabeth Schneider, author of
Uncommon Fruits & Vegetables: A Commonsense Guide and Vegetables from Amaranth to Zucchini: The Essential Reference (both are indispensable reference books). Schneider explains: “Quince requires cooking to be edible … the hard, ivory interior, when slowly cooked, develops a rich flavor … that makes it a delight in sweet and savory dishes.”

When buying quince, Schneider advises to choose large fruits with a smooth and regular shape, which makes them easier to peel. Because the firm flesh is difficult to cut, it’s important to use a sharp knife. Schneider says that “quinces bruise easily, [but] last for months” if they are tightly wrapped in plastic and kept in the refrigerator.

On the island, quinces were traditionally packed in sawdust and stored in north-facing rooms. This kept the quinces fresh until the family pig was slaughtered in late December or early January.

Having determined that cooked quince can be tasty, the next step was developing a stew recipe. As I perused my Greek cookbook collection, I found a multitude of recipes for Pork and Quince Stew (called Kydonato in Greek), all of them different. Some were seasoned only with bay leaves, others contained cinnamon or cloves or nutmeg or allspice or a combination of several spices. Some used dry red wine, others sweet red wine, and still others white wine. Some recipes were rich with onions, others warned not to add onions, lest they overshadow the quince flavor.

I ended up creating my own recipe for Pork and Quince Stew, taking guidance from a variety of recipes and seasoning it to please our palates. My husband has never been fond of fruit and meat, nor is he keen on cinnamon in savory food. Since I was intent on using the quinces, I left out the cinnamon and instead flavored the dish with allspice, nutmeg, bay leaves, and lemon peel.

Pork and Quince Stew was a great success. The flavors were savory and not overly sweet, and the quince was a lovely complement to the tender pork. We both enjoyed it thoroughly.

My husband added dashes of Jamaican hot sauce to his serving. I was persuaded to try the stew with a little hot sauce and was surprised by how good it tasted. I wouldn’t cook the stew with hot sauce, but I’d definitely serve it on the side for spicy food fans.

Pork and Quince Stew – Kydonato (Χοιρινό Kυδωνάτο)
Serves 4
When cutting the lemon peel strips , avoid as much of the white pith as possible. Serve with roasted potatoes and a crisp green salad.

2 1/4 pounds bone-in pork butt or shoulder, or country-style ribs (1 1/2 pounds boneless)
Salt
Freshly ground black pepper
2 Tbsp. olive oil
3 cups diced onion, 1/2” dice
1 cup white wine
2 Tbsp. tomato paste
2 cups water
1/2 tsp. whole allspice berries
3 bay leaves
2 4” strips of lemon peel
2 Tbsp. butter
2 quinces
1 Tbsp. sugar
1/4 tsp. freshly grated nutmeg

Wash and dry the pork, cut the meat off the bones, remove any large pieces of fat, and cut the meat into 1” cubes. Season the cubes, and any bones, with salt and freshly ground black pepper.

Heat the olive oil in a large pot and sauté the pork and bones until they are well-browned. Stir in the onions and sauté until they soften and begin to turn golden. Stir in the wine, scraping up any browned bits on the bottom of the pan, and cook until the wine is reduced by half. Stir in the tomato paste until it is thoroughly combined. Stir in the water, allspice, bay leaves, and lemon peel. Bring the liquid to a boil, cover, turn down the heat, and simmer for 1 1/2 – 2 hours until the pork is very tender. Taste and add salt or freshly ground black pepper as needed.

While the pork is cooking, peel the quince, cut them into quarters, remove the core, and drop in
acidulated water (water with lemon juice) to keep the quince from turning brown. Cut each quince quarter in half lengthwise and then in half crosswise; dry the quince pieces thoroughly.

Melt the butter in a frying pan, add the quince pieces, and cook until they are lightly browned on all sides. Turn off the heat, sprinkle the sugar and nutmeg over the quince, and toss to combine.

When the pork is tender, stir in the quince, and cook covered for 30 minutes. Remove the bay leaves and lemon peel. Serve immediately, warning your guests not to eat the allspice berries.
~~~~~~~~~~~~~~~~~~~~~~~~~~~~
This is my entry for Weekend Herb Blogging, hosted this week by Siri from Siri's Corner.

Monday, May 26, 2008

Recipe: Stuffed Pork Tenderloin with Chorizo, Spinach, Lemon, and Pancetta & Chorizo and Spinach Pilaf

I hit the Taste and Create mother lode this month.

Taste and Create is an event organized by For the Love of Food. In this event, food writers are paired with a randomly assigned partner, and asked to cook and review one recipe from their partner’s blog.

Taking part in Taste and Create can be a challenge. Participants come from very different backgrounds and have widely divergent interests. But the commitment you make when signing up for Taste and Create is to cook from your partner’s blog, whether or not their recipes are ones you’d otherwise make.

I like Taste and Create for the same reason I liked grab bags as a kid; you never know what you’ll get until you open the bag.

This month, Abby at
Eat the Right Stuff is my Taste and Create partner. The recipes on her blog, which was new to me, are wonderful; I wanted to make them all. The ingredients and seasonings she uses are the ones I love most. Abby’s writing is easy to understand and her photographs inspirational. Like I said, I hit the mother lode.

As soon as I read the description “pork stuffed with pork wrapped with pork,” I had to make Abby’s recipe for
Stuffed Pork Tenderloin. As Abby promised, the caramelized onion, chorizo, lemon, and spinach stuffing was fabulous, and the accompanying rice worth making on its own.

I did have to deal with the typical vagaries and ingredient difficulties that always exist when making a recipe created in another country. For example, the recipe calls for “2 picante (hot) chorizo sausages.” I don't know about London (where Abby lives), but in the US, chorizo comes in many sizes and forms, including fresh and dry-cured, and is imported from many different countries.

I ultimately decided the stuffing would be good with any of the multitude of available chorizos. I ended up using a
dry-cured chorizo seasoned with hot smoked paprika made in Spain by Palacios (and bought at Sagaya in Anchorage). For those who don’t have access to chorizo, hot Italian sausage would be a good substitute.

Spicy chorizo, earthy spinach, and bright-flavored lemon combine to make a delicious stuffing for mild-flavored pork tenderloin. The pork is finished with a crispy pancetta wrapping and served on a bed of surprisingly good Chorizo and Spinach Pilaf.


Photograph by Abby at Eat the Right Stuff


Stuffed Pork Tenderloin with Chorizo, Spinach, Lemon, and Pancetta & Chorizo and Spinach Pilaf
Serves 4 - 6

Adapted from Eat the Right Stuff
If you can’t find chorizo, substitute your favorite salami or fresh hot Italian sausage.

1 pork tenderloin (1 – 1 1/4 pounds)
1 8-ounce dry-cured hot chorizo sausage
1 1/2 cups diced yellow onion, 1/4” dice
1 Tbsp. olive oil
Salt
Freshly ground black pepper
9 ounces cleaned and roughly chopped spinach, divided
3/4 cup Panko breadcrumbs
2 tsp. finely grated lemon peel
2 Tbsp. lemon juice
16 slices of pancetta (see NOTE)
1 cup long-grain rice
2 cups chicken stock

Preat the oven to 400°F.

Wash the pork and dry it well. Cut the pork in half, lengthwise. Place the pork between two sheets of plastic wrap and pound it with a meat pounder (or rolling pin) to flatten it slightly.

Remove the casing from the chorizo and cut the meat into 1/4” dice.

Sauté the onion, lightly seasoned with salt and freshly ground black pepper, in olive oil until it softens and starts to turn golden. Add the diced chorizo and cook until the onions begin to caramelize. Remove half the onions and chorizo and most of the oil to a bowl and reserve it for making the pilaf.

Add half the spinach to the pan and cook, stirring regularly, until it wilts. Remove from the heat and stir in the breadcrumbs, lemon peel, and lemon juice. Season well with black pepper. Taste and add salt or freshly ground black pepper, as needed.

Line up the slices of pancetta so they are slightly overlapping to form a pancetta rectangle. Top with half the pork tenderloin, then the stuffing, and then the remaining tenderloin. Wrap the pancetta around the tenderoin to fully encase it. Put the roll in a roasting pan, with the pancetta seam side down. Bake for 25-30 minutes or until the pork is cooked through. Remove from the oven and let rest for 5-10 minutes before slicing and serving.

While the tenderloin is roasting, make the pilaf: Put the reserved onion, chorizo, and oil in a pan and heat. When it starts sizzling, add the rice and stir well to coat the grains with oil. Cook for 1 minute, then stir in the stock and bring it to a boil. Cover, turn down the heat to low, and let the rice cook for 20 minutes. When the rice is done, stir in the remaining half of the spinach.

Serve slices of Stuffed Pork Tenderloin with Chorizo, Spinach, Lemon, and Pancetta over a bed of Spinach and Chorizo Pilaf.

NOTE: The pancetta slices must be long enough to wrap all the way around the stuffed tenderloin; this size of pancetta is available only from deli counters and specialty stores in most of the US. Too often, the only readily available pancetta is sold in pre-sliced 3-ounce vacuum-packed plastic bags. These pieces of pancetta aren’t long enough to wrap the tenderloin; if this is the only kind available, buy two 3-ounce bags to make sure there is enough pancetta.

Saturday, April 26, 2008

Recipe: Cannelloni with Spinach Filling (Κανελόνια με Σπανάκι)

Last week I found a bag of cookbooks in my basement that I’d never read.

I’d bought the books last year at a thrift store two days before my head exploded. By the time I was up and cooking, I’d completely forgotten about the thrift store cookbook score. My recent discovery was a lovely Easter present. A new cookbook always puts me in a good mood, and here were five of them. A bonanza!

The first book I picked up was Michael Field’s
Culinary Classics and Improvisations: Creative Leftovers Made from Main Course Masterpieces.

Michael Field was a successful concert pianist in the fifties and early sixties who had a passion for cooking. By 1964, that passion had become Field’s career. He got started by holding “
socialite cooking classes in his Manhattan apartment.” Ultimately, he started a culinary school in New York City, wrote cookbooks and magazine articles, and was a consulting editor for the Time-Life Foods of the World series.

Field
died in 1971 at age 56. Among the accomplishments cited in his Time magazine obituary are debunking “such myths as the need to wash mushrooms, devein shrimp and press garlic” and preaching the “imaginative use of leftovers.”

Field’s primary rule for using leftovers is the source of leftovers must be “of the highest quality.” To this end, Field provides classic recipes for roasted and braised meat, fish, and fowl. He uses the leftovers from these dishes for the remaining recipes.

For example, Field gives a recipe for Yankee Pot Roast, the leftovers of which can be used in his recipes for Pot Roast Pie with Braised White Onions and Mushrooms, Pirog of Beef, Bigos, Cannelloni with Beef and Spinach Filling, Pâté of Pot Roast, or Cold Braised Beef Vinaigrette.

Here’s my take on Field's Cannelloni:

Cannelloni with Spinach Filling (Κανελόνια με Σπανάκι)
Serves 4 (makes 8 cannelloni)
Adapted from
Culinary Classics and Improvisations by Michael Field (Alfred A. Knopf 1967)
Cannelloni is a very flexible dish, and is a terrific way to use up leftovers. For stuffing, combine the spinach with sautéed mushrooms or leftover chicken, beef, pork, lamb, or roasted vegetables. It’s great with homemade pasta, but can also be made with plain crêpes or store-bought manicotti tubes. The tomato sauce may be made special for Cannelloni, but the dish tastes great with leftover or jarred sauce. I made my own pasta, hand-cutting noodles with the extra dough. The noodles are terrific in homemade chicken soup. Although Cannelloni may be made in one large pan, I like using individual gratin dishes for ease of serving and because it allows me to freeze assembled but unbaked cannelloni for future use.


Pasta (or substitute crêpes or purchased manicotti shells):
2 eggs
1 1/2 cups all purpose flour
1 tsp. salt
2 Tbsp. olive oil
2 Tbsp. water

Cream Sauce:
3 Tbsp. butter
3 Tbsp. all purpose flour
1 1/2 cups half and half
1/8 tsp. cayenne pepper
Salt

Filling:
1/2 pound cleaned, fresh spinach or 10 ounces frozen spinach, thawed
1 cup diced onion, 1/8” dice
2 Tbsp. olive oil
Salt
Freshly ground black pepper
1 Tbsp. minced garlic
1 cup finely chopped leftover roast meat or leftover roast vegetables (see vegetarian variation below)
1 Tbsp. dried oregano, crushed
1/2 cup finely grated parmesan cheese
1 egg

1 cup tomato pasta sauce, puréed (use your favorite tomato sauce recipe or a good quality jarred pasta sauce)
1/4 cup freshly grated parmesan cheese

Make the Pasta: Mix all the ingredients in a food processor and process until the dough clumps together, adding water if necessary. The finished dough should be very stiff. Dump the dough out on a floured surface and knead for 2 – 3 minutes, or until the dough is smooth, shiny, and elastic. Wrap in plastic wrap and let rest for 30 minutes.

Following the manufacturer’s instructions, use a pasta machine to roll out the dough, half at a time, until the pasta has gone through the second to the last setting on the pasta machine. Let the pasta sheets dry for 10 minutes. Trim the edges and cut the pasta sheets into 5” lengths. You need 8 pasta rectangles. (NOTE: Cut the rest of the pasta into noodles, let them dry, and store in an air-tight container until ready to use.)

Cook the pasta rectangles in boiling, salted water until they are al dente. With a slotted spoon, lift out the pasta sheets and put them in a bowl of cold water. Dry the pasta rectangles by laying them out on paper towels.

Make the Cream Sauce: Melt the butter in a small saucepan. Whisk in the flour and cook, stirring, for 2 minutes. Add the cream in a slow stream, whisking rapidly and cook, stirring constantly, until the sauce thickens. Stir in the cayenne and salt, remove from the heat, and set aside until ready to use.

Make the Filling: Blanch the spinach in boiling, salted water for 1 minute. Drain and rinse with cold water. Squeeze as much liquid as possible out of the blanched (or thawed) spinach, and finely chop it. Put in a bowl.

Sauté the onion, lightly seasoned with salt and freshly ground black pepper, in olive oil until the onions soften and start to turn golden. Stir in the garlic and cook for 1 minute. Add the onion mix, meat, oregano, and parmesan to the filling and mix together thoroughly. Taste and add salt or freshly ground black pepper, as needed. Mix in the egg.

Assemble the Cannelloni: Preheat the oven to 375°F

Lay out 8 rectangles of pasta, evenly divide the filling between them, and roll them up. Spread a little white sauce in the bottom of a baking dish large enough to hold all the cannelloni or 4 individual gratin dishes. Place the cannelloni in the pan seam side down and side by side. Cover the cannelloni with tomato sauce and then cover the tomato sauce with the remaining cream sauce. Sprinkle with parmesan cheese. (The recipe may be made ahead to this point and refrigerated or frozen.)

Bake for 20 minutes, or until the sauce is bubbling. Put under the broiler until the tops are nicely browned; watch carefully, it is easy to burn the cheese.

Vegetarian Cannelloni
For meat in the filling, substitute 2 1/2 cups diced mushrooms (1/4” dice). Sauté the mushrooms, lightly seasoned with salt and freshly ground black pepper, in 1 Tbsp. butter and 1 Tbsp. olive oil until the mushrooms are nicely browned.
~~~~~~~~~~~~~~~~~~~~~~~
This is my entry for
Weekend Cookbook Challenge: Vintage Cookbooks hosted by Chocolate Moosey.

Monday, January 28, 2008

Recipe: Pork and Chickpea Stew (Χοιρινό με Ρεβίθια)

Viewed from mountaintop pastures, the sun sparkles off achingly blue Aegean waters. Boats travel lazily in and out of the island’s many natural harbors. Hulking shapes of nearby islands grace the horizon.

In spring, wild plants, both edible and inedible, paint the pastures green, briefly disguising rocky earth and thin soil. Bursts of color from showy displays of wild flowers punctuate the bright green vistas. A small valley divides the pastures. Topsoil, deposited over the centuries, supports the valley’s lush plant communities.

By August, the hillsides are painted again, but this time in shades of gold and ochre and rust. The plants, once so green and inviting, are sharp and prickly, attacking the legs of those who venture to cross the land. Rocks are everywhere. Small lizards dart to and fro, hunting for food on the parched hillsides.

Uncle Dimitris used to grow chickpeas in the valley, the only place on the rocky mountaintop capable of sustaining a cultivated crop. He reached the remote area by donkey, and tilled the hard soil by hand. He let the chickpeas dry on the vine, then brought them down to the village for Aunt Stavroula to clean and cook.

During years of poverty, through occupations, wars, inflation, and unemployment, garbanzo beans were an important winter food on the island. They are rich in protein and nutrients, and were particularly valued on the many fasting days that fill the Greek Orthodox calendar.

In this recipe, chickpeas are paired with pork to produce a flavorful and filling winter stew. I’ve made the stew with only chickpeas, leaving out the pork, and it is very tasty - though not as appealing for meat-eaters. When it’s just the two of us, my husband’s serving is heavy on the meat, and my serving is heavy on the chickpeas, a state of affairs that pleases us both.


Pork and Chickpea Stew (Χοιρινό με Ρεβίθια)
Serves 4 – 6

When made with canned chickpeas and tomatoes, both of which work well in this dish, the stew is particularly easy to make. I like the extra flavor boost from oil-cured olives, but the stew is wonderful without them.

1 1/2 pounds pork steak (bone-in) or 1 pork tenderloin (about 1 to 1 1/4 pounds)
Salt
Freshly ground black pepper
2 Tbsp. olive oil
2 1/2 cups diced yellow onions (1/2” dice)
1 Tbsp. minced garlic
2 Tbsp. dried thyme, crushed
1 cup dry white wine
3 cups cooked chickpeas (2 14.5 ounce cans)
2 cups (1 14.5 ounce can) diced tomatoes
1 cup crushed tomatoes
2 cups chicken stock
3 bay leaves
1 Tbsp. minced fresh sage
1/3 cup chopped oil-cured or salt-cured black olives (optional)

Wash and dry the pork well. Cut into 1” cubes, reserving any bones. Season the pork and bones with salt and freshly ground black pepper and, in a large pot, brown on all sides in olive oil. Stir in the onions, lightly season again with salt and freshly ground black pepper, and sauté until the onions begin to turn golden. Add the garlic and dried thyme and cook for 1 minute.

Add the wine, bring to a boil, and cook until the wine is reduced by half. Stir in the chickpeas, diced and crushed tomatoes, chicken stock, and bay leaves. Bring to a boil, cover, turn down the heat to low, and simmer for 45 – 60 minutes, or until the pork is tender.

Remove the cover, stir in the sage and black olives, and bring to a medium boil. Cook the stew, stirring as necessary to prevent it from sticking to the pan, until the liquid is the consistency you desire, about 10 – 15 minutes.

Serve with feta cheese, crusty bread, and a crisp green salad.

~~~~~~~~~~~~~~~~~~~~~~~~~~~~~~~
This is my entry for Weekend Herb Blogging, hosted this week by Claudia from Fool for Food.

Sunday, January 27, 2008

Recipe: Pork and Sage Bites (Χοιρινό και Φασκόμηλο Μεζές)
“We’re having pork for dinner,” I announced last week. “Do you want it with sage or rosemary?”

The answer was sage. It continues to thrive in our bedroom herb garden, and needed a haircut, so I was happy to pair it with the pork.

I didn’t have a plan for what to make, but wanted something with simple flavors that could be put together at the last minute. Since it’s January, and we’re still not shopping, whatever I made had to use on-hand ingredients.

For years, one of our favorite treats has been a sauceless version of saltimbocca (an Italian dish whose name means “jumps in the mouth”). My saltimbocca is made with chicken pounded thin and layered with prosciutto and sage.


I decided to make something similar with the pork. We’re out of prosciutto, but pork is flavorful meat and doesn’t need the flavor boost prosciutto gives chicken.

Thinly pounded pork, browned quickly in butter and liberally seasoned with freshly ground black pepper, pairs beautifully with fresh sage leaves. Like its Italian cousin, the Pork and Sage Bites jumped in our mouths as fast as we could open them.

Although we ate the Pork and Sage Bites for dinner, they make an easy and flavorful appetizer. For those who enjoy ouzo, Pork and Sage Bites would be a tasty accompaniment.

Pork and Sage BitesPork and Sage Bites (Χοιρινό και Φασκόμηλο Μεζές)
Makes about 60 pieces
Pork and Sage Bites can be prepared up to 24 hours in advance. They cook very quickly and make a wonderful hot appetizer or main course. I recently served them to complement Red Cabbage with Mushrooms and Blueberries. The leftovers, and there were plenty since only two of us were eating, disappeared in less than a day.

1 pork tenderloin (about 1 pound)
Salt
Freshly ground black pepper
1 bunch fresh sage
2 – 4 Tbsp. butter

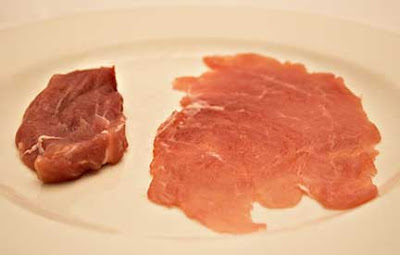
Pounded PorkWash and dry the pork. Slice the tenderloin at an angle into 1/2” thick medallions. Place the medallions between two sheets of plastic wrap. Working from the center to the edges, lightly pound the medallions with the flat side of a meat pounder until they are 1/8” thick.

Making Pork and Sage BitesCut the thinly pounded pork into 2” – 3” pieces (it doesn’t matter if they are slightly larger or smaller than this). Salt the pork and season it with plenty of freshly ground black pepper. Place one fresh sage leaf, attractive side up, on top of each pork piece. Secure the sage leaf to the pork with a wooden toothpick.

Preheat a heavy plate (this is easiest to do by putting the clean dry plate in a microwave on high for 60 – 90 seconds).

Melt 1 Tbsp. butter in a frying pan until it is hot, but not brown or smoking. Add as many pork pieces to the pan, sage leaf side up, as will fit comfortably; do not crowd them or the pork will steam rather than brown. Cook for 1 – 2 minutes, or until the meat starts to brown. Turn over and cook for 1 – 2 minutes more. Place cooked Pork Bites on the preheated plate. Cook the remainder of the Pork Bites, adding butter to the pan as necessary.

Serve immediately.
~~~~~~~~~~~~~~~~~~~~~~~~~~~~~~~~~
This is my entry to the "Grow Your Own" event hosted by Andrea's Recipes.
~~~~~~~~~~~~~~~~~~~~~~~~~~~~~~~~~
For Jack, who wants to know five odd, random, or weird things about me:
I didn’t eat a raw tomato until I was 24.
The first sentence I learned in Greek was, “I’m sorry, I can’t eat anymore.”
I watched Eskimo villagers pull a beluga whale to shore and ate fresh muktuk.
I’ve only been to McDonalds one time and that was in Bed-Stuy.
I like emptying mini-bars and filling them with cheese.

Friday, December 21, 2007

Novel Food: Corelli's Mandolin and Recipe for Cephalonian Meat Pie (Κεφαλονίτικη Κρεατόπιτα)

KreatopitaCephalonia, a Greek island in the Ionian Sea, is famous throughout the world for its meat pies.

In recent years, Cephalonia has also become known as the beautiful setting for the novel (and movie) Corelli’s Mandolin by Louis De Bernières (Pantheon Books 1994).

Corelli’s Mandolin opens in Cephalonia during the early years of World War II, shortly before the invasion of Greece. In those years, despite the hovering threat of war, life on Cephalonia continued unchanged. A procession celebrating the death of St. Gerasimos, the patron saint of Cephalonia, was held as it had been for the last hundred years:

“Outside in the beautiful meadows of the valley and amongst the plane trees that lined the road from Kastro, pilgrims and Corybants had been arriving for two days, some of them from distant parts indeed. … The pews were filled with distant acquaintances renewing their friendship by means of the animated and voluble conversation that non-Greeks mistakenly construe as irreverence. Outside, the pilgrims unloaded animals laden with feta, melons, cooked fowl, and Cephalonian meat pie, shared it with their neighbors, and composed epigrammatic couplets’ at each others’ expense. Groups of laughing girls strolled about, arm in arm, smiling sideways at potential husbands and possible sources of flirtation, and the men, pretending to ignore them, stood about in knots, gesticulating and waving bottles as they solved the outstanding problems of the world.“ Corelli’s Mandolin at p. 74 - 75.

Eight days after the celebration of St. Gerasimos described by De Bernières, the Italian dictator Mussolini demanded that Greece allow Italy to occupy certain strategic parts of the country. On October 28, 1940, the Greek prime minister refused this demand and Italy immediately invaded Greece. (Today, October 28 is a Greek national holiday honoring the 1940 refusal to submit to foreign tyranny.)

Although the Greek army held off the Italians, the country fell when Germany joined the battle. Greece was occupied by a joint force of Germans, Italians, and Bulgarians for the duration of World War II. Corelli’s Mandolin describes life in occupied Cephalonia.

Captain Antonio Corelli was a reluctant officer of the Italian garrison on Cephalonia. The fictional Captain Corelli loved music, culture, and his mandolin. Corelli tried to be a benevolent member of the occupation. He was quartered in the home of the town’s doctor and eventually fell in love with Pelagia, the doctor’s daughter.

When the doctor became aware that Pelagia was in love with Corelli, he tried to dissuade her from consummating the affair. The doctor warned Pelagia of the many dire consequences, tangible and intangible, that could result from consorting with an Italian occupier.

Leaving Cephalonia and forsaking its meat pies were some of those consequences: “Are you ready to leave this island and this people? What do you know of life over there? Do you think that Italians know how to make meat pie and have churches dedicated to St. Gerasimos? No, they do not.” Corelli’s Mandolin at p. 281

Corelli’s Mandolin is ultimately the story of Pelagia’s life and the life of Cephalonia, and how both survived the upheaval brought by war. De Bernières used Cephalonian meat pie (Kreatopita) in describing idyllic island life before the war and, when Pelagia is at a crossroads that could lead her away from the island, as a symbol of all that is good about Cephalonia.

The phrase “Cephalonian meat pie” encompasses a multitude of recipes. Most households on Cephalonia have their own version of this delicious dish. In Prospero’s Kitchen: Mediterranean Cooking of the Ionian Islands from Corfu to Kythera, Diana Farr Louis and June Marinos say, “Recipes for Kreatopita in Cephalonia are like recipes for bouillabaisse in Marseille: each one is offered as the only truly authentic version handed down by a mythical grandmother.”

Louis and Marinos describe Kreatopita recipes with prunes, raisins, almonds, and pine nuts. Some recipes use rice, others potatoes; some use marjoram, others oregano. Some Kreatopitas are made with goat, beef, pork, or lamb, and still others with a combination of two or three different meats. Some recipes add hard-boiled eggs to the filling. Louis and Marinos conclude, “It all boils down to a matter of taste.”

Here is the version of Kreatopita that suits my taste. It is based on one I had many years ago at an Athens restaurant that no longer exists. I’d forgotten this dish until recently, when I ate it in a dream and woke up with the taste of Kreatopita in my mouth. The garlic yogurt accompaniment, while not traditional, is how the Kreatopita was served in my dream. It provides a wonderful counterpoint to the meat pie.

For company, I prefer making Kreatopita in 4 - 4 1/2” tart pans (with removable bottoms) so that each person gets their own individual pie. The individual pies may also be frozen whole, to serve later for easy meals. One large meat pie is equally good for serving a crowd, and easier to make than individual pies.

A Bite of KreatopitaCephalonian Meat Pie (Κεφαλονίτικη Κρεατόπιτα)
Makes eight 4 1/2” pies or one 10” pie
Cephalonian Meat Pie may be made with pork, beef, lamb, or a combination of some or all of these meats. It may also be made with leftover roast. (If using leftovers, start by sautéing the onions, and add the cooked meat along with the tomatoes, herbs, and spices.)Traditionally, kefalotyri cheese is used for Kreatopita, but any firm cheese may be substituted. I most recently made this with P’tit Basque sheep cheese, and its earthy flavor paired well with the cinnamon-scented meat.

Using a little butter in the crust (filo) isn’t traditional, but it adds good flavor and flakiness. Olive oil can fully replace the butter, and the crust will still be tasty, but slightly tougher. More water is needed to make the crust if butter is left out. The dough may also be made by hand. If mixing by hand, make sure the olive oil is evenly distributed in the flour and use a fork or pastry cutter to add the butter.

Crust (Filo):
3 cups flour
1/2 tsp. salt
1/2 cup olive oil
1/4 cup cold butter, cut into small chunks
1/3 – 2/3 cup ice water

Filling:
2 pounds meat, cleaned of all bones, fat, and gristle
1/4 cup olive oil
Salt
Freshly ground black pepper
4 cups diced onions, 1/2” dice
2 Tbsp. minced garlic
2 tsp. Aleppo pepper or 1 tsp. crushed red pepper
3 cups ground tomatoes, fresh or canned
1 cup red wine
1 cup beef or chicken stock
1 cinnamon stick
1 tsp. allspice
1/2 tsp. nutmeg
1 Tbsp. dried oregano, crushed
3 bay leaves
1 pound peeled and diced waxy potatoes (red or Yukon gold), 1/2” dice

1 cup minced fresh parsley
2 cups grated kefalotyri, kasseri, or other firm cheese

For the crust: In a food processor, mix the flour, salt, and olive oil until the olive oil is thoroughly incorporated into the flour. Add the butter and pulse three or four times to break up and distribute the butter; when you are done, the butter pieces should be the size of small lentils. Add 1/3 cup ice water and pulse to mix. Pinch together some of the dough to see if it holds together. If it does not, add small amounts of water, pulsing to mix, until the dough holds together when pinched.

Dump the dough onto a piece of plastic wrap and knead lightly until the dough holds together. If you are making individual pies, separate the dough into sixteen pieces, shape the pieces into flat disks, wrap in plastic wrap, and refrigerate for at least 30 minutes. If you are making one large pie, separate the dough into two pieces, shape them into flat disks, wrap in plastic wrap, and refrigerate for at least 30 minutes.

For the filling: Dice the meat into 1/2” pieces, and season it with salt and freshly ground black pepper. Sauté the meat in olive oil until it is browned on all sides. Stir in the onions, and continue to sauté until the onions soften and begin to turn golden. Stir in the garlic and Aleppo pepper and sauté for 1 minute.

Stir in the tomatoes, wine, stock, cinnamon stick, allspice, nutmeg, oregano, bay leaves, salt, and freshly ground black pepper. Bring to a boil, reduce the heat, and simmer for 30 minutes. Stir in the potatoes and continue to cook until the sauce is rich and thick (it is not necessary to fully cook the potatoes). Taste, and add salt, freshly ground black pepper, or oregano, as needed. Let cool. (The filling may be made ahead to this point.) After the filling has cooled a little, stir in the parsley.

Preheat oven to 400°F.

Roll out the bottom crusts (or crust if you are making one large pie) and press into the bottoms and sides of the tart pans (the bottom crust needs to overhang the pan). Divide the filling between the pans, and top with the grated cheese. Roll out the top crusts and place over the filling. Trim the edges of dough if they are too long, roll the edge of the bottom crust over the top crust, crimp the two crusts together, and tightly seal the edges. Use a sharp knife to cut a slit in the top crust; this will allow steam to escape as the Kreatopita bakes.

Bake for 45 - 50 minutes, until the top of the pies are golden brown. (If you are making one large pie, cook for 45 minutes at 400°F, turn the heat down to 350°F, and cook for 30 minutes more. Cover the edges of the pie with foil if they get too dark.)

Serve with Garlic Yogurt on the side, a crisp green salad, dried black olives, and crusty bread.

Garlic Yogurt
2 cups whole-milk yogurt
4 cloves garlic
1 tsp. coarse-grained salt
1 Tbsp. white wine vinegar
2 Tbsp. olive oil

Line a colander with paper towels. Dump the yogurt into the lined colander and let the liquid drain out of the yogurt for 30 – 60 minutes. Puree the garlic by mashing it into the salt. Mix together the drained yogurt, mashed garlic, salt, vinegar, and olive oil. Taste and adjust the seasoning by adding garlic, salt, or vinegar, as needed.

~~~~~~~~~~~~~~~~~~~~~~~~~~~~~~~
This is my entry for Novel Food sponsored by Simona of Briciole and Lisa of Champaign Taste. Simona's half of the wonderful round-up is here and Lisa's half is here.