Showing posts with label rice. Show all posts

Wednesday, October 13, 2010

Triqui Family Makes Life in Alaska,Violence Grips Triqui Region in Oaxaca (with recipe for Reyna's Oaxacan Chicken Mole)


Reyna Martinez DeJesus stood before a line of smoking grills at the back of “Ricos Tostaditos,” a Mexican food stand at the Northway Mall Farmers’ Market. Tall pots, tightly covered and steaming, crowded two of the grills. On another, flank steaks cooked over flame, sending their tantalizing aromas out into the market.

The irresistible smell of grilled meat drew me over. I ate some in a tostada, dressed with fresh homemade salsa and hot sauce. I wanted more of Reyna’s food. I ordered pozole, traditional Mexican soup made with hominy corn and finished with red chile sauce, intending to take it home for lunch. I tried taking just one bite, to see how the chile sauce tasted. It was amazingly good. Before I knew it, I’d powered down every bit of the pozole.

During repeat visits to Ricos Tostaditos, I learned Reyna, 35, her husband Lorenzo DeJesus Flore, 40, and their six children are Triqui, an indigenous people from the mountains of Oaxaca, a southern Mexican state. Triqui, not Spanish, is their primary language.

So how did a family of Triqui end up in Anchorage, Alaska? It started with Lorenzo’s decision to leave his violent region for the United States.

Lorenzo and Reyna told me their story when I was at their house learning how to make Reyna’s Chicken Mole. I wanted a cooking lesson. Lorenzo wanted somebody, anybody, to know what is happening to his friends and family in San Juan Copala.

As for Reyna’s Chicken Mole, like every bite of food that Reyna makes, it’s delicious.


Mediterranean Cooking in Alaska has moved as of March 2011. To read this post please go to


http://www.laurieconstantino.com/triqui-family-makes-life-in-alaska-leaves-oaxacan-violence-behind/


Please click on over and visit my new site. Thank you!


Monday, November 2, 2009

Greek Cookbooks: Hellenic Athletic Club of Khartoum with Recipe for Spiced Gazelle Pilaf (Πικάντικο Πιλάφι με Κρέας)

Modern Greeks have been in Sudan since the early 20th century.  In 1910, a Greek Orthodox church opened in Khartoum.  By 1956, there were 6000 Greeks and 1000 Cypriots in the country.  The Greek presence was particularly strong in the capital, Khartoum, where all the restaurants, cafes, hotels, cinemas, and most shops were Greek-owned.” 

In 1983, the Sudanese president imposed Islamic Sharia law, which fanned the flames of civil war between the Muslim north and Christian-Animist south.  From then to now, civil war and famine have killed millions of Sudanese. Many Europeans fled to their homelands. By 1992, only 500 Greeks remained in Sudan.  Today, there are only about 300.


Dancers at the Greek School in Khartoum, Sudan
Photograph courtesy of Apouro

Although the way of life for Sudanese Greeks has changed since 1983, there is still a Greek Orthodox church and Greek school in Khartoum.  The Hellenic Athletic Club is a hangout for Khartoum expats.  The Greek school’s students celebrate Greek Independence Day, Greek Easter, Oxi Day (when Greece stood up to Mussolini), and the 1973 Athens Polytechnic Uprising against the then-ruling Fascist junta.

Greek readers should check out this compelling description of a scalding hot Greek Easter in Khartoum, written by the Greek Ambassador to Sudan. For English speakers, the poetry of the original Greek is so powerful, it seeps through the vagaries of Google translator. Anyone interested in more about Khartoum can read this fascinating blog written by a Greek teacher who lives there (in Greek, but with fun pictures).

In 1983, the year the Sudanese civil war reignited, Greeks in Khartoum published a cookbook: Treasured Recipes: A Collection of Personal Recipes from the Women Members of the Hellenic Athletic Club of Khartoum and Their Friends (148 pages, 191 recipes, 6.5” x 9”). The editors explain the recipes “reflect the nature of our community here in the Sudan, and the influences upon our cooking, resulting from our way of life, from travel, and through marriage to other nationalities.”

Just as I’ve learned to cook Mediterranean food in Alaska, Greeks in Sudan adapted traditional recipes to their new country.  Fish recipes call for Nile perch, a giant freshwater fish that grows over 6 feet long and over 500 pounds.  Sudanese limes are recommended in lieu of lemons. Egyptian Roumi (Romy) cheese stands in for traditional Greek varieties. Spicy shatta is used for seasoning.

The recipe for Stifado (Greek stew) calls for gazelle meat. Its creator says when the stew is done, “The only thing left is to sit before the camp fire with some friends and polish the whole thing off!”  Gazelle also makes an appearance in George Limnios’ recipe for “Rice and Gazelle Pilaf.”  (An internet site counsels Khartoum visitors who “fancy” a camping safari to call “Greek guide George Limnios [who] happily provides safari advice and organizes trips.”)

Other interesting recipes in Treasured Recipes include: Tomato-Bacon Soup, Eggplants with Eggs, Spaghetti with Bacon-Olive Sauce, Sheftalia, Purslane Stew, Stuffed Mortadella Rolls, Baked Eggplant Packets, Grape Leaves with Onion, Zucchini, and Carrot Stuffing, Salty Cake, and four different recipes for Olive Bread (no explanation for the abundance of Olive Bread recipes).

The idea of “gazelle pilaf” stuck in my mind; I had to make it. (I also had to buy my home when I saw it had a gazebo and have a strong attraction to gazetteers.)  Luckily, there were moose steaks in the freezer to stand in for gazelle, though deer, lamb, or beef would also work. 

The tantalizing, cinnamon aroma of tomato-meat sauce soon filled the house.  Even before adding rice, the rich and spicy sauce was amazing on its own; neither of us could keep our tasting spoons away from its deliciousness. (The sauce, thinned with a little stock, would make terrific soup.)  The tastes of the individual spices had blended into an entirely new and wonderful flavor; no single spice dominated.  The rice soaked up the sauce, ensuring we enjoyed every last bite of the pilaf.


Spiced Gazelle Pilaf (Πικάντικο Πιλάφι με Κρέας)
Serves 4-6
Adapted from George Limnios’ recipe for “Rice and Gazelle Pilaf” in Treasured Recipes: A Collection of Personal Recipes from the Women Members of the Hellenic Athletic Club of Khartoum and Their Friends (Khartoum 1983)
The cinnamon sticks and whole cloves must be removed before serving. To make this easier, wrap the spices with cheesecloth or muslin and tie the packet up with string, instead of cooking them loose in the liquid.

1 lb. boned and trimmed gazelle (or moose, deer, lamb, or beef) meat
Salt
Freshly ground black pepper
1/4 cup olive oil
3 cups diced yellow onion, 1/4” dice
2 Tbsp. minced garlic
1 tsp. coriander seed, ground
1 tsp. cumin seed, ground
1 tsp. Aleppo pepper or 1/2 tsp. crushed red pepper flakes (optional)
1 cup red wine
1/4 cup tomato paste
4 cups water
3 cinnamon sticks
8 whole cloves
1 cup long-grain rice

Wash the meat, dry it well, and cut it into 1” cubes. Season the cubes on all sides with salt and freshly ground black pepper.  Heat the olive oil in a large pot (that has a lid) and thoroughly brown the meat.  Stir in the onions, lightly seasoned with salt and freshly ground black pepper, and sauté until they soften and begin to turn golden. Mix in the garlic, coriander, cumin, and Aleppo pepper and cook for 1 minute.  Stir in the wine, bring to a boil, and cook until it reduces by half. Stir in the tomato paste until it’s evenly distributed.

Stir in the water and packet of cinnamon sticks and cloves.  Bring to a boil, turn down the heat, and simmer for 75-90 minutes or until the meat is tender and the liquid reduced to about 2 1/2 cups.  Remove and discard the cinnamon sticks and cloves.  Stir in the rice, cover the pot, turn down the heat as low as possible, and cook for 20 minutes or until the rice is cooked and the liquid absorbed.  Serve immediately.

Sunday, April 19, 2009

Recipes: Home-Cured Flat Pancetta & Edamame and Mushroom Risotto with Pancetta

Bacon’s smell wafting through the air is so enticing that even committed vegetarians are sometimes tempted to stray from their virtuous path. These days I mainly use bacon and pancetta as flavor-boosting ingredients; it’s been years since I ate it on its own.

Since I use bacon to boost flavor, I buy the best available. So I was intrigued to read on
Kits Chow, that Christine’s Home-Cured Bacon was so good, her husband asked her not to buy bacon from the store anymore. I had to try it.

Although I’ve visited
Kits Chow more than once over the past year, I was there recently because I was paired with Christine for March’s Taste and Create. Invented by Nicole of For the Love of Food, Taste and Create is one of my favorite food writing events. Every month Nicole pairs participating food writers; each is responsible for trying one recipe from the other’s blog and writing about it.

Some months it can be a challenge to find something I want to write about on my partner’s blog (although I’ve always found something delicious to make). Other months there’s an abundance of recipes I can’t wait to try; this was an abundant month. I haven’t made it yet, but Christine’s simple
Ginger Custard will appear on our table shortly after I next go shopping.

Christine writes from an Asian perspective, while I focus on Mediterranean foods, but there are many similarities in our cooking styles. We both emphasize foods made with fresh, locally available products, and enjoy making ingredients from scratch.

Christine shares my passion for creating variations on a theme. For example, she recently wrote about and photographed a
series of grilled cheese sandwiches; every time I look at this post, I crave an immediate grilled cheese fix. I also appreciate Christine’s creative Asian-Hellenic fusion cooking.

But back to the bacon.

Christine used a
Hugh Fearnley-Whittingstall recipe from the Guardian to make her bacon. The recipe is simple: pork belly is liberally coated with a dry-rub of salt, sugar, and spices, and then cured in the refrigerator for several days.

The result was delicious: meaty, juicy, and mouth-watering. I’m calling it flat pancetta rather than bacon because it isn’t smoked (a hallmark of American bacon). And since I renamed it pancetta, I used the meat to flavor a wonderful risotto made with edamame beans and garlicky sautéed mushrooms. I’m only sorry there isn’t any leftover risotto; writing the recipe has left me wanting more.

Homemade PancettaHome-made Flat Pancetta
Adapted from
Hugh Fearnley-Whittingstall via Kits Chow
The original recipe recommended curing the meat at least 4 days, or as long as 10, draining the juices and applying more cure every 24 hours. I stopped the process on the fourth day because the pancetta was getting too salty for my taste. Since I cured it for shorter than called for in the original recipe, and because the recipe doesn’t include nitrites or nitrates, I froze all the pancetta I didn’t use right away rather than worrying about spoilage. The best place to buy meaty pork belly is in Asian markets (in Anchorage, Sagaya is the best source). Be sure to look the pork over carefully and buy the meatiest piece you can find. Once, in desperation, I bought a frozen piece of pork belly wrapped in freezer paper. The butcher repeatedly assured me the meat was skin-on; it wasn’t, plus the “meat” was 90% fat. The fault was my own for buying meat sight unseen.

Curing mix:
2 Tbsp. black peppercorns
2 Tbsp. coriander seeds
1 tsp. juniper berries
5 bay leaves
1 1/3 cup kosher salt (3/4 pound)
3/4 cup (packed) brown sugar (1/4 pound)

2 pieces meaty pork belly, with skin, 1 1/2 – 2 pounds each

Make the Curing Mix: Grind the peppercorns, coriander seeds, juniper berries, and bay leaves in a spice grinder, or pound them in a mortar and pestle until they are finely crushed. Mix the ground spices with the salt and brown sugar.

Curing Pancetta - Day 1Day 1: Rub each piece of pork belly with the curing mix until the meat is well coated and every nook and cranny is covered with the mix. Put the meat in a glass or other non-metallic container. Cover with plastic wrap and refrigerate.

Curing Pancetta - Day 2Day 2: After 24 hours, pour off all the liquid that has leached out of the pork and rub the meat with more curing mix until it is once again well coated.

Day 3: Repeat Day 2.

Day 4: Rinse off all the cure under cold running water. Dry the meat very thoroughly. Wrap in wax paper, parchment paper, or cheesecloth and refrigerate or freeze until ready to use (before choosing storage method, read the above headnote).

Edamame and Mushroom Risotto with PancettaEdamame and Mushroom Risotto with Pancetta
Serves 4
The mushrooms need to be sautéed in batches to ensure they brown properly; if you try to brown all the mushrooms at one time, they’ll steam rather than brown. Because home-cured pancetta can be salty, be sure to lightly salt the mushrooms or the finished dish may be too salty (the mushrooms need some salt to ensure they cook properly). Pancetta is often sold in packages of very thinly cut pre-sliced meat. Although I use pre-sliced pancetta in a pinch, I mostly buy pancetta direct from the deli counter (if I’m not making my own at home). I ask for either a chunk of pancetta, which I hand slice and dice at home, or have the deli staff cut the pancetta into slices the thickness of thick bacon. With thicker slices, eaters enjoy bursts of pancetta flavor when devouring the risotto; thinner slices tend to melt into the other flavors.

Mushrooms:
1/2 pound fresh cremini mushrooms, cut in 1/4” slices (about 2 cups sliced)
1/2 pound fresh shiitake mushrooms, stems removed and cut in 1/4” slices (about 2 cups sliced)
2 Tbsp. butter, divided
2 Tbsp. olive oil, divided
Salt
Freshly ground black pepper
1 Tbsp. minced garlic, divided

Risotto:
3/4 cup diced home-cured or store-bought pancetta (rind removed), 1/4” dice
2 Tbsp. olive oil
1 1/2 cups diced onions, 1/4” dice
Freshly ground black pepper
1 1/3 cups Arborio rice
1 cup dry white wine
10 ounces shelled edamame beans, blanched if fresh or thawed if frozen
6 Tbsp. minced fresh mint, divided
6 – 7 cups vegetable or chicken stock
1 cup freshly (and finely) grated parmesan cheese

Cook the Mushrooms: Sauté the cremini mushrooms, lightly seasoned with salt and freshly ground black pepper, in 1 Tbsp. butter and 1 Tbsp. olive oil, until the mushrooms are nicely browned. Stir in half the garlic and cook for 1 minute. Remove the browned mushrooms from the pan with a slotted spoon and set aside. Repeat with the shiitake mushrooms, using the remaining olive oil, butter, and garlic.

Make the Risotto: In a sauté pan large enough to hold the finished risotto, sauté the pancetta until the fat renders and the pancetta begins to brown. Stir in the onions, lightly seasoned with freshly ground black pepper, and sauté until the onions soften and begin to turn golden. Stir in the rice to completely coat it with oil and cook, stirring, for 1 minute. Add the wine, bring to a medium boil, and cook, stirring, until the wine is almost all absorbed.

Add 1/2 cup of stock and cook over moderate heat, stirring constantly, until the stock is almost all absorbed. Keep adding stock, 1/2 cup at a time, and stirring until each addition of stock is almost absorbed. When the rice is half done, stir in the edamame beans and 5 Tbsp. mint. (The recipe can be made ahead to this point, and finished right before serving. If you make it ahead, after you take the rice off the burner, stir it until it cools down before adding the edamame and mint.)

Continue adding stock, 1/2 cup at a time, and stirring until the rice is tender, but still firm in the center (this takes 18 – 22 minutes total). There may be stock left over. Stir in the reserved mushrooms, remaining 1 Tbsp. mint, and 1/2 cup grated parmesan. If necessary, add stock until the risotto is the consistency you desire; it should be moist and creamy, not thick and dry. Taste and add salt and freshly ground black pepper, as needed.

Serve immediately with the remaining grated parmesan on the side for sprinkling on top.
~~~~~~~~~~~~~~~~~~~~~~~~~~~~~
This is an entry for My Legume Love Affair – 9th Helping (MLLA9), created by Susan of The Well-Seasoned Cook, which I hosted in March 2009. My Legume Love Affair - 10th Helping for April 2009 is being hosted by Courtney of Coco Cooks.

Saturday, February 21, 2009

Greek Cookbooks: Varoulko: Colors, Smells, and Tastes with Recipe for Sea Urchin Risotto (Ριζότο με Αχινό)

The sun is setting over ice-rimmed Turnagain Arm, the inlet I see out my Anchorage window. The snow sparkles in the setting sun’s reflection.

My body is here, but my mind is in Greece. I’m wading the shallows of a Northern Aegean island, a plastic basin of sea urchins floating beside me. It’s mid-February and the sea urchins are in their prime. Their tongues of “
roe” are plump and full; their flavor captures the sea’s pure essence.

Four master chefs
recently discussed what they wanted for their last meal on earth. For mine, I want a pile of just-harvested sea urchins, followed by a bowl of Lefteris Lazarou’s Sea Urchin Risotto, and then a few more fresh urchins.

Lazarou is the genius chef behind
Varoulko, one of the best seafood restaurants in Athens. He flawlessly cooks sea creatures and, right when their flavors peak, sends them to his guests. One summer night we went to Varoulko and ate under the open sky in an Acropolis-view roof garden. This was our menu:

~~ Whole Wheat Toasts with Sea Urchin Roe
~~ Filo-Crusted Sardines with Silky Smooth Eggplant Sauce
~~ Grilled Calamari with Feta and Wine Sauce
~~ Angel Hair Pasta with Grouper Cheeks, Fresh Oregano, and Tomatoes
~~ Braided, Grilled Garfish Drizzled with Smoky Fava Sauce
~~ Filo Napoleon with Custard, Figs, and Rosemary & Yogurt Sorbet


Because Lazarou focuses on seafoods’ essential flavors, his dishes aren’t overly fussy. To accompany the superb food, Varoulko’s list includes many Greek wines that pair well with seafood.

Varoulko is extremely expensive and not a place for everyday eating. If I want reliably good, reasonably priced, high quality seafood in Athens, I head to fish tavernas;
Logia tis Ploris and Trata o Stelios in Kaisariani are two of my favorites. Yet, for a special occasion, or just to be inspired by Lazarou’s skill, Varoulko is well worth a visit.

In 2006, Lazarou, working with Greek food writer Diane Kochilas, published his cookbook:
Βαρούλκο Χρώματα, Αρώματα και Γέυσεις (Varoulko Colors, Smells and Tastes) (available only in Greek). This may be the most beautiful cookbook I’ve ever seen. It’s printed on high-quality paper that showcases Vassilis Stenos’ stunning food porn. Subtle background drawings of fish, akin to holographic watermarks, grace every page.

Lazarou’s recipes are straightforward and, like the food at Varoulko, emphasize flavor over showy technique. Best of all, his brilliant recipe for Sea Urchin Risotto, the one I want to eat as part of my last meal, is in the cookbook.

If you’re in Greece, head for the shore to gather sea urchins during the next few months. After eating your fill of raw urchins, including a few extra for me, gather enough to take home and make a batch of Lazarou’s Sea Urchin Risotto. )

Those who don’t live near wild urchins can make Sea Urchin Risotto with roe
sold under the Japanese name “uni.” To find it where you live, locate a sushi bar that offers uni and ask for their source of supply.

Sea Urchin Risotto (Ριζότο με Αχινό)
Serves 4
Adapted from
Βαρούλκο Χρώματα, Αρώματα και Γέυσεις (Varoulko Colors, Smells and Tastes) by Λευτέρης Λαζάρου με Νταϊάνα Κόχυλα (Lefteris Lazarou with Diane Kochilas)
Depending on the season, it can take awhile to clean sufficient sea urchins for risotto. The dish is absolutely delicious when made with 1/2 cup fresh sea urchin roe, as Lazarou specifies, and decadent if 3/4 cup roe is used, as I admit to having done. The easiest way to warm plates is to microwave them on high for 1 minute.
Here are directions, with photographs, for opening sea urchins.

1 cup diced yellow onion, 1/8” dice
1/4 cup olive oil
Salt
Freshly crushed white peppercorns
1 cup Arborio rice
4 – 5 cups chicken stock
1/2 cup white wine
1/2 – 3/4 cup fresh sea urchin roe, carefully cleaned of all spines and grit, divided

Sauté the onions, lightly seasoned with salt and freshly crushed white peppercorns, in olive oil until they soften and start to turn golden. Stir in the rice to completely coat it with oil and cook, stirring, for 1 minute. Add the wine, and stir until it’s almost absorbed. Add 1/2 cup stock and cook over moderate heat, stirring constantly, until the stock is almost absorbed. Continue adding stock, 1/2 cup at a time, and stirring while its absorbed, until the risotto is the consistency you desire; it should be moist and creamy, not dry. It takes about 18 – 20 minutes for the rice to cook.

When the rice is just done, stir in 1/4 cup sea urchin roe, and divide the risotto between 4 warmed plates. Make a shallow hollow in the center of each portion, and fill it with the remaining sea urchin roe, evenly divided.

Serve immediately.
~~~~~~~~~~~~~~~~~~~~~~~~~~~~
This is my entry for Bookmarked Recipes hosted and created by Ruth of Ruth’s Kitchen Experiments.

Wednesday, March 12, 2008

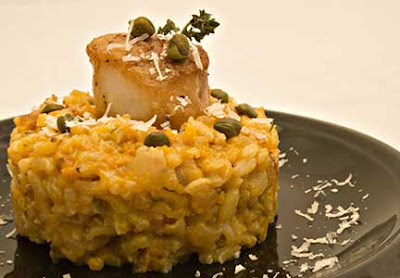
Recipes: Butternut Squash and Pancetta Risotto & Pan Fried Scallops and Capers (Κολοκύθα Ριζότο με Ιταλική Πανσέτα & Χτένια με Κάπαρης)

When I first started making risotto, Arborio rice wasn’t available in Anchorage, Alaska’s largest city. Because Arborio, a short-grain Italian rice, makes superior risotto, I imported it in my luggage or by mail-order. In those years, risotto was special occasion fare.

More recently, local stores stocked Arborio rice, but charged a premium for it. Although it became a pantry staple, ever cost-conscious, I still limited how often I made this toothsome treat.

Last month, our local Costco began selling imported Arborio rice in 3 kilo (6.6 pound) boxes for a very reasonable price. Now I guiltlessly make risotto whenever I want.

The firm, yet creamy, texture of perfectly cooked risotto is the perfect foil for vegetables of all kinds. Combined with
beets or squash, risotto is warming winter fare. In spring, I like it with peas or artichokes. In summer, I look forward to lighter risottos flavored with basil or lemons.

Yesterday, I needed to use a butternut squash that had been sitting on the counter for way too long. I also had a handful of leftover sea scallops. It was definitely time to make an old favorite: Butternut Squash Risotto with Pan-Fried Scallops.

Black-pepper pancetta from Salumi and salt-cured capers, booty from a recent trip to Seattle, rounded out my list of risotto ingredients. The result was an attractive, full-flavored dish that we enjoyed for a mid-week meal and that would be perfect for serving to company.

Butternut Squash and Pancetta RisottoButternut Squash and Pancetta Risotto (Κολοκύθα Ριζότο με Ιταλική Πανσέτα)
Serves 4 - 6
Butternut Squash and Pancetta Risotto makes a filling meal served on its own with a light salad. It pairs well with seafood; see recipe below for Pan-Fried Scallops and Capers, a lovely partner for the risotto. To make vegetarian Butternut Squash Risotto, leave out the pancetta, sauté the onions in olive oil, and use vegetable stock. To make the vegetarian version extra special, stir in a little truffle oil just before serving.

Squash:
1 1/4 pound butternut squash (1 pound cleaned; 3 cups cut in 3/4” dice)
3 Tbsp. olive oil
Salt
Freshly ground black pepper

Risotto:
1/2 cup diced pancetta, 1/4" dice
1 cup diced onion, 1/4” dice
Salt
(if the pancetta is very salty, omit the salt)
Freshly ground black pepper
1 cup Arborio rice
1 Tbsp. minced garlic
1 cup dry white wine
1 Tbsp. minced fresh thyme, sage, or rosemary
4 – 5 cups vegetable or chicken stock
3/4 cup freshly grated Parmesan cheese

Preheat oven to 450°F.

Roasting the Squash: Remove the squash skin with a knife or vegetable peeler, cut in half, remove the seeds, and cut into 3/4” dice. Put the diced squash on a rimmed baking sheet and toss it with salt, freshly ground black pepper, and 2 tbsp. olive oil. Bake for 20 – 25 minutes or until the squash is browned on at least one side. Remove from the oven and place in a strainer to drain off excess oil.
(The recipe may be made ahead to this point.)

Making the Risotto: In a sauté pan large enough to hold the finished risotto, sauté the pancetta until the fat renders and the pancetta begins to brown. Stir in the onions, lightly seasoned with salt and freshly ground black pepper, and sauté until the onions soften and begin to turn golden. Stir in the rice so it is completely coated with oil and cook, stirring, for 1 minute. Stir in the garlic and cook for one minute. Add the wine; bring to a medium boil and cook, stirring, until the wine is almost absorbed. Stir in the roasted squash.

Add 1/2 cup of stock and cook over moderate heat, stirring constantly, until the stock is almost absorbed. Keep adding stock, 1/2 cup at a time, and stirring until each addition of stock is almost absorbed. When the rice is half done, stir in the thyme.
(The recipe can be made ahead to this point, and finished right before serving. If you are going to make it ahead, after you take the rice off the burner, stir it until it cools down.)

Continue adding stock, 1/2 cup at a time, and stirring until the rice is tender, but still firm in the center (this takes 18 – 22 minutes). There may be stock left over. Stir in 1/2 cup of grated parmesan. Add stock until the risotto is the consistency you desire; it should be moist and creamy, not dry. Taste and add salt and freshly ground black pepper, as needed.

Serve immediately with the remaining grated parmesan on the side for sprinkling on top.

Scallops and Capers with Butternut Squash RisottoPan Fried Scallops and Capers with Butternut Squash Risotto (Χτένια και Κάπαρης με Κολοκύθα Ριζότο)
Serves 6

Don’t start cooking the scallops until the risotto is done.

1 recipe Roasted Butternut Squash Risotto (see above)
2 Tbsp. capers (preferably preserved in salt)
12 large scallops (about 1 pound)
Salt
Freshly ground black pepper
1 Tbsp. olive oil
3 Tbsp. fresh lemon juice

If using salt-preserved capers, rinse off the salt and let them soak in cold water for 10 – 15 minutes, and then rinse them again. If using brined capers, rinse off the brine. Dry the capers.

Wash the scallops, removing any tough muscle clinging to the scallops' sides. Dry and season them on both sides with salt and freshly ground black pepper.

Heat the olive oil over high heat in a frying pan large enough to hold all the scallops. When the oil is very hot, add the seasoned scallops, and cook for 2 – 3 minutes, depending on the scallops’ size. Turn the scallops over and cook for 2 – 3 minutes more. Except for turning them over the one time, do not move the scallops or fidget with them while they cook. The scallops will brown better if they aren’t repeatedly turned.

While the scallops are cooking, warm up 6 plates (this is easiest to do in a microwave; put the dry plates in the microwave for 1 minute on high). Place equal amounts of risotto on each of the warmed plates.

When the scallops are done, turn off the heat and top each serving of risotto with two scallops. Stir the lemon juice and capers into the still-warm pan, scraping up any browned bits on the pan’s bottom.

Top each scallop with a drizzle of pan juices and a sprinkling of capers. Serve immediately.

~~~~~~~~~~~~~~~~~~~~~~~~~

Τhis is my entry for Weekend Herb Blogging hosted this week by Kel from Green Olive Tree.

Thursday, February 7, 2008

Recipe: Greek Cabbage and Rice (Λαχανόρυζο)

This week Alaska held its presidential caucuses. My caucus site was a zoo; people were packed like sardines into the available space. In Anchorage, you rarely see crowds like this and I’ve never seen more Alaskans gathered for a political event.

Traffic was jammed up for miles; we parked at a shopping center across the way. With temperatures hovering around -10°F, the hatless walk between the shopping center and the caucus site was invigorating. The tops of my ears were complaining bitterly.

An amazing aspect of the event was the attendees’ joviality. Despite traffic jams, freezing weather, overflow crowds, delays, and the general disorganization that occurs when too many people are packed into too small a space, everyone seemed happy and excited to be present.

The opposing camps in my district laughed and joked together as we were sorted and counted. No matter how the primaries ultimately turn out, the engaged and enthusiastic crowds seemed a promising omen for the general election in November.

When I got home from politicking, I was past ready for dinner and wanted something to ward off the subzero weather. I happily dug into a bowl of leftover Greek Cabbage and Rice. I had originally served the Cabbage and Rice as an accompaniment to Grilled Pork Steak, a recipe in Tastes Like Home: Mediterranean Cooking in Alaska.

Cabbage and Rice is flavored with onions and tomato paste. These savory flavors, paired with sweet dried currants, turn Cabbage and Rice into a filling vegetarian main course. For meat eaters, it is equally tasty served as a side dish with pork or chicken.

Greek Cabbage and RiceGreek Cabbage and Rice (Λαχανόρυζο)
Serves 2 - 3 as a main course, or 4 - 6 as a side dish


1 small green cabbage (about 2 pounds)
3 cups diced onions, 1/2” dice
1/4 cup olive oil
Salt
Freshly ground black pepper
3 Tbsp. tomato paste
1 Tbsp. dried thyme, crushed
2 cups water, divided
1/2 cup rice
1/4 cup dried currants

Discard any tough or damaged outside cabbage leaves. Cut the cabbage into quarters; cut out and discard the core. Cut the cabbage quarters crosswise into 1/2” strips.

In a pan large enough to hold all the ingredients, sauté the onions, lightly seasoned with salt and freshly ground black pepper, in olive oil until they soften and start to turn golden. Stir in the cabbage, lightly season with salt and freshly ground black pepper, and cook until the cabbage wilts. Stir in the tomato paste and dried thyme and cook for 1 minute. Stir in 1 1/2 cups water, bring to a boil, cover, reduce the heat, and simmer for 20 minutes.

Stir in the rice, dried currants, and remaining 1/2 cup water. Cover and cook over low heat for 20 minutes or until the rice is done. Serve immediately.

~~~~~~~~~~~~~~~~~~~~~~~~~~~~~~~~
This is my entry for Weekend Herb Blogging, hosted this week by Ulrike from Kuchenlatein.

Tuesday, January 22, 2008

Recipes: Roasted Beet and Thyme Risotto & Halibut Confit with Lemons and Capers (Παντζάρια Ριζότο με Θυμάρι & Ψάρια Κονφί με Λεμόνι και Κάπαρης)

A couple days ago I read a recipe for beet gnocchi that caught my imagination. That night, I had yet another bout of insomnia. Instead of sleeping I thought about beets and gnocchi, and beets and pasta, and beets and rice.

Beets and rice: why not beet risotto? Once I thought of it, I could almost taste the earthy sweetness of beets in a creamy risotto, laced generously with Parmesan cheese and fresh thyme. I had to make it.


Luckily, there were beets in my last Full Circle Farm CSA box. I had previously roasted the beets to concentrate their flavor, which simplified the task of making beet risotto.

I paired the risotto with Pacific halibut poached in olive oil, known around my house as Halibut Confit. The recipe originally came from Gourmet Magazine; I remember Ruth Reichl writing it was one of her much-loved dishes. It is definitely my favorite way to cook halibut that’s been frozen.

Even when fresh, halibut can be dry; freezing makes this problem worse. However, when previously frozen halibut is cooked while submerged in olive oil, it stays moist - so long as you don't overcook it. This is because its juices can’t evaporate into the air, and stay in the fish under the protective coating of olive oil. Although the recipe uses a lot of olive oil, the fish doesn’t absorb the oil, and is not at all oily.

To avoid waste, I always strain the lemony oil and reuse it. Surprisingly, the oil doesn’t take up the flavor of the fish. The flavored oil makes wonderful salad dressing, and can be used in any dish that benefits from lemon.

Beet Risotto and Halibut ConfitTo serve, I spread the beet risotto on plates, and topped each serving with a chunk of tender halibut. I spooned capers and parsley over the fish, and garnished the plates with the oil-poached lemon slices that cooked with the fish.

The result was better than I imagined. Every bite contained flavor bursts that excited my taste buds. The capers were so good with the beet risotto I returned to the kitchen and spooned extra capers and parsley out of the olive oil.

The dishes pair amazingly well; each compliments and improves the other. However, the two don’t need to be served together to taste wonderful.

Roasted Beet and Thyme Risotto would be good served with a salad for a light supper, or as an accompaniment to chicken or turkey. Halibut Confit is an excellent way to cook halibut, no matter what side dishes are served with it. It’s been on my permanent recipe rotation since it first appeared in Gourmet, seven years ago.

Beet RisottoRoasted Beet and Thyme Risotto (Παντζάρια Ριζότο με Θυμάρι)
Serves 6
Fresh thyme is an integral part of this dish, and is worth seeking out.

7 – 8 cups vegetable or chicken stock
2 cups diced onion, 1/4” dice
1/4 cup olive oil
Salt
Freshly ground black pepper
1 1/2 cups Arborio rice
1/4 cup minced garlic
1 cup dry white wine
2 cups roasted and grated beets (2 medium beets) (see Note below)
1/4 cup minced fresh thyme
1 1/2 cups freshly grated Parmesan cheese

Bring the stock to a simmer, or heat it in the microwave until it is warm.

Sauté the onion, lightly seasoned with salt and freshly ground black pepper, until it softens and begins to turn golden. Stir in the rice so it is completely coated with oil and cook, stirring, for 1 minute. Add the wine, and stir until it is almost absorbed. Stir in the grated beets.

Add 1/2 cup of stock and cook over moderate heat, stirring constantly, until the stock is almost absorbed. Keep adding stock, 1/2 cup at a time, and stirring until each addition of stock is almost absorbed. When the rice is half done, stir in the thyme. (The recipe can be made ahead to this point, and finished right before serving. If you are going to make it ahead, after you take the rice off the burner, stir it until it cools down.)

Continue adding stock and stirring until the rice is tender, but still firm in the center (this takes 18 – 22 minutes). There may be stock left over. Stir in the cheese. Add stock until the risotto is the consistency you desire; it should be moist and creamy, not dry. Taste and add salt and freshly ground black pepper, as needed.

NOTE on Roasting Beets: Preheat the oven to 400°F. Wash the beets, cut off the greens leaving an inch of stem (don't cut into the beet itself), rub the beets with olive oil, and wrap tightly in a foil packet (or place in a tightly covered baking dish). Bake for 40 minutes to 1 1/2 hours, depending on the size of the beets and how fresh they are. The beets are done when they're tender if poked with a knife or skewer. Let the beets cool, and slip off their skins (I wear gloves when I do this to protect my hands from staining). (These can be made ahead and kept in the refrigerator for about a week.)

Halibut Confit with Lemons and Capers (Ψάρια Κονφί με Λεμόνι και Κάπαρης)
Serves 4 - 6

Adapted from March 2000 Gourmet magazine
Because it is cooked at such a low temperature, the olive oil can be reused. It picks up the flavor of lemons, but not of fish.

2 pounds halibut fillets, skinned
Salt
Freshly ground black pepper
1/2 cup capers, 1/4 c. roughly chopped and 1/4 c. left whole
1/2 cup minced parsley
2-3 lemons, sliced 1/8” thick
1 1/2 – 2 1/2 cups olive oil

Preheat oven to 250°F.

Wash and dry the halibut. Season it on both sides with salt and freshly ground black pepper. Using a glass baking dish just large enough to hold the halibut, line the bottom with lemon slices. Put the fish on top of the lemon slices. Mix the capers and parsley together, and spread evenly on top of the halibut. Cover the fish and herbs with a layer of lemon slices. Pour enough olive oil over to completely cover everything.

Bake for 45 to 70 minutes depending on the thickness of the halibut fillets. After 45 minutes, remove the pan of fish from the oven, carefully lift up a few lemons, and test for doneness. The fish will flake easily if it is done. If the fish isn’t done, return it to the oven. Halibut is dry when overcooked, so be careful not to leave it in the oven for too long. Remember the oil is hot and cools down slowly, so the fish will continue to cook if you leave it in the oil, even after the pan is taken out of the oven.

Serve the halibut with some of the capers and parsley in oil spooned over the top and slices of the lemon that cooked with the fish on the side.

~~~~~~~~~~~~~~~~~~~~~~~~~~~~
This is my entry for Weekend Herb Blogging, hosted this week by Anna from Anna's Cool Finds.

Tuesday, November 27, 2007

Onion Day Recipes: Winter Squash with Onions (Κολοκύθι Κόκκινο με Κρεμμύδι) and Leek Pilaf (Πρασόρυζο)

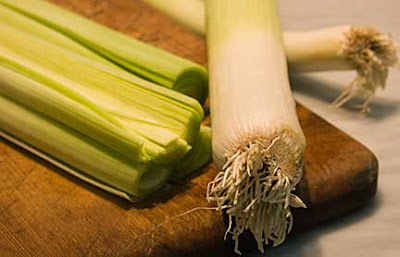
LeeksBetween Thanksgiving feasting, leftovers, and dinner out at a steakhouse, we’ve been eating entirely too much meat. Or at least more meat than normal.

I’m ready for vegetables. Thanks to my CSA box from Full Circle Farm, all I had to do for inspiration was open the refrigerator.

Delicata SquashGiant leeks caught my eye first: four leeks, weighing a little over a pound each. I also noticed Delicata squash, a mild-tasting, thin-skinned heirloom variety that had been in the refrigerator a couple weeks. The skin was shiny and the flesh was firm, but it was time to cook the Delicata.

The traditional onion market (Zibelemärit) opens November 26 in Berne, Switzerland. Zorra of Kochtopf blog decreed the 26th to be Onion Day, and challenged cooks around the world to use onions in honor of the market. I decided to take up the challenge and showcase Delicata squash, onions, and leeks, a member of the onion family.

Kimolos, a tiny Greek island in the Aegean Sea, is part of the Cyclades island group. In 2001, less than 800 people lived on its 20 square miles. That year, Filena Venardou, who came to Kimolos as a teacher, published a book of traditional recipes from Kimolos: Η Κουζίνα της Κιμώλου (The Cuisine of Kimolos).

Winter Squash with Onions (Κολοκύθι Κόκκινο με Κρεμμύδι) is one of the traditional recipes Venardou collected. She says winter squash is much tastier than summer squash, and the Kimolos method of cooking it in hot oil gives the squash a crispy crust and seals in its juices.

I adapted Venardou’s recipe using Delicata squash and finished the fried squash and onions with a dusting of the dried wild thyme we collected last summer in Greece. The resulting dish, which must be served hot, was robust and filling. It would be a good side dish for any kind of meat or poultry, although Venardou suggests serving it as an appetizer and we enjoyed it as an Onion Day main course.

Chopping LeeksTo round out the meal, I made Leek Pilaf (Πρασόρυζο), an easy and flavorful Greek dish enjoyed during the many fasting periods that fill the Greek Orthodox calendar. The light, herby flavors of dill and mint contrasted nicely with the rich flavors of fried squash and onions.

Since it is difficult for me to cook without using onions or garlic, it is fitting that Onion Day closes my first month of serious food blogging. It is also the day on which the thousandth visitor stopped by my blog. Happy Onion Day!

Squash&Onions and PrasorizoWinter Squash with Onions (Κολοκύθι Κόκκινο με Κρεμμύδι)
Serves 4 - 6
Delicata squash is easily peeled with a sturdy vegetable peeler. After peeling the squash, cut it in half, use a spoon to scrape out the stringy centers and seeds, and dice the flesh.

3 cups diced Delicata or other winter squash, 3/4” dice (approximately one squash)
4 cups diced yellow onions, 3/4” dice
3/4 cup flour
Salt
Freshly ground black pepper
1 tsp. dried thyme, crushed
Oil for frying

Put the diced squash and onions in a bag with the flour, salt, and freshly ground pepper. Shake the bag around so the flour evenly coats the vegetables. Dump the floured vegetables into a strainer and shake the strainer to remove the excess flour.

Heat 1/2” of olive oil in a large frying pan until it is very hot, but not smoking. Add 1/3 of the floured squash and onions to the hot oil, and fry until the undersides are browned. Turn the vegetables over, and brown the other side. Using a slotted spoon, remove the vegetables from the oil and place on paper towels to drain. Repeat with the remaining vegetables, being careful not to crowd them in the frying pan, or they will steam rather than brown.

Sprinkle the crushed dried thyme over the browned vegetables, taste and add salt or freshly ground black pepper, as needed.

Leek Pilaf (Πρασόρυζο)
Serves 6
Leek pilaf is good on its own, or as a tasty accompaniment to any kind of fish, seafood, or poultry. Before dicing leeks, be sure to slit them lengthwise and clean thoroughly under running water to remove the dirt and grime that often is trapped between the leek’s layers.

6 cups diced leeks, white and pale green parts only, 1/2” dice (2 – 3 leeks)
1/4 cup olive oil
Salt
Freshly ground black pepper
1 cup rice
1 Tbsp. tomato paste
2 cups water
1/3 cup minced fresh dill
1/3 cup minced fresh mint

Sauté the leeks, lightly seasoned with salt and freshly ground black pepper, in olive oil until they soften and start to turn golden around the edges. Add the rice and sauté for one minute, stirring constantly to evenly distribute the leeks and oil. Add the tomato paste, and thoroughly mix it into the rice. Stir in the water, dill, and mint, bring to a boil, cover, and turn the heat down as low as possible. Cook for 20 minutes, or until the rice absorbs all the water. Turn off the heat, and let the pilaf sit covered for 15 minutes before serving. Taste and add salt or freshly ground black pepper, as needed.


Thursday, November 22, 2007

Greek Cookbooks: A Festival of Recipes (Dayton, OH) with Recipes for Chicken with Toursi and Cinnamon-Scented Rice Pilaf / Κοτόπουλο με Τουρσί και Πιλάφι)

On holidays and other special occasions, most of us want the familiar foods of our childhoods. So it was with the Greeks who abruptly left Saranda Ecclessias in the 1920s. On Thanksgiving, the most American of holidays, they combined turkey with Toursi and Cinnamon-Scented Rice Pilaf, a dish redolent with the smells and flavors of their former homes in Eastern Thrace.

Evanthia Valassiades described the dish in A Festival of Recipes: A Collection of Recipes from the Annunciation Greek Orthodox Church in Dayton, Ohio: "This combination may sound unusual but it is really wonderful. Families from Saranta Ecclessias enjoy this meal at Thanksgiving. The stuffing and sauerkraut portions would be doubled for turkey. We don’t stuff the turkey, but bake the rice accompaniment separately.”


For a rich and hearty winter meal, holiday or not, here is my version of Evanthia Valassiades’ recipe. Cinnamon-Scented Pilaf served with sweetened sauerkraut and flavorful chicken is an exotic, and compelling, flavor combination. The sugar renders the sauerkraut sweet rather than sour. I modified Evanthia’s recipe by significantly reducing the amount of sugar (the original recipe called for one cup), and by adding onion and thyme to round out the flavors.

Chicken and Toursi (Κοτόπουλο με Τουρσί)
Serves 6
The recipe is adapted from A Festival of Recipes: A Collection of Recipes from the Annunciation Greek Orthodox Church, Dayton, Ohio, sponsored by G.A.P.A. Women, 2001


Mediterranean Cooking in Alaska has moved as of March 2011. To read this post please go to

http://www.laurieconstantino.com/traditional-east-thracian-fare/


Please click on over and visit my new site. Thank you!