Showing posts with label pie. Show all posts

Friday, September 17, 2010

Tomato Tart (Τάρτα ντομάτας)

Tomato Tart captures the essence of vine-ripened tomatoes and is a lovely way to highlight their tangy sweet flavor. Mustard goes surprisingly well with garden tomatoes and fresh herbs, and a buttery crisp crust is the perfect platform to show them off. Everyone in the family agrees on these points.

There is vigorous debate, however, on how long to cook the tomatoes for the ideal tart. I like them best when they’re just warmed through, leaving the tomatoes hot, juicy, and full of fresh tomato flavor. My husband prefers them oven-roasted to concentrate their glorious summer sweetness.

Since we both like both versions, I usually make whatever I have time for. With lots of time, I make the oven-roasted tomato version; with less time, the slice and bake version. No matter the version, since tomatoes are front and center, use the best quality tomatoes you can find. During the summer tomato harvest, when juicy red tomatoes are easy to find, my thoughts always turn to Tomato Tart.

Flavor-rich Greek tomatoes inspired Tomato Tart. I first started making it in 1987 when we lived in Greece and were blessed with a garden glut of the best tomatoes I'd ever tasted. When we returned to Alaska, and were stuck with insipid supermarket tomatoes, this dish was out of reach. In recent years, however, tomatoes bursting with summer flavor have been showing up at Alaska farmers' markets. When they're available, Tomato Tart is on the menu.

In addition to the fresh/oven-roasted tomato variations, I’ve made Tomato Tart with regular Dijon mustard and whole-grain Dijon mustard. I’ve made it with the herbs called for in this recipe, as well as with fresh sage, fresh thyme, dried thyme, and various combinations of all or some of the herbs. I’ve made it with every kind of cheese imaginable. The constants are tomatoes, mustard, cheese, and herbs; the specifics depend solely on what’s in the refrigerator.

There’s a reason I’ve been making Tomato Tart for over 20 years. It’s delicious.

Tomato Tart with Buttery Crisp Crust (Fresh Tomato Version)
Serves 4 – 6 (One 10” tart)
Like pizza, Tomato Tart is delicious served cold. Mix the dough for the crust first; while it’s resting in the refrigerator, prepare remaining ingredients. Although it isn’t absolutely necessary to peel the tomatoes, for the fresh tomato version the finished dish has better texture if peeled tomatoes are used. To peel them, cut a shallow “X” on the bottom of the tomato. Drop the tomatoes in boiling water for 20 seconds. Remove the tomatoes and drop them in cold water. Drain and slip off the peels.

Crust:
1 1/2 cups all-purpose flour
1/4 tsp. salt
9 Tbsp. butter
1 egg yolk
2 - 3 Tbsp. ice water

Herb-Mustard Paste:
2 tsp. minced fresh rosemary
1 Tbsp. minced fresh basil
1 tsp. crushed dried oregano
2 cloves chopped fresh garlic
1-2 Tbsp. olive oil
Salt
Freshly ground black pepper
2 Tbsp. Dijon mustard

Filling:
Herb-Mustard Paste
1 1/2 cups coarsely grated graviera, asiago, Edam, or another good melting cheese
6-8 medium fresh ripe tomatoes (or 3 large), sliced 3/4” thick
Salt
Freshly ground black pepper
1/4 tsp. crushed dried oregano
Drizzle olive oil

Preheat oven to 425°F.

Make Crust: Whir flour and salt together in food processor. Cut butter into chunks, add to food processor, and pulse until butter is mostly combined with flour, but a few pea-sized pieces remain. (You can also cut butter into flour with two knives or a pastry blender.) Add egg yolk and 2 Tbsp. ice water and pulse to combine. If dough is too dry to hold together when pinched, add remaining 1 Tbsp. ice water and pulse. Dump dough out onto a piece of wax paper or plastic wrap and form into a solid disk. Wrap and refrigerate for 30-60 minutes.

Make Herb-Mustard Paste: Pound all ingredients for Paste together in mortar and pestle or combine well in a blender. (Start with 1 Tbsp. olive oil; add more as needed for smooth paste.)

Bake Crust: Roll out dough into 13 - 14” diameter circle. Center in 10” tart pan, pressing dough towards center and into edges. Trim overhanging dough so that it is size of the tart pan’s sides; fold over the overhanging dough to form a double-thickness side crust. Prick bottom of dough all over with a fork. Cut a piece of aluminum foil double the size of the tart pan, fold foil in half, and press it firmly into the dough (the foil prevents the dough from bubbling up while baking). Bake in preheated oven for 20 minutes. Remove foil and bake for 5 more minutes. Remove from oven.


Assemble Tart: Turn oven down to 400°F. Spread Herb-Mustard Paste over hot, prebaked crust. Evenly distribute grated cheese over mustard paste and top with sliced fresh tomatoes. Where necessary, cut tomato slices into pieces to fill in any gaps in tomato coverage. Lightly drizzle with olive oil, and sprinkle with salt, freshly ground black pepper, and crushed dried oregano. Bake for 20 minutes, until cheese is melted and tomatoes are just warmed through. Serve immediately.

Oven-Roasted Tomato Variation: Preheat oven to 400°F. Increase quantity of tomatoes by 4 medium or 2 large. Don’t peel tomatoes. Line 2 rimmed baking sheets with foil. Put tomato slices on baking sheets in single layer. Drizzle with olive oil and season with salt and freshly ground black pepper. Bake until tomatoes have dried slightly and the oil is browning on the foil around the tomatoes, but are still soft in the middle, about 45-60 minutes, depending on the tomatoes’ size. Remove from oven and cool on racks. Continue with recipe, as above.

Monday, August 18, 2008

Greek Wild Thyme Honey with Recipe for Cinnamon-Honey Tart (Melopita – Μελόπιτα)

Thyme Covered Hillsides at Tigani BaySandy beaches and rocky promontories alternate along the island’s irregular coastline. Mounds of wild thyme cover the hills sloping down to the sea, and scent the sea air with their heady aroma.

Harvesting Wild Thyme

Harvesting Wild Thyme

By the start of summer, the wild thyme is in bloom. Yiannis, our beekeeper friend, has already moved his hives to fields near the shore and the abundantly blooming thyme. The bees spend their summer making thyme-flavored honey that Yiannis harvests and sells to locals and tourists alike.

I fell in love with thyme honey years ago at a galakatopoleio, a type of Greek store that sells milk, yogurt, and desserts like rice pudding (rizogalo) and custard pies (galaktoboureko). We’d stopped for a late breakfast and I ordered yogurt.

Used to American yogurt, which has a much thinner consistency than its Greek counterpart, I was surprised to see the galaktopoleio’s proprietor slice off a thick slab from a long yogurt loaf. He served the yogurt slice with liberal drizzlings of thyme honey. Despite its simplicity, the combination was utter perfection. Thyme honey, unlike the bland clover honey I grew up with, has a robust flavor.

When we return from Greece each year, we always have a supply of wild thyme honey in our baggage. However, in Alaska, Greek yogurt is difficult, and usually impossible, to find. When available, it’s too expensive for my budget.

Greek Yogurt and Honey
If I crave Greek yogurt and honey in Alaska, I buy plain, whole-milk yogurt (Pavel’s Original Russian Yogurt, available at Natural Pantry in Anchorage, is my favorite brand), and strain it for at least an hour through a paper towel set in a colander. Strained American yogurt mimics the texture of the yogurt we buy in Greece. I like straining yogurt right when I bring it home from the market; that way, it’s ready to eat at my convenience. All I need do is drizzle a scoop of strained yogurt with Yiannis’ honey, and my favorite breakfast is ready to serve.

Honey isn’t a newcomer to the Greek table. It’s been an important ingredient in Greek cooking throughout recorded history and continuing to the present day. In
The Deipnosophistae of Athenaeus, which includes excerpts from the earliest Greek writings about food and cooking, honey appears regularly. Among other uses, the ancient Greeks combined honey with wine, added it to savory sauces, and drizzled it over all kinds of sweets.

Athenaeus (circa 200 AD) catalogs “cheesecakes of every sort and every name,” including many that contain honey. In a recent post, Mariana of History of Greek Food wrote about her version of one cheesecake described by Athenaeus.

Cinnamon-Honey Tart (Melopita), a dessert using many of the same ingredients as the cheesecakes documented by Athenaeus, is still popular in Greece today. There’s also a Greek honey cake called Melopita; for clarity, I’ve translated the cheesecake-style Melopita as Cinnamon-Honey Tart.

On some Greek islands, and notably on
Sifnos, Cinnamon-Honey Tart is traditionally made for Easter feasts. It’s worthy of a place at any special occasion table.

Cinnamon Honey Tart(Melopita)Cinnamon-Honey Tart (Melopita – Μελόπιτα)
Serves 10 - 12
The texture of Cinnamon-Honey Tart filling is similar to pumpkin pie filling, and is better when made with whole-milk ricotta. In Greece, fresh, unsalted myzithra is used instead of ricotta, but this product isn’t available in Alaska. The myzithra sold in most US supermarkets is dried, salted, and not suitable for a sweet tart filling.

I like making Cinnamon-Honey Tart in an 11” tart pan with a removable bottom to increase the crust to filling ratio. Use a 9” springform cake pan if you prefer cheesecake to tarts (more filling, less crust), a 9”x13” pan if you want to serve the dessert as bar cookies (great for potlucks), or pastry-lined cupcake tins or tartlet pans to make individual-size servings. In developing the recipe, I baked various versions of the filling as custards (without the crust) in a water bath at 325°F for 30 minutes. The custards are tasty, dead simple to make, and may be made ahead (the flavor develops over time).

Crust:
1 1/2 cups all-purpose flour
1/2 cup powdered sugar
1 Tbsp. finely grated lemon peel (peel from 1 lemon)
1/8 tsp. salt
1/2 cup cold butter (1 stick) cut in chunks
2 Tbsp. lemon juice


Filling:
15 – 16 ounces ricotta, preferably whole milk, or fresh, unsalted myzithra
2/3 cup thyme honey or other full-flavored honey
3 large eggs
1 Tbsp. cinnamon, preferably true Ceylon cinnamon (see About Cinnamon below)
1/8 tsp. salt

Make and Bake the Crust: Put the flour, sugar, lemon peel, and salt in the bowl of a food processor and pulse to mix the ingredients. Add butter chunks to the processor bowl, and process until the butter and flour are evenly mixed. Sprinkle in the lemon juice and process until the dough just holds together. If the dough is too dry, add 1 – 2 Tbsp. ice-cold water.

Dump the dough onto a sheet of plastic wrap, and knead lightly to form a flat disk. Wrap and let rest for at least 30 minutes before using.

Preheat the oven to 450°F.

Roll out the dough into a round with a diameter 3” wider than the tart pan (or enough to cover the bottom and 1” of a 9” springform pan’s sides). Use the rolling pin to lift the dough and place it in the pan; press the dough firmly into pan’s sides and bottom. Trim the dough’s edges so there is just enough to fold under and cover the sides of the tart pan with a double layer of dough (if using a springform pan, trim the dough so it goes 1” up the sides. Prick tiny holes all over the crust with a fork.

Press a double layer of aluminum foil directly onto the dough-covered bottom and sides. Bake the crust for 15 minutes. Remove the foil and bake for 5 minutes or until the crust is set and lightly golden. Remove from oven and place on a cooling rack. Reduce the oven heat to 375°F.

Make and Bake the Filling: Mix all the ingredients together to form a smooth batter. Pour the batter into the pre-baked pie crust. Bake for 20 – 25 minutes, or until the sides of the tart are set and the middle is still a little jiggly; residual heat will finish cooking the filling (because the springform pan is deeper, the filling in it will take a little longer to cook). Overcooking Cinnamon-Honey tart causes the filling to crack.

About Cinnamon:

I tested the filling recipe multiple times, using a different kind of cinnamon each time (Ceylon “True” Cinnamon, Korintje (Indonesian) Cassia Cinnamon, China Tung Hing Cassia Cinnamon, and Vietnamese “Saigon” Cassia Cinnamon), as well as a mixture of “True” Cinnamon and allspice. My favorite was the version made with “True” Cinnamon; the citrus notes in this variety blended perfectly with the lemon-flavored crust. Although Vietnamese “Saigon” Cassia Cinnamon is the cinnamon I prefer in most dishes, its flavor was too overpowering for this dish. I order my cinnamon online from The Spice House, Penzeys, or World Spice Merchants. Supermarket cinnamon is just fine for this recipe.

Wednesday, July 23, 2008

Recipe for Red Pepper and Tapenade Tart (Πιπερόπιτα με Πάστα Ελιάς)

Workmen have been at the house for a week replacing our ancient furnaces with a new boiler. For the last five hours they’ve been struggling to run long lengths of pipe through a narrow opening in the basement ceiling's sheetrock. The sound made by repeatedly pounding and banging on metal ductwork is impressively loud.

It’s odd to have so much racket during the day; I’m used to a silent house. Mind you, I’m not complaining and am glad we’re having the work done. It’s just interesting how sustained noise interferes with my ability to hold a coherent thought.

When the men left for lunch, blissful silence briefly returned. I took the opportunity to eat in peace, and enjoyed the last of the Red Pepper and Tapenade Tart for lunch. Three days in the refrigerator and it still tasted terrific; this recipe’s a keeper.

Red Pepper and Tapenade TartRed Pepper and Tapenade Tart (Πιπερόπιτα με Πάστα Ελιάς)
Serves 4-6 (one 9” tart)


Mediterranean Cooking in Alaska has moved as of March 2011. To read this post please go to


http://www.laurieconstantino.com/red-pepper-and-tapenade-tart/


Please click on over and visit my new site. Thank you!


Friday, April 4, 2008

Recipe for Potato Pie with Cabbage and Mustard (Πατατόπιτα με Λάχανο και Μουστάρδα)

Whether it’s potatoes and cabbage in the winter, or eggplant and tomatoes in the summer, I love layer upon layer of perfectly seasoned vegetables. I recently dug into my Full Circle Farm CSA box to make one of those wonderful dishes: Potato Pie with Cabbage and Mustard.

Over the years, I’ve separately served each individual layer of the Potato Pie to accompany meat, poultry, or seafood. Oven roasted potatoes, caramelized onions with cumin, and sautéed cabbage with thyme are all are old stand-bys that taste great.

The old stand-bys combined in a single dish make company-ready fare that is better than the sum of its parts. The vegetable juices run together and mingle, forming unexpected and delicious flavor combinations.

Potato Pie with Cabbage and Mustard is warm and filling, and makes a satisfying meal when paired with a crisp green salad, olives, and bread. It is also a charming partner for sausages or roast meat.

Potato Pie with Cabbage and MustardPotato Pie with Cabbage and Mustard (Πατατόπιτα με Λάχανο και Μουστάρδα)
Serves 4 – 6

Inspired by A Passion for Vegetables by Paul Gayler (Lyons Press 2000)
I’ve suggested using a 9” springform pan for this recipe because it makes unmolding the pie easier. However, I’ve made this in a well-oiled large soufflé dish and the pie slid right out, so a springform isn’t absolutely necessary. The vegetables are cooked separately and individually seasoned; keep in mind the finished dish and be careful not to over-salt any single vegetable. For a more decorative presentation, place pitted, dried black olives between the potato slices on the bottom layer. Turnips may be substituted for the potatoes.

1 pound Yukon gold or red potatoes
1/4 cup olive oil, divided
Salt
Freshly ground black pepper
6 cups thinly sliced yellow onions, cut in quarter moons
4 tsp. minced fresh garlic
1 tsp. freshly ground cumin seeds
1 Tbsp. wholegrain Dijon or
Creole mustard
4 cups thinly sliced green cabbage
4 tsp. minced thyme
1 cup grated
graviera or cheddar cheese

Preheat the oven to 450°F.

Wash, peel, and cut the potatoes into 1/4” slices. On a rimmed baking sheet, toss the potatoes with 1 Tbsp. olive oil and season with salt and freshly ground black pepper. Roast for 10 – 15 minutes or until the potatoes soften and start to turn golden.

Sauté the onions, lightly seasoned with salt and freshly ground black pepper, in 2 Tbsp. olive oil until the onions soften and start to brown. Stir in the garlic and cumin and cook for 2 minutes. Using a slotted spoon, remove the onions to a bowl. Stir in the mustard when the onions have partially cooled.

In the pan used for the onions, add the remaining 1 Tbsp. olive oil. Sauté the cabbage, lightly seasoned with salt and freshly ground black pepper, until the cabbage wilts completely. Remove from the heat and stir in the minced thyme.

Thoroughly oil a 9” springform pan; tightly cover the outside of the pan with foil to prevent oil from leaking out into the oven.

Layer the springform pan's bottom with 1/3 of the potatoes, cover the potatoes with 1/2 the cabbage, cover the cabbage with 1/2 the onions, and cover the onions with 1/2 the cheese. Repeat the layers, and finish with a layer of potatoes. (The recipe can be made ahead to this point and refrigerated; bring to room temperature before baking.)

Bake for 30 – 35 minutes, or until the top of the pie is golden and the juices bubbling. Let the pie rest in the pan for 5 – 10 minutes. Invert and unmold on a serving plate; if any potato slices stick to the bottom of the pan, carefully move them back to their place on top of the pie. Carefully cut into wedges and serve.

~~~~~~~~~~~~~~~~~~~~~~~
More Cabbage Recipes:
Greek Cabbage and Rice (Λαχανόρυζο) (My recipe for rice with cabbage, onion, thyme, tomato, and currants)
Red Cabbage with Mushrooms and Blueberries (Chou Rouge Forestière) (My review of Robert Reynolds and Josephine Araldo’s From a Breton Garden, including Araldo’s unique red cabbage recipe.)
Cabbage Rolls (λαχανοντολμαδάκια) (Peter Minakis’ recipe for Greek cabbage rolls stuffed with rice and meat.)
Mama’s Health Soup (Zoe’s Greek mother’s recipe for cabbage soup, written up by Lulu as a service to humanity).

Monday, March 31, 2008

Filo Tips and Recipe for Greek Leek Pie – Prasopita (Πρασόπιτα)

Friday night’s Prasopita (prah-SO-pee-tah, Greek leek pie) tasted great, but producing it was not pretty. I learned, yet again, to embrace kitchen disasters for their educational benefits.

It was one of those evenings where everything went wrong. From dodging falling knives to cleaning up egg-splattered floorboards, the frustrations accumulated. It was typical that I opened the filo and found the sheets of pastry inseparably stuck together. All but six were unusable and went straight into the garbage.

I quickly mixed up dough for an olive oil crust, and switched to making tri-cornered hand pies. Unfortunately, I didn’t make nearly enough pastry dough. It started running out while I still had a bowlful of filling. Too impatient to make more pastry, I rolled up the remaining dough and made an open-face, free-form tart.


Prasopita and Leek Tart
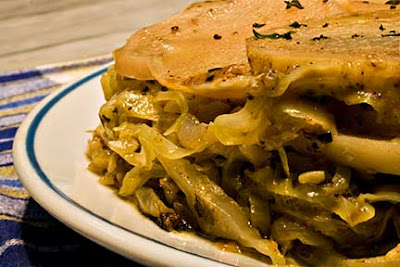
When I was done, I had three filo-wrapped traditional Prasopites, six tri-cornered leek hand pies, and one free-form leek tart. Although I hadn’t planned it, this gave us the opportunity to directly compare filo-wrapped pies with those having a simple olive oil crust. The comparison was enlightening.

As between the filo and hand pies, it wasn’t a close call; the filo pies were far superior. Crisp filo pastry was the perfect counterpoint to the savory leek filling. Although the hand pie crust was flaky, the filling to crust ratio was too low and the crust’s flavor too dominant.

The open-face tart was another story. In this version, the single layer of olive oil crust nicely balanced the flavorful leek filling. Even better, the crust held its integrity and remained crispy even after it had been in the refrigerator for two days. This is not true of filo-wrapped pies; they rapidly lose their crispness after even a short time in the refrigerator.

So what will I do in the future? For a party, or any situation where pites are likely to be eaten quickly, I’ll stick with traditional filo. Nothing beats buttery-rich filo wrapped around leek and herb filling. I’ll also use filo when I’m not planning to bake all the pies at one time – unbaked filo-wrapped pies freeze well and can be popped in the oven direct from the freezer.

On days when I want Greek pie, but am in a hurry and don’t want to mess with filo, or when I want to limit the amount of fat I ingest, I’ll make an open-face tart. It’s an easy, extremely flavorful, savory treat. I’d happily serve it for any occasion, special or not.

Filo Tips – Working with Filo is Easy
First, pronunciation; in English, there are multiple ways to spell filo (fillo, fyllo, phyllo) because Greek to English isn’t transliterated consistently. But no matter the spelling, the pastry is pronounced FEE-low.

As with the ruined mess I faced on Friday, stuck together filo sheets are the bane of a cook’s existence. It is generally caused by improperly storing filo, by thawing and refreezing filo, or by leaving filo for too long at room temperature. To avoid this problem, buy from stores that sell a lot of filo. When you are ready to use it, thaw filo overnight in the refrigerator, bring it to room temperature before you start to work with it, and use the thawed filo within a week.

Finish making the filling, including cooling it, before you open the package of filo.

Filo is a lot more forgiving than it might seem. A few rips and tears don’t make any difference at all, and usually disappear in the many layers of filo or when a pie is shaped or rolled.

Dried out filo breaks apart and makes working with it difficult to impossible. Once filo is removed from the package, you either must work very quickly or must cover the filo sheets with a slightly damp cloth. The first few times you work with filo, the damp cloth is a must. As you gain confidence, you’ll be able to work quickly enough that the damp cloth is unnecessary.

If you want to make your own filo, Peter Minakis explains how
here.

If you want to see how filo is traditionally made in Greece, Maria Verivaki has a video and explanation here.

PrasopitaRecipe for Greek Leek Pie – Prasopita (Πρασόπιτα)
Makes 10 large or 20 small filo-wrapped pastries or 1 10” free-form tart
For vegans or those who are fasting, leave out the feta and eggs, and brush the filo sheets only with olive oil. Freeze extra Prasopites and bake frozen, adding 5 – 10 minutes to the baking time.

Leek Filling:
3 cups diced leeks, white and light green parts only, 1/2” dice (3 medium leeks)
1 1/2 cups diced yellow onions, 1/2” dice
3 Tbsp. olive oil
Salt
Freshly ground black pepper
1 1/2 cups sliced green onions (1 bunch)
1 Tbsp. minced garlic
1/2 cup minced fresh dill
1/2 cup minced fresh parsley
1 cup crumbled feta
2 eggs

Filo:
1 pound box of filo (18” x 14”)
1/2 cup (1 stick) butter
1/4 cup olive oil

Make the Filling: Sauté the leeks and onions, lightly seasoned with salt and freshly ground black pepper, in olive oil until the onions soften and start to turn golden. Put in a bowl and mix with all the remaining filling ingredients, except the eggs. Taste and add salt or freshly ground black pepper, as needed. Stir in the eggs.

Preheat the oven to 400°F.

Clarify the butter (see NOTE below for why and how to clarify butter). Mix the clarified butter and olive oil, and brush a rimmed baking sheet with the mixture.

Rolling Filo for PitaAlternative 1 - Shaping Large Prasopita: Remove the filo from the box, unroll it, and cover any you are not actively using with plastic wrap or a slightly damp cloth. Lay one 18” x 14” sheet of filo out on the counter and brush it lightly with butter-oil. Cover with another sheet of filo and brush it lightly with butter-oil. Spread 1/2 cup of filling along one of filo’s short edges. Fold in the sides and roll up the filo. Place roll on the prepared baking sheet seam side down and brush lightly with butter-oil. Repeat until all the pastries are rolled.

Alternative 2 – Shaping Small Prasopita: Follow the directions for shaping large Prasopita, but use 9” x 14” filo sheets or cut 18” x 14” filo sheets in half and use 1/4 cup filling.

Open-Face Leek TartAlternative 3 – Make Open-Face, Free-Form Tart: In a food processor mix 2 cups flour, 6 Tbsp. olive oil, and 1/2 tsp. salt. Mix in as much water as necessary (4 – 6 Tbsp.) to make dough that sticks together. Form into a ball and let rest at room temperature for 30 minutes. Roll out the dough into a 12” circle, place on a baking sheet, and spread the filling out on the dough, leaving a border of 1 1/2”. Sprinkle a little freshly grated parmesan cheese over the filling. Fold up the edges, sealing with water as necessary for folds in the dough to stick together.

Place the Prasopites (or tart) in the oven and bake for 30 – 40 minutes, or until the filo is brown and crispy (or the tart pastry is set and lightly browned).

Serve immediately.

NOTE: Clarified butter is butter with the milk solids removed. To clarify butter, melt it in a saucepan or microwave and skim off and discard the white foam that rises to the top. Pour the clear yellow butter into a bowl, being careful to keep the milky liquid that sinks to the bottom of the pan out of the clarified butter. Discard the milky liquid. If you don’t clarify butter used for separating layers of filo, the pastry won’t cook correctly, and will be soggy rather than crisp.

UPDATE: Maria Verivaki recently made this Prasopita, and shaped it into one large sprial pie (called Strifti - Στριφτή - in Greek). Here's Maria's post about Prasopita Strifti.
~~~~~~~~~~~~~~~~~~~~~~~~
More Leek Recipes:
Beet, Fennel, and Leek Salad with Lemon-Ginger Dressing (Παντζάρια, Μάραθο και Πράσο Σαλάτα με Πιπερόριζα Σάλτσα) (I make a winter salad and spice it up with ginger salad dressing)
Leek Pilaf (Πρασόρυζο) (I make Greek leeks with rice.)
Leek Soufflé
Leek and Tomato Crumble
The Easiest Grilled Leeks Ever

~~~~~~~~~~~~~~~~~~~~~~~~
This is my entry for
Weekend Herb Blogging, hosted this week by its creator Kalyn of Kalyn’s Kitchen.

Friday, March 14, 2008

Recipes: Santorini Fava Pie with Tomatoes, Capers, and Eggs & Fava Pantremeni (Σαντορίνη Φάβα Πίτες με Ντομάτες, Κάπαρης και Αυγά & Φάβα Παντρεμένη)

Let’s clear up the linguistic confusion first.

In English, fava refers to Vicia faba, large beans in long green pods that are also known as broad beans or horse beans in English (in Greek, they're called koukia). This article is not about Vicia faba.

Today I’m writing about
Greek fava, Lathyrus clymenum L., a variety of yellow split pea that has been grown on the Aegean island of Santorini for at least 3500 years. In Greek, the word “fava” can refer to either the dried split peas or the appetizer spread that is made from them.

Although fava is grown across Greece, Santorini fava are slightly sweeter than those grown elsewhere and are widely considered to have superior flavor. Santorini is also famous for its
“waterless” tomatoes and its capers; Santorini Fava Pie uses all three ingredients.

The crust for the pie is made from puréed fava, and is a good way to use up leftovers. To make the crust, cooked fava is mixed with semolina flour, pressed into a tart pan, and baked until it’s slightly crispy. Baked fava develops a wonderfully nutty flavor that enhances the filling ingredients. Because it doesn’t need to be rolled out, fava crust is simple to make.

Puréed fava is also the base of Fava Pantremeni, or “Married” Fava. The name refers to the wedding of fava and capers, two very compatible ingredients, in a single dish. The below recipe for Fava Pantremeni is based on a dish we ate last summer at
Logia tis Ploris, an Athenian fish taverna.

Although it's difficult to find fava outside of Greece, yellow split peas are a fine substitute.

Santorini Fava Pie with Tomatoes, Capers, and EggsSantorini Fava Pies with Tomatoes, Capers, and Eggs (Σαντορίνη Φάβα Πίτες με Ντομάτες, Κάπαρης και Αυγά)
Serves 6 as an appetizer
Adapted from
Simply Plated 2

Crust:
1 1/2 cups fava purée (see recipe below)
6 – 10 Tbsp. semolina flour

Tomato Filling:
2 Tbsp. olive oil
1 1/2 cups thinly sliced onions, cut in quarter moon slices
Salt
Freshly ground black pepper
1/2 tsp. Aleppo pepper (optional)
1 14.5-ounce can diced tomatoes, or 1 1/2 cups fresh, with juices
1/4 cup water
1 bay leaf
2 tsp. oregano
3 Tbsp. minced sun-dried tomatoes in oil or 1 1/2 Tbsp. tomato paste
2 Tbsp. capers, preferably salted, rinsed and soaked

6 eggs

Make the Crust: Taste the fava purée and add salt, pepper, or oregano, as needed; the crust should be well-seasoned or the pie will be bland. Stir in 6 Tbsp. of semolina flour, and additional flour as needed to make dough that is the texture of thick mashed potatoes; the amount of flour depends on the moisture level of the fava purée. Taste again to make sure the seasoning is correct. (This can be made ahead.)

Make the Filling: Sauté the onions, lightly seasoned with salt and freshly ground black pepper, in the olive oil until the onions soften and start to turn golden. Stir in the Aleppo pepper and cook for 1 minute. Stir in the tomatoes, water, bay leaves, and oregano. Bring to a boil, turn down the heat, and simmer for 45 – 60 minutes, or until the sauce is thick and most of the liquid has evaporated. Turn off the heat and stir in the sun-dried tomatoes and capers. Taste and add salt or freshly ground black pepper, as needed.
(This can be made ahead.)

Make the Pie: Preheat the oven to 425°F.

Light grease 6 small tart pans (I prefer 4.5” tart pans with removable bottoms). Divide the fava dough between the pans. Press out the dough to completely cover the bottom and sides of the pan. Bake for 10 – 15 minutes, or until the crusts are lightly browned and crispy around the edges. Turn down the oven to 350°F.

Fill each baked crust with tomato filling, making an indentation in the filling that is deep enough to hold an egg. Crack an egg into a small bowl and carefully pour it into the indentation. Repeat until all the eggs are used. Sprinkle with salt and freshly ground black pepper.

Bake for 12 – 15 minutes, or just until the eggs are set; the yolks should be runny and the whites soft. Remove pies from the tart pans and serve immediately.

Fava PantremeniFava Pantremeni (Φάβα Παντρεμένη)
If you don’t have access to Greek fava, yellow split peas are the best substitute I’ve found.

Fava Purée:
1/2 cup Santorini fava or yellow split peas
6 Tbsp. olive oil
1 cup diced onion, 1/4” dice
Salt
Freshly ground black pepper
3 cups water
1 tsp. oregano
1 Tbsp. lemon juice

Pantremeni Ingredients:
1/2 cup diced onion, 1/8” dice
3 Tbsp. lemon juice
1/4 cup olive oil, plus more for drizzling
4 tsp. oregano
1/4 cup capers, rinsed and dried
1/4 cup diced tomatoes, 1/8” dice
(optional)

Make the Fava Purée: Put the fava in a strainer and rinse under cold running water. Sauté the onions, lightly seasoned with salt and freshly ground black pepper, in 1/4 cup olive oil until the onions soften and start to turn golden. Stir in the rinsed fava and water, bring to a boil, turn down the heat, and simmer for 1 1/2 to 2 hours until the fava turns into a thick purée. Stir the fava regularly to make sure it isn’t sticking to the bottom of the pan, particularly towards the end of the cooking time.

When the fava is the thickness you desire, turn off the heat and stir in the oregano, lemon juice, and remaining 2 Tbsp. olive oil. Taste and add salt, as needed. Cover with a dish towel and let cool to room temperature.
(At this stage, the purée is ready to be used in Santorini Fava Pie, above.)

Make the Fava Pantremeni: Stir the diced onion, lemon juice, and olive oil into the Fava Purée. Spread the purée out on a plate. Drizzle with olive oil. Sprinkle the oregano over the purée, then the capers, and then the tomatoes (if using).

Serve with a bowl of olives and crusty bread, or as part of an appetizer spread.
~~~~~~~~~~~~~~~~~~~~~~~
This is my entry for My Legume Love Affair – 9th Edition (MLLA9), created by Susan of The Well-Seasoned Cook, which I am hosting in March 2009.

Tuesday, February 5, 2008

Recipe: Roasted Beet and Garlic Tart (Παντζαρόπιτα)

It’s lucky I love colorful food. There’s been nice big bunches of bright red beets in my last few Full Circle Farm CSA boxes.

The best thing about an abundance of beets is being able to experiment. I’ve already written about my savory Roasted Beet and Thyme Risotto, and just completed testing on a wonderful Roasted Beet and Garlic Tart. The tart was inspired by the traditional Greek pairing of beets and skordalia, a strongly flavored garlic sauce.

In the last few months, I’ve made beet tarts with golden beets, chiogga beets, and blood-red beets. I’ve tried various combinations of herbs and spices, and different amounts of onions and garlic. I’ve tested crusts with butter, crusts with olive oil, and crusts with both.

My finished tart recipe layers roasted beets and onions sautéed until sweet, and is seasoned liberally with fresh garlic and thyme. Feta cheese and sour cream add tang, and a crisp, flaky crust balances the filling’s strong flavors.

Roasted Beet and Garlic Tart is equally good served hot or at room temperature (I’ve been known to eat it cold, straight from the refrigerator). As a result, it can easily be made ahead and served as an appetizer or first course.

Roasted Beet and Garlic TartRoasted Beet and Garlic Tart (Παντζαρόπιτα)
Makes one 9-inch tart; serves 4 -6
The tart can be made successfully with any variety of beet. No matter the variety, I always roast beets to concentrate and enhance their flavor. Using a little butter in the crust (filo) isn’t traditional (nor is this tart), but it adds good flavor and flakiness. Olive oil can fully replace the butter, and the crust will be tasty, but slightly tougher. Add more water to make the crust if butter is left out. The dough may also be made by hand. If mixing by hand, make sure the olive oil is evenly distributed in the flour and use a fork or pastry cutter to add the butter.

Mediterranean Cooking in Alaska has moved as of March 2011. To read this post please go to


http://www.laurieconstantino.com/beets-and-garlic-a-classic-pairing/


Please click on over and visit my new site. Thank you!


Saturday, January 19, 2008

Recipe: Pear and Almond Tart (Τάρτα Αμύγδαλο και Αχλάδια)

My friend Teeny had her own recipe disaster last week. Her problem had the same cause as mine: a restaurant cookbook that hadn’t been adequately vetted for home use.

Teeny attempted a Pear and Almond Tart that looked good on paper. However, the 12” tart had 2 sticks of butter in the crust and 3 sticks of butter in the filling (a little less than a 1/2 stick butter per serving). Since the recipe said to cook it at 300°F for only 40 minutes, the unfortunate tart came out of the oven a partially cooked, slagged down mess.

I decided to come up with an alternate version. I studied the recipe; its flaws were too significant to bother modifying it. I started from scratch with only the concept in mind.

My first attempt looked gorgeous. I was afraid if I cut into it at home, I’d have “an accident” and eat it all myself. Instead, I took it to the sushi restaurant where I was lunching with friends. A whole table of tasters; nothing is better for food in beta testing.

The tart was tasty. Everyone liked it, although one taster thought it a little sweet. I liked the flavor, but the texture of the almond filling was off.

When I got home, I tried again. I made three different variations of the filling, and baked them in separate ramekins. I changed the proportions of eggs, sugar, and flavorings. When the three came out of the oven, the filling using egg whites only was my clear favorite.

I tried a final batch and added a little lemon peel to the egg white filling, and it was exactly what I’d been aiming for. The filling was rich with ground almonds, slightly crunchy on the top, and laced with the full clear flavor of pear.

Pear and Almond Tart is easy to make, easy on the eyes, and easy to enjoy.

Pear and Almond Tart (Τάρτα Αμύγδαλο και Αχλάδια)
Makes one 9” tart – Serves 8
Ground almond meal can be substituted for the whole almonds, and is a good choice for those who don’t have a food processor. Bob’s Red Mill, a brand available in many US supermarkets, sells ground almond meal. Health food stores often carry almond meal in the refrigerator section. If you have leftover almond meal, store it in the refrigerator as it can easily turn rancid. I used unblanched almonds in the tart because almond skins have abundant antioxidants and also taste good; blanched almonds work fine too. Apples may be substituted for the pears in this tart.

Crust:
1 1/2 cups all purpose flour
1/2 cup powdered sugar
Pinch of salt
2 tsp. finely grated lemon peel
10 Tbsp. unsalted butter (1 stick plus 2 Tbsp.)
1 egg, whisked to combine the white and yolk

Filling:
1 1/2 cups whole unblanched almonds
3/4 cup sugar
3 egg whites
1/4 tsp. pure almond extract
1 Tbsp. finely grated lemon peel

2 large ripe pears
Sugar for sprinkling on top of tart

Make the crust: Mix the flour, powdered sugar, salt, and lemon peel together in a food processor. Cut the butter into 3/4” squares, add to the food processor, and pulse five or six times to break up and distribute the butter. When you are done, the butter pieces should be the size of small lentils. Add the whisked egg and pulse to mix. Pinch together some of the dough to see if it holds together (it should). If it does not, add small amounts of water, pulsing to mix, until the dough holds together when pinched.

Dump the dough onto a piece of plastic wrap, press the dough together, and shape it into a flat disk. Wrap the disk in plastic wrap, and refrigerate for at least 30 minutes.

Preheat the oven to 400°F.

Roll out the dough on a well-floured pastry cloth until it forms a 10 1/2 inch circle. Use the rolling pin to lift the dough and place it over a 9” tart pan with removable bottom. Press the dough firmly into the sides and bottom of the tart pan. Cut the edges of the dough so there is just enough to fold under and cover the sides of the pan with a double layer of dough. Use a fork to prick tiny holes all over the bottom crust.

Press a double layer of aluminum foil onto the dough (this will prevent it from bubbling up when it bakes). Bake the crust for 15 minutes. Remove the foil and bake for 5 minutes or until the crust is set and lightly golden. Remove the tart crust from the oven and place it on a cooling rack. Reduce the oven heat to 350°F.

Make the filling: Put the almonds and sugar in the food processor and process until the almonds are very finely ground. Add the egg whites and almond extract and process until the mixture is smooth, scraping down the sides from time to time. Add the lemon peel and pulse to evenly distribute.

Make the tart: Spread the almond filling in the bottom of the pre-baked tart crust.

Peel the pears and cut them in half. Use a melon baller or teaspoon to scoop out the core. Place each pear half flat on a cutting board, and cut crosswise into 1/8” slices. Keep the slices together in the shape of a half pear. Remove the last three slices from the wide end of each half pear and reserve. Lightly push down the slices in each half pear to fan them out, fanning from the narrow end to the wide end.

With a spatula, carefully lift each fan of pear slices and place it on top of the almond filling, with the narrow end at the center, and the four fans of pear slices spaced evenly apart. Put the reserved three slices from each pear half in the spaces between the pear fans. Lightly press the pears into the filling. Sprinkle the pears with granulated sugar.

Bake for 30 minutes at 350°F. Turn the heat down to 300°F and cook for 30 minutes, or until the filling is set and the tart golden.

Serve plain or with scoops of vanilla gelato.

~~~~~~~~~~~~~~~~~~~~~~~~~~~~~~~
This is my entry for In the Bag, with the ingredients being pears, lemons, and nuts, hosted by A Slice of Cherry Pie.

Tuesday, January 8, 2008

Recipe: Palestinian Spinach Pies (Παλαιστινιακή Σπανακόπιτα)

My friend Salwa comes from Beit-jala, a small village just outside Bethlehem on the West Bank of the Jordan River. She came with her husband to Alaska, where they are raising twin sons far from the violence that has disrupted the West Bank for too many years.

Salwa is an excellent cook. Interviewing Salwa and other church members was the highlight of writing Tastes Like Home: Mediterranean Cooking in Alaska. Tastes Like Home is a fundraiser for Holy Transfiguration Greek Orthodox Church, a pan-orthodox parish in Anchorage, Alaska.

We are working hard to raise money for a new church building, necessary because we now hold services in a converted house far too small for our congregation. Weddings and funerals overwhelm our current building and must be held elsewhere. All proceeds from the sale of Tastes Like Home go directly into the Holy Transfiguration Building Fund.

Last month, we sold Tastes Like Home at the Anchorage Museum’s Book Fair. I staffed the booth with help from other church volunteers.

Salwa spent several hours helping out at the Book Fair. When we weren’t talking to customers, we were chatting about food. Salwa said she’d been thinking about bringing Palestinian Spinach Triangles to church the next day for coffee hour.

Palestinian Spinach Pies? My ears perked up. I asked if they were similar to Spanakopita (Greek Spinach Pies). Salwa said they were the same shape, but used pita bread dough instead of filo for the wrapping, so weren’t loaded with butter. She said the filling was spiced with sumac and did not include cheese, so was suitable for religious fasting days or vegans.

I grabbed a pen and started taking notes.

I brought the Palestinian Spinach Pies to a New Year’s Eve party, where they disappeared before 9 pm. I will happily make this recipe again and again.

Palestinian Spinach PiesPalestinian Spinach Pies (Παλαιστινιακή Σπανακόπιτα)
Makes 80 2 1/2” spinach pies
Adapted from recipe by Salwa Abuamsha

The spinach pies can be made with 2 1/2” up to 5” circles. Smaller spinach pies are typically made at home, and larger pies are more often seen in bakeries and street stalls. The pies can be made ahead, baked, and refrigerated (or frozen and thawed), and rewarmed for 15 minutes at 350°F.


Mediterranean Cooking in Alaska has moved as of March 2011. To read this post please go to


http://www.laurieconstantino.com/palestinian-spinach-pies-vegan-friendly/


Please click on over and visit my new site. Thank you!


Friday, December 21, 2007

Novel Food: Corelli's Mandolin and Recipe for Cephalonian Meat Pie (Κεφαλονίτικη Κρεατόπιτα)

KreatopitaCephalonia, a Greek island in the Ionian Sea, is famous throughout the world for its meat pies.

In recent years, Cephalonia has also become known as the beautiful setting for the novel (and movie) Corelli’s Mandolin by Louis De Bernières (Pantheon Books 1994).

Corelli’s Mandolin opens in Cephalonia during the early years of World War II, shortly before the invasion of Greece. In those years, despite the hovering threat of war, life on Cephalonia continued unchanged. A procession celebrating the death of St. Gerasimos, the patron saint of Cephalonia, was held as it had been for the last hundred years:

“Outside in the beautiful meadows of the valley and amongst the plane trees that lined the road from Kastro, pilgrims and Corybants had been arriving for two days, some of them from distant parts indeed. … The pews were filled with distant acquaintances renewing their friendship by means of the animated and voluble conversation that non-Greeks mistakenly construe as irreverence. Outside, the pilgrims unloaded animals laden with feta, melons, cooked fowl, and Cephalonian meat pie, shared it with their neighbors, and composed epigrammatic couplets’ at each others’ expense. Groups of laughing girls strolled about, arm in arm, smiling sideways at potential husbands and possible sources of flirtation, and the men, pretending to ignore them, stood about in knots, gesticulating and waving bottles as they solved the outstanding problems of the world.“ Corelli’s Mandolin at p. 74 - 75.

Eight days after the celebration of St. Gerasimos described by De Bernières, the Italian dictator Mussolini demanded that Greece allow Italy to occupy certain strategic parts of the country. On October 28, 1940, the Greek prime minister refused this demand and Italy immediately invaded Greece. (Today, October 28 is a Greek national holiday honoring the 1940 refusal to submit to foreign tyranny.)

Although the Greek army held off the Italians, the country fell when Germany joined the battle. Greece was occupied by a joint force of Germans, Italians, and Bulgarians for the duration of World War II. Corelli’s Mandolin describes life in occupied Cephalonia.

Captain Antonio Corelli was a reluctant officer of the Italian garrison on Cephalonia. The fictional Captain Corelli loved music, culture, and his mandolin. Corelli tried to be a benevolent member of the occupation. He was quartered in the home of the town’s doctor and eventually fell in love with Pelagia, the doctor’s daughter.

When the doctor became aware that Pelagia was in love with Corelli, he tried to dissuade her from consummating the affair. The doctor warned Pelagia of the many dire consequences, tangible and intangible, that could result from consorting with an Italian occupier.

Leaving Cephalonia and forsaking its meat pies were some of those consequences: “Are you ready to leave this island and this people? What do you know of life over there? Do you think that Italians know how to make meat pie and have churches dedicated to St. Gerasimos? No, they do not.” Corelli’s Mandolin at p. 281

Corelli’s Mandolin is ultimately the story of Pelagia’s life and the life of Cephalonia, and how both survived the upheaval brought by war. De Bernières used Cephalonian meat pie (Kreatopita) in describing idyllic island life before the war and, when Pelagia is at a crossroads that could lead her away from the island, as a symbol of all that is good about Cephalonia.

The phrase “Cephalonian meat pie” encompasses a multitude of recipes. Most households on Cephalonia have their own version of this delicious dish. In Prospero’s Kitchen: Mediterranean Cooking of the Ionian Islands from Corfu to Kythera, Diana Farr Louis and June Marinos say, “Recipes for Kreatopita in Cephalonia are like recipes for bouillabaisse in Marseille: each one is offered as the only truly authentic version handed down by a mythical grandmother.”

Louis and Marinos describe Kreatopita recipes with prunes, raisins, almonds, and pine nuts. Some recipes use rice, others potatoes; some use marjoram, others oregano. Some Kreatopitas are made with goat, beef, pork, or lamb, and still others with a combination of two or three different meats. Some recipes add hard-boiled eggs to the filling. Louis and Marinos conclude, “It all boils down to a matter of taste.”

Here is the version of Kreatopita that suits my taste. It is based on one I had many years ago at an Athens restaurant that no longer exists. I’d forgotten this dish until recently, when I ate it in a dream and woke up with the taste of Kreatopita in my mouth. The garlic yogurt accompaniment, while not traditional, is how the Kreatopita was served in my dream. It provides a wonderful counterpoint to the meat pie.

For company, I prefer making Kreatopita in 4 - 4 1/2” tart pans (with removable bottoms) so that each person gets their own individual pie. The individual pies may also be frozen whole, to serve later for easy meals. One large meat pie is equally good for serving a crowd, and easier to make than individual pies.

A Bite of KreatopitaCephalonian Meat Pie (Κεφαλονίτικη Κρεατόπιτα)
Makes eight 4 1/2” pies or one 10” pie
Cephalonian Meat Pie may be made with pork, beef, lamb, or a combination of some or all of these meats. It may also be made with leftover roast. (If using leftovers, start by sautéing the onions, and add the cooked meat along with the tomatoes, herbs, and spices.)Traditionally, kefalotyri cheese is used for Kreatopita, but any firm cheese may be substituted. I most recently made this with P’tit Basque sheep cheese, and its earthy flavor paired well with the cinnamon-scented meat.

Using a little butter in the crust (filo) isn’t traditional, but it adds good flavor and flakiness. Olive oil can fully replace the butter, and the crust will still be tasty, but slightly tougher. More water is needed to make the crust if butter is left out. The dough may also be made by hand. If mixing by hand, make sure the olive oil is evenly distributed in the flour and use a fork or pastry cutter to add the butter.

Crust (Filo):
3 cups flour
1/2 tsp. salt
1/2 cup olive oil
1/4 cup cold butter, cut into small chunks
1/3 – 2/3 cup ice water

Filling:
2 pounds meat, cleaned of all bones, fat, and gristle
1/4 cup olive oil
Salt
Freshly ground black pepper
4 cups diced onions, 1/2” dice
2 Tbsp. minced garlic
2 tsp. Aleppo pepper or 1 tsp. crushed red pepper
3 cups ground tomatoes, fresh or canned
1 cup red wine
1 cup beef or chicken stock
1 cinnamon stick
1 tsp. allspice
1/2 tsp. nutmeg
1 Tbsp. dried oregano, crushed
3 bay leaves
1 pound peeled and diced waxy potatoes (red or Yukon gold), 1/2” dice

1 cup minced fresh parsley
2 cups grated kefalotyri, kasseri, or other firm cheese

For the crust: In a food processor, mix the flour, salt, and olive oil until the olive oil is thoroughly incorporated into the flour. Add the butter and pulse three or four times to break up and distribute the butter; when you are done, the butter pieces should be the size of small lentils. Add 1/3 cup ice water and pulse to mix. Pinch together some of the dough to see if it holds together. If it does not, add small amounts of water, pulsing to mix, until the dough holds together when pinched.

Dump the dough onto a piece of plastic wrap and knead lightly until the dough holds together. If you are making individual pies, separate the dough into sixteen pieces, shape the pieces into flat disks, wrap in plastic wrap, and refrigerate for at least 30 minutes. If you are making one large pie, separate the dough into two pieces, shape them into flat disks, wrap in plastic wrap, and refrigerate for at least 30 minutes.

For the filling: Dice the meat into 1/2” pieces, and season it with salt and freshly ground black pepper. Sauté the meat in olive oil until it is browned on all sides. Stir in the onions, and continue to sauté until the onions soften and begin to turn golden. Stir in the garlic and Aleppo pepper and sauté for 1 minute.

Stir in the tomatoes, wine, stock, cinnamon stick, allspice, nutmeg, oregano, bay leaves, salt, and freshly ground black pepper. Bring to a boil, reduce the heat, and simmer for 30 minutes. Stir in the potatoes and continue to cook until the sauce is rich and thick (it is not necessary to fully cook the potatoes). Taste, and add salt, freshly ground black pepper, or oregano, as needed. Let cool. (The filling may be made ahead to this point.) After the filling has cooled a little, stir in the parsley.

Preheat oven to 400°F.

Roll out the bottom crusts (or crust if you are making one large pie) and press into the bottoms and sides of the tart pans (the bottom crust needs to overhang the pan). Divide the filling between the pans, and top with the grated cheese. Roll out the top crusts and place over the filling. Trim the edges of dough if they are too long, roll the edge of the bottom crust over the top crust, crimp the two crusts together, and tightly seal the edges. Use a sharp knife to cut a slit in the top crust; this will allow steam to escape as the Kreatopita bakes.

Bake for 45 - 50 minutes, until the top of the pies are golden brown. (If you are making one large pie, cook for 45 minutes at 400°F, turn the heat down to 350°F, and cook for 30 minutes more. Cover the edges of the pie with foil if they get too dark.)

Serve with Garlic Yogurt on the side, a crisp green salad, dried black olives, and crusty bread.

Garlic Yogurt
2 cups whole-milk yogurt
4 cloves garlic
1 tsp. coarse-grained salt
1 Tbsp. white wine vinegar
2 Tbsp. olive oil

Line a colander with paper towels. Dump the yogurt into the lined colander and let the liquid drain out of the yogurt for 30 – 60 minutes. Puree the garlic by mashing it into the salt. Mix together the drained yogurt, mashed garlic, salt, vinegar, and olive oil. Taste and adjust the seasoning by adding garlic, salt, or vinegar, as needed.

~~~~~~~~~~~~~~~~~~~~~~~~~~~~~~~
This is my entry for Novel Food sponsored by Simona of Briciole and Lisa of Champaign Taste. Simona's half of the wonderful round-up is here and Lisa's half is here.

Friday, December 7, 2007

Recipes: Caper Tart & Capers and Eggs (Καπαρόπιτα & Κάπαρη με τ’Αυγά)


The rocky hills and sea cliffs of Greece’s Aegean islands provide the harsh environment thorny caper plants need to thrive. Capers are an important wild edible in Greece; their flower buds, berries, and leaves add piquant flavors to island cuisine.

Archeological evidence shows that Mediterranean people have eaten capers for at least 18,000 years. By the time of the ancient Greeks, capers’ use as a favored condiment was well-documented. Theophrastus, chronicler of Greek plants used in the third and fourth centuries BCE, advised that wild capers growing on rocky cliffs were pungent and delicious, while capers grown on cultivated land were much less desirable.


Caper FlowerOn Greek islands today, women head for the rocky shores in June to hand-gather caper buds before the plant flowers. Since caper plants produce buds over a period of weeks, harvesters return to the same plant time and time again. In Η Κουζίνα της Κιμώλου (The Cuisine of Kimolos), Filena Venardou calls caper-gathering tedious, but says by summer’s end, cupboards of every island home are stocked with enough capers to last the year.

Caper buds are preserved three different ways: pickled in brine (the most common way capers are sold in America), cured in salt, or dried in the sun. I prefer salt-cured capers because the salt concentrates and enhances the capers’ sharp floral flavors, rather than overpowering them as brine can do. In Alaska, salt-cured capers are sold only in specialty stores and are expensive, so I use brined capers for cooking, leaving the salt-cured ones for use in salads and sauces that aren’t heated.

On the Greek island of Kimolos, islanders prefer curing capers in salt. To do this, Venardou says capers are well-cleaned, packed in coarse salt, and stored in glass containers. Prepared this way, capers will last indefinitely.

CaperberriesWhen a caper bush is allowed to flower, it forms an edible fruit called a caperberry. In Greece, caperberries are pickled in vinegar, and served with beans or fish, or as an appetizer with ouzo. Caper leaves are also pickled and used as a condiment to accompany fish or chicken, or added to salads.

Adapting one of Venardou’s recipes, I recently made scrambled eggs loaded with capers. Venardou described Capers and Eggs (recipe below) as succulent and unique, with the dominant flavor of capers. The resulting dish was unusual and delicious, but even for caper-lovers, more suited to lunch or dinner than breakfast, when we normally enjoy eggs.

While contemplating the interesting flavor combination of Venardou’s dish, the idea for a Caper Tart popped into my mind. The idea was so fully realized that my mouth immediately started to water. I imagined serving the tart with salmon; its richness would complement the sharp flavor of capers. I couldn’t wait to try this combination, so we had both dishes for dinner that night.

Caper Tart was an immediate hit, and an ideal accompaniment for pan-fried salmon. While mixing the tart’s filling, I added soft white cheese and thyme to bridge the gap between mild, slightly sweet eggs and piquant capers. A crisp olive-oil crust took the place of bread in the meal, and its flavor and texture added complexity to the tart.

Caper Tart is relatively easy to make. While its flavors mesh beautifully with salmon, it would be delicious with any kind of fish or poultry, served on its own with a crisp green salad, or as part of an appetizer spread. The leftovers are tasty eaten cold, especially because the olive-oil crust retains its integrity even after days in the refrigerator.

Caper TartCaper Tart (Καπαρόπιτα)
Makes one 9-inch tart. Serves 4 -6.
Using a little butter in the crust (filo) isn’t traditional (nor is this tart), but it adds good flavor and flakiness. Olive oil can fully replace the butter, and the crust will still be tasty, but slightly tougher. More water is needed to make the crust if butter is left out. The dough may also be made by hand. If mixing by hand, make sure the olive oil is evenly distributed in the flour and use a fork or pastry cutter to add the butter.

Crust (Filo):
1 1/2 cups flour
1/4 tsp. salt
1/4 cup olive oil
2 Tbsp. cold butter, cut into small chunks
3 – 5 Tbsp. ice water

Filling:
1/2 cup capers in brine
2 cups diced onions, 1/4” dice
2 Tbsp. olive oil
Salt
Freshly ground black pepper
2 tsp. dried thyme, crushed, plus 1 tsp. for sprinkling over tart
2 eggs
1/2 cup manouri, ricotta, or mascarpone cheese
1/2 cup feta, crumbled

For the crust: In a food processor, mix the flour, salt, and olive oil until the olive oil is thoroughly incorporated into the flour. Add the butter and pulse three or four times to break up and distribute the butter; when you are done, the butter pieces should be the size of small lentils. Add 3 Tbsp. ice water and pulse to mix. Pinch together some of the dough to see if it holds together. If it does not, add small amounts of water, pulsing to mix, until the dough holds together when pinched. Dump the dough onto a piece of plastic wrap and knead lightly until the dough holds together. Shape the dough into a flat disk, wrap in plastic wrap, and refrigerate for at least 30 minutes.

Preheat the oven to 425°F.

Roll out the dough on a well-floured pastry cloth until it forms a 10-1/2 inch circle. Use the rolling pin to lift the dough and place it over a 9” tart pan with removable bottom. Press the dough firmly into the sides and bottom of the tart pan. Cut the edges of the dough so there is just enough to fold under and cover the sides of the pan with a double layer of dough. Use a fork to prick tiny holes all over the bottom crust.

Press a double layer of aluminum foil into the dough (this will prevent it from forming bubbles when it bakes). Bake the crust for 15 minutes. Remove the foil and bake for 5 minutes or until the crust is set and lightly golden. Remove the tart crust from the oven and place it on a cooling rack. Reduce the oven heat to 350°F.

For the filling: Drain and rinse the capers. Put them in a bowl of cold water to soak for 15 minutes, drain, and spread out the capers on a paper towel to dry.

Sauté the onion, lightly seasoned with salt and freshly ground black pepper, in olive oil until the onion softens and starts to brown around the edges. Add the capers and 2 tsp. crushed dried thyme and sauté over medium heat for five minutes. Spread the onion and caper mixture over the bottom of the baked tart crust.

Whisk together the egg, cheese, and freshly ground black pepper until they are thoroughly mixed. Pour the egg mixture over the capers and onions, then top with the crumbled feta, making sure all the ingredients are evenly distributed. Sprinkle 1 tsp. of crushed dried thyme over the top of the tart.

Bake the tart at 350°F for 35 – 40 minutes, or until the top of the filling just starts to brown.

Remove the tart from the pan and serve hot or at room temperature.

Capers and EggsCapers and Eggs (Κάπαρη με τ’Αυγά)
Serves 2
Adapted from Η Κουζίνα της Κιμώλου (The Cuisine of Kimolos) by Φιλένα Βενάρδου (Filena Venardou).

4 eggs
1 cup diced yellow onions, 1/8” dice
1/2 cup capers
2 Tbsp. olive oil
Salt
Freshly ground black pepper

Capers and Eggs IngredientsDrain and rinse the capers. Put them in a bowl of cold water to soak for 15 minutes, drain, and spread out the capers on a paper towel to dry.

Sauté the onion, lightly seasoned with salt and freshly ground black pepper, in olive oil until the onion softens and starts to brown around the edges. Add the capers and sauté over medium heat for five minutes. Turn the heat down to low.

Whisk together the eggs and some freshly ground black pepper. Pour the eggs over the capers and onions and allow the eggs to slightly set. When the eggs start to solidify, stir them continuously with a spatula, being sure to scrape the eggs from the sides of the pan, until the eggs are cooked through, but still moist.

Serve with Greek Village Bread (a recipe is in Tastes Like Home: Mediterranean Cooking in Alaska) and slices of manouri or ricotta salata cheese.
~~~~~~~~~~~~~~~~~~~~~~~~~~~~~~
This is my entry for Weekend Herb Blogging #112, sponsored this week by Simona at Briciole.

Friday, October 26, 2007

Cookbook: Hortopita (Greens and Cheese Pie)

When fall begins its descent, and the days start to shorten, our garden is lush with greens; they flourish in Alaska's cool weather. Anticipating the snow that fell this week, we recently harvested the remaining greens and put the garden to bed for the winter.

Mixed GreensSwiss chard, spinach, beet greens, Italian chicory, and dandelions

Some greens (a mixture of cultivated dandelions and Italian chicories) I blanched and froze for winter use. Others I used to make Hortopita, which is similar to Spanakopita (Spinach Pie), but with a more complex flavor. Although Hortopita tastes bests when made with wild greens, and benefits from a combination of sweet and bitter greens, any mixture of wild or supermarket greens may be used. When combined with cheese and herbs in Hortopita, mixed greens make a magnificent meal.

Hortopita


Making Hortopita brings back happy memories of foraging for wild greens in Greek island vineyards, and sitting barefoot in the afternoon shade with my friends, cleaning our bounty while chatting about our lives and sharing village gossip.

The recipe for Hortopita is in Tastes Like Home: Mediterranean Cooking in Alaska.


Tastes Like Home:
can be ordered here.