Showing posts with label breakfast. Show all posts

Wednesday, July 14, 2010

Bhutanese Refugees in Anchorage, Alaska with Recipe for Lamb's Quarters & Tomatoes with Eggs (Χόρτα και Ντομάτες με Αυγά)

Lush baskets of greens lined the table: crumpled dark Lacinato kale, sweet golden-stalked Swiss chard, deep maroon piles of earthy red orach. The sign read, “Fresh International Gardens.”

“Good morning! Where’s your farm?” The answer to my standard market question was a surprise: “Mountain View.”

Mountain View, a densely populated neighborhood within Anchorage’s urban core, is an unlikely spot for a market garden. “How much land do you have?” “8000 square feet.”

A commercially viable garden in Alaska on less than 1/5 of an acre? I looked again at the people staffing the booth. Of diverse ages and ethnicities, they didn’t fit the typical farm family image.

“Is Fresh International Gardens a farm? Or a group?” I hesitated. “Or what?”

The answer: “Or what.” Fresh International Gardens is part of the Refugee Farmers’ Market Program. This program helps refugees, newly arrived in Anchorage, adjust to uprooted lives in a new country. In addition to gardening, the program teaches entrepreneurial and life skills essential to succeeding in Alaska.

The thriving program grew from a seed planted by Julie Riley, longtime Anchorage Cooperative Extension Service Horticulture Agent. In 2004, Riley successfully helped Hmong refugees from Southeast Asia adapt their gardening skills to Alaska’s cold climate. This success inspired Catholic Social Services to work with Riley and others to create the Refugee Farmers’ Market Program. Using municipal land next to Mountain View’s McPhee Park, the program is now in its fourth year.

Most refugees working on the 2010 garden are originally from Bhutan. Over the last 10 months, a group of nearly 100 Bhutanese refugees began the challenging process of creating lives in Alaska after many difficult homeless, stateless years.

Bhutan is a land-locked country the size of Switzerland. It lies between China and India on the Himalayas’ eastern edge; Nepal is to the west. In the late 19th century, the Lhotsampa (meaning southerner in Bhutanese) began emigrating to Bhutan from Nepal, largely to work as laborers for the Bhutanese.

The Lhotsampa settled, built homes, and grew families in Bhutan. Life continued uneventfully until the late 1980s. At that time, the ethnic majority ruling Bhutan became worried about its ethnic group being outnumbered by Lhotsampas. To prevent this, the rulers began a program of ethnic cleansing, forcibly expelling many Lhotsampas from the country.

The forcible expulsions left over 100,000 Lhotsampas, including Anchorage’s new residents, stranded for nearly two decades in Nepalese refugee camps. It wasn’t until 2008 that various countries, including the US, began admitting Bhutanese refugees for permanent resettlement.

Last Thursday I went to the Fresh International Garden site on McPhee and talked with gardener and market entrepreneur Bishnu Subedi.

Subedi said he was forced from his home by the Bhutanese government in 1992. He lived in Nepalese refugee camps until Alaska welcomed him last year. “Seventeen years. Seventeen years, no home. Now, in Alaska, apartment. A home.” Subedi smiled, hesitantly.

While we talked, Subedi and a fellow refugee cleaned and turned a new garden bed, planting it with spinach seed. The men were neatly dressed; their shirts freshly ironed. They deftly and swiftly worked shovel and hoe with bare feet.

Subedi is just now learning English, and spoke it haltingly. He described his plans: work hard, feed his family, get a green card, become a citizen. He laughed, shrugged, and said, “For now, have apartment. But is home. Home.” He smiled again, this time broadly.

I walked further into the garden where three Bhutanese women were weeding beds of thickly planted greens. They heaped all but one kind of weed in piles for disposal. The women treated lamb’s quarters (Chenopodium album) differently. This plant was separated out and added to plastic grocery bags that were already full when I arrived.

Though weeds, lamb’s quarters are delicious edible greens. Since none of the women spoke English, I couldn’t ask if they planned on eating lamb’s quarters. Kelly Ingram, a Vista volunteer working for the Refugee Farmers’ Market Program, had an answer: the women used lamb’s quarters as an ingredient in curry.

Wild lamb’s quarters are gathered for food all around the globe. Uniquely, the Himalayan region, where Lhotsampas survived in Nepalese refugee camps, is the one area in the world where lamb’s quarters are domesticated. It is grown there for its leafy greens and as a grain crop. Lamb’s quarters is a quinoa relative; up to 70,000 poppy-sized seeds grow on every plant. The seeds are ground into flour, cooked as porridge, made into alcoholic beverages, and used as livestock feed.

Unlike countries with subsistence economies, wild foraging is a rarity in modern America. Lamb’s quarters and other wild greens are usually seen only as noxious weeds that pop up in home gardens and interfere with efficient commercial crop production. As a result, few Alaskans have tried tasty lamb’s quarters.

Lamb’s quarters are related to spinach and Swiss chard, and can be substituted for those greens in any recipe. Its flavor is milder, and its leaves slightly firmer, than spinach. Although young lamb’s quarters leaves may be eaten raw, I prefer them cooked. Then again, I also prefer spinach cooked.

Of the wild greens that grow in Alaska, lamb’s quarters is one of the easiest to harvest. (First time foragers may want to review my Rules for Gathering Wild Plants.) Cut off the top 6-8” of each plant, remove any damaged or diseased leaves (look carefully, lamb’s quarters are susceptible to leaf miner damage), and strip the leaves and soft seed heads from the stem. These are ready to use in your favorite greens recipe; the stem may be discarded.

Lamb’s quarters freeze well. Harvest the greens before seeds form, blanch in boiling salted water for 30-45 seconds, drain, cool, squeeze out excess water, package in freezer bags, and freeze.

Lamb’s quarters thrive on land that’s been previously cultivated, or any place they can get an easy foothold. In my yard, they're particularly fond of the topsoil pile, where loose dirt and ready nutrients attract a nice patch of lamb’s quarters every year.

Returning from my trip to the Fresh International Gardens, I had a powerful hankering for lamb’s quarters. Lacking a Bhutanese curry recipe, but being rich in farm fresh eggs, I lunched on a Greek village favorite: eggs cooked on a bed of wild greens and tomatoes.
Lamb's Quarters and Tomatoes with Eggs takes less than 30 minutes to make, including the time to harvest the lamb’s quarters (assuming you're behind on your weeding so have lamb's quarters readily available). Despite its simplicity and humble ingredients, the flavors are luxuriant: runny yolks combine with vegetable juices to form an enthrallingly rich sauce.

Lamb's Quarters and Tomatoes with Eggs (Χόρτα και Ντομάτες με Αυγά)
Serves 2
Any wild or domesticated greens may be used in this recipe. Milder greens, such as lamb’s quarters, nettles, spinach, and Swiss chard, taste best. Feta cheese, bread, and Kalamata olives typically are served with this dish.

6 cups greens, cleaned of stems and damaged leaves
1/2 cup diced onion, 1/4” dice
1 Tbsp. olive oil
Salt
Freshly ground black pepper
1 cup diced fresh tomato, 1/4” dice
2 Tbsp. minced fresh mint or basil
4 eggs

Blanch greens in boiling salted water for 30-45 seconds. Drain, rinse with cold water, and squeeze out as much water as you can from greens (do this in batches using your hands or all at once using a clean dish towel). Roughly chop the blanched greens.

Sauté onion, lightly seasoned with salt and freshly ground black pepper, in olive oil. When onions begin to turn golden, add chopped greens and tomato. Mix well. When greens are hot, taste and add salt or freshly ground black pepper as needed. Stir in mint or basil.

Spread greens evenly over bottom of the pan and make an indentation for each egg in greens. Break one egg into each hole, lightly season with salt, turn heat down to low, and cover pan. Cook until egg whites just solidify and yolks are still liquid. Serve immediately.

~~~~~~~~~~~~~~~~~~~~~~~~~~~~~~~~
Fresh International Gardens sells produce every Wednesday at the Northway Mall Farmers’ Market and alternating Saturdays at the University Center Farmers’ Market and the Spenard Farmers’ Market. Volunteers are needed to help with the Refugee Farmers’ Market Program; for more information about volunteer opportunities, contact Kelly Ingram at 786-6331.
~~~~~~~~~~~~~~~~~~~~~~~~~~~~~~~
This post is included in Weekend Herb Blogging compiled by Susan at The Well-Seasoned Cook.

Saturday, July 10, 2010

Recipe for Squash Blossom Frittata (Κολοκυθοανθοί με Αυγά)


Haul from Wednesday's Farmers' Market: parsley, dill, Swiss chard, beets, spinach, broccoli, orach, zucchini, squash blossoms, cucumbers, tomatoes

Farmers’ market season is upon us. Stalls are bursting with fresh greens and herbs. Early broccoli and zucchini are spottily available. The first bunches of baby carrots appeared today. 


Making Tostadas

Surprises abound at the markets: scarlet vine-ripened tomatoes from Delta Junction, Matanuska Creamery's Caramel Cashew ice cream made using only milk from Alaska, steaming pots of homemade pozole and elote, blowsy ‘Flemish Antique’ peony poppies, freshly gathered duck and chicken eggs from Future Farmers of America.

Among the abundance, golden squash blossoms stand out as a rare treat. Never in stores, they're available only during their short season to home gardeners and farmers’ market shoppers. So far this year, only Rempel Family Farm is selling squash blossoms in Anchorage (50 cents each on Wednesday at Northway Mall Farmers’ Market and Saturday at South Anchorage Farmers’ Market).


Delicate squash blossoms don't like plastic bags. If paper bags aren't available, wrap in newspaper.

All squash blossoms are edible and may be used interchangeably. Because we grow zucchini at home, I’ve gotten used to calling them zucchini flowers. The more generic term, squash blossoms, is usually more accurate when buying from farmers who grow a wider range of squash.

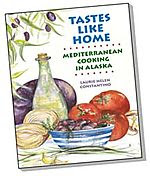
I love stuffing squash blossoms with cheese and cooking them until they’re crispy and oozing with hot, melted cheese. (Tastes Like Home: Mediterranean Cooking in Alaska has recipes for 2 different cheese fillings for zucchini flowers.) Herby essence of basil brightens the flavor of Cheesy Potato-Basil Stuffing for zucchini flowers, and pairs well with a side of fresh greens. Squash blossoms are also tasty dipped in a tempura batter and simply fried.


Blue and brown eggs from Future Farmers of America; both had deep golden yolks.

On days when I want the flavor of squash blossoms, and don’t want to fiddle around or mess with hot oil, I make Squash Blossom Frittata.  Today we had farm-fresh, golden-yolked eggs, fresh herbs, and creamy fresh goat cheese to pair with the squash blossoms. Sighs of satisfaction replaced conversation as we ate; I finished by licking my fingers, wanting more.


Squash Blossom Frittata (Κολοκυθοανθοί με Αυγά)
Serves 2-4
Food writers often advise to remove pistils and stamens from inside squash blossoms, as well as the green bases (calyxes/calyces) and stems. Don’t do it. These parts are all edible and add wonderful flavor and texture. I remove the stems in this recipe purely for decorative reasons; without stems, the blossoms form a perfect pinwheel in the frittata. Use enough flowers to complete a pinwheel; about 8 large, 10 medium, or 12 small.  Accompany Squash Blossom Frittata with a crisp garden lettuce salad and dry white wine.

8-12 squash blossoms
5 eggs
2 Tbsp. minced fresh dill
1/2 cup diced shallots, 1/4” dice (may substitute green onions, see Note below)
1 Tbsp. butter, plus 1 tsp. (divided)
Salt
Freshly ground black pepper
3-4 Tbsp. fresh goat cheese
Dill sprigs for garnish (optional)

Prepare the Squash Blossoms:  If necessary, gently brush off dirt or debris from flowers; don’t wash or get them wet. Carefully open flowers and shake out any insect hitchhikers. Cut off stems, but leave green bases attached. 

Prepare Eggs:  Whisk together eggs and dill with a light seasoning of salt and freshly ground black pepper.  Using a heavy 9-10” oven-proof frying pan (cast iron works best), sauté shallots, lightly seasoned with salt and freshly ground black pepper, in 1 Tbsp. butter until they soften and start to turn golden.  Add sautéed shallots to eggs and whisk to blend (reserve excess butter in pan for cooking frittata).

Cook Frittata:  Preheat broiler to high.

Melt remaining 1 tsp. butter in pan used to cook shallots, arrange squash blossoms in pinwheel around bottom, and cook over medium heat for 30 seconds. Turn blossoms, and evenly pour whisked egg mixture over them. Break goat cheese into pieces and scatter over eggs. Turn heat down to low, cover pan, and cook until eggs are almost set, but still runny on top, about 4-5 minutes.  Put under broiler to finish cooking eggs. Flip out onto platter, garnish with dill sprigs, and serve.

Note: Green onions may, but don’t need to, be sautéed. If you use green onions and don’t sauté them, reduce butter to 2 tsp. and whisk green onions into eggs with dill.

~~~~~~~~~~~~~~~~~~~~~~~~~~~~~
This post is included in Weekend Herb Blogging compiled by Cinzia from Cindystar.


Peony Poppy 'Flemish Antique', Papavar somniferum paeoniflorum

Friday, November 6, 2009

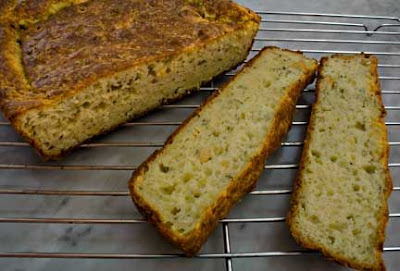
Salty Cake (Easy Cheese Bread) (Kέικ Αλμυρό)

Greeks are famously hospitable.  Visitors to Greek homes are warmly welcomed and showered with treats of all kinds.  Coffee with sweet pastries, ouzo with savory delicacies, water with preserved fruits; no matter your beverage, a Greek hostess quickly puts together a tasty accompaniment.

For some of us, enjoying Greek hospitality comes with a cost: overeating.  Before I spoke Greek, this was more of a problem. Because we couldn’t converse, people communicated love and affection by giving me double portions. Since everything was delicious, and I didn’t know how to decline, I ate it all.  Unfortunately, I was gaining 5-10 pounds for every month we spent in Greece, and dieting for 2 months afterwards so my clothes would fit again.

I finally learned how to say no. This is more difficult than it sounds.  It’s nearly impossible for a Greek hostess to accept “no” for an answer. The more you decline, the more you’re offered.  It’s also slightly rude on my part; if I were a more polite guest, I’d graciously accept some of the tasty tidbits.

After ten years of declining all snacks (and apologizing for being such a difficult guest), our friends and family have grudgingly accepted this peculiarity of mine – at least when it comes to sweets. Diabetes is rampant in the village and, in the last few years, turning down sweets has become a medical necessity for many.  Since so many can’t eat sweets, village hostesses now keep a supply of “salty” (almyro-αλμυρό) snacks on hand.

In the village, salty snacks aren’t things like potato chips, pretzels, and peanuts. Salty, in this context, just means not sweet.  Salty cookies (koulourakia) look identical to sweet cookies but, without the sugar, taste like thick crackers. Salty cakes include ingredients like cheese, olives, or ham; in the US, they’re called quick breads.

Lately, when I decline something sweet, a hostess may triumphantly declare that she has something salty instead.  Surely, I can try a few bites of a salty treat, something with absolutely no sugar? No, I sadly say, I can’t manage anything salty either, even though I’m sure it’s absolutely delicious.

Although I’m a difficult guest, I happily fulfill my duties as a hostess. In our village house, where visitors constantly stop by, the refrigerator is stocked with beverages, pastries are in the cupboard, and there’s even a salty little something for those who don’t eat sweets.

Treasured Recipes: A Collection of Personal Recipes from the Women Members of the Hellenic Athletic Club of Khartoum and Their Friends (Khartoum 1983), the Sudanese-Greek cookbook I recently wrote about, has an interesting recipe for Salty Cake.  This recipe is quite simple, but produces a rich, cheesy quick bread with wonderful flavor and a hint of mint. It’s tasty served to visitors as a snack or for brunch, but it also makes a nice accompaniment to soup or chili.


Salty Cake (Easy Cheese Bread) (Kέικ Αλμυρό)
Makes 1 9”x9” square bread or 1 9”x5” loaf
Adapted from Lefko Tsanakas and Lucy Vassiliou’s recipe for “Cake Almiro” in Treasured Recipes: A Collection of Personal Recipes from the Women Members of the Hellenic Athletic Club of Khartoum and Their Friends (Khartoum 1983)
Lefko and Lucy call for either feta or a combination of various cheeses, but emphasize using some “feta cheese is essential.” The recipe may be doubled and baked in a Bundt pan for an attractive brunch offering (when doubling the recipe, use 7 whole eggs and no egg yolks). This bread is best served warm. If you bake it ahead, wrap it in foil and refrigerate; to serve, warm in a 350°F oven for 20 minutes.

3/4 cup softened butter
3 large eggs
1 egg yolk
2 cups crumbled feta or 1 cup crumbled feta and 1 cup grated graviera, asiago, or other cheese
2 Tbsp. dried mint, crushed
1 3/4 cup flour
1 1/2 Tbsp. baking powder
3/4 cup milk

Preheat the oven to 350°F.

Butter a 9” square pan or 9”x5” loaf pan, dust bottom and sides with flour, tap out and discard any excess flour.

Beat the butter until creamy. Beat in the eggs and yolk, one at a time.  Add the cheese and mint and mix to combine.  Stir together the flour and baking powder.  Add flour to the cheese mixture one third at a time, alternating with additions of milk (one third at a time), until all is combined. Pour batter into the prepared pan. Smooth out the top to evenly distribute the batter.

Bake for 45-60 minutes, or until the bread has a nice brown crust on top.  Let cool for 30 minutes and remove from pan. Serve warm or at room temperature.

Friday, February 27, 2009

All About Za'atar with Recipe for Za'atar Herb Blend and 5 Recipes for Using Za'atar

Za'atar Bread and LabnehIf za’atar is within reach, anyone can make delicious food at the drop of a hat. The possibilities are endless: Za’atar Olives, Za’atar and Labneh, Za’atar Tomato Sauce with Grilled Meat, Za’atar Bread, and Za’atar Pizza are only a few ways to use this versatile ingredient. I almost have my Za'atar Chicken recipe ready to post.

Za’atar is
valued for more than great taste. “Who for forty days eats powdered dried leaves of za'tar fasting can be harmed by no serpent.” If the worst happens and you’re bitten by an asp or stung by a scorpion, za’atar cures “the bitings and the stings of venomous beasts." A Bethlehem proverb teaches, “Thyme and oil lead to the prosperity of the home.” Even more importantly, “eating za'atar improves your memory and makes you more intelligent.”

So what is za’atar?
A. An herb blend
B. Savory
C. Thyme
D. Oregano
E. Biblical hyssop
F. All of the above

The answer is “(F) All of the above.”

Za’atar (ZAHT-ar) is a class of herbs, and includes members of the thyme, oregano, and savory families. Za’atar is also a Middle Eastern herb blend, containing one or more of the za’atar herbs. As with many centuries-old dishes, za’atar blend has many regional and familial variations.

Disparity in za’atar’s spelling is pervasive; za’atar, za’tar, zatar, zahtar, satar, zahatar, and za’ater are all used. The spelling confusion is easy to explain. Za’atar is an Arabic word (الزعتر). Like Greek and other languages that don’t use the Roman alphabet, Arabic is inconsistently transliterated into English.

Some experts claim the herb za’atar is only one specific type of savory; others claim with equal vehemence it’s one specific type of oregano. Both may be right, but only for the region or family they’re writing about.

No matter its local or historical usage, “za’atar” has come to be a generic term used in the Middle East for a group of similarly-flavored members of the herb genus
Lamiaceae. Za’atar herbs grow in the same habitat and have similar appearances. These practical factors may have led Middle Easterners to use one word for all the plants.

Linguistic confusion over “za’atar” is not unique to Arabic.
In Turkish, the plant groups Origanum, Thymbra, Coridothymus, Satureja, and Thymus, generically called za’atar in Arabic, are all referred to as “kekik.”

Scientific analysis supports the pragmatic use of one word to refer to a plant group rather than a single plant. Gas chromatography and mass spectrometry show “the chemical profiles of the specific chemotypes of Satureja thymbra L. and Thymbra spicata L [a]re very similar. They are also very similar to those of the chemotypes of Coridothymus capitatus and Origanum syriacum.” [These four herb species are all called za’atar.]

Adding to the confusion, each za’atar herb is known by more than one name:

· Coridothymus capitatus aka Thymus capitatus aka Satureia/Satureja capitata (conehead thyme, headed savory, Persian hyssop, za’atar parsi, Spanish oregano)
· Origanum maru aka Origanum syriacum/cyriacum aka Marjorana syriaca (Biblical hyssop, Lebanese oregano, Syrian oregano, Egyptian marjoram)
· Satureja/Satureia thymbra (Roman za’atar, za’atar rumi, pink savory, barrel sweetener; in Greek, Θρούμπι, Τραγορίγανη)
· Thymbra spicata (spiked thyme, donkey hyssop, desert hyssop)

There are also several varieties of commercially available za’atar blends. For example,
according to Paula Wolfert, “The taste of a za’atar mixture can be herbal, nutty, or toasty. …’Israeli’ is a pale green blend of pungent herbs that includes the biblical hyssop, along with toasted sesame seeds and sumac. The ‘Syrian’ blend, the color of sand, has a decidedly toasty flavor. The ‘Jordanian’ blend is dark green and very herbal, with some turmeric.” These aren’t the only za’atar blends; each spice merchant and family has a unique formula.

Before creating my own za’atar blend, I bought and tasted several commercially available varieties. I experimented with diverse combinations of herbs trying to best approximate the flavor of my favorite commercial brand. I also read as many English-language za’atar recipes as I could find.

For the herbal flavor in za'atar blend, many North American recipes use only dried domestic thyme, or a mixture of domestic thyme and domestic marjoram. These recipes, when tasted side by side with imported za’atar blends, tasted bland to me. I discovered that Greek oregano (preferably, but not necessarily, wild-harvested and sold on the stem) is key to creating flavorful za’atar in Alaska. Greek oregano’s spicy flavor, when tempered by combining it with dried wild or domestic thyme, approximates the flavor of authentic za’atar blend.

For anyone interested in growing their own, the various plants referred to as za’atar can be purchased from
Well Sweep Herb Farm or Mountain Valley Growers. Although they’re tasty, keep in mind that most domestically grown herbs don’t have the flavor of their wild progenitors. There’s nothing like scarce water, poor soil, and hot sun for developing flavor.

For those who live where there are Middle Eastern markets or specialty stores, by all means buy ready-made, preferably imported, za’atar. You can also
order za’atar blends online.

In Anchorage, you can buy sumac, a key ingredient in my za’atar blend, at
Sagaya, City Market, and Summit Spice. Summit Spice sells its own Anchorage-made za’atar blend in tiny packets using marjoram, thyme, sumac, and sesame seeds. Summit also has a product labeled “Greek oregano,” which they tell me may be grown on farms in Greece or Turkey, depending on the shipment.

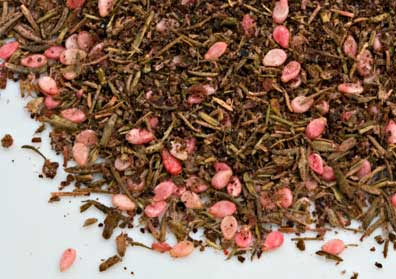
Za'atarZa’atar Herb Blend
Because za’atar has so many uses, I make a lot at one time: 1/2 cup oregano, thyme, and sumac, 1/4 cup sesame seeds, and 1 Tbsp. salt. The sumac, which has a sour taste akin to lemon, is what gives za'atar its red color.

1 part dried Greek oregano, preferably wild-harvested
1 part dried thyme
1 part ground sumac
1/2 part white sesame seeds
Salt to taste

Grind the oregano and thyme in a spice grinder or blender, making sure it’s free of sticks and stems. Put the herbs in a glass jar with a tight sealing lid. Add the sumac, sesame seeds, and salt and shake well to thoroughly combine. Put on the lid and close it tightly. Store away from heat and light.

Za'atar OlivesZa’atar Olives
Made entirely with pantry staples, Za’atar Olives are easy to prepare and make a great last-minute appetizer. Especially when warm, Za’atar Olives are an addictive treat.

2 cups Kalamata olives
1/2 cup olive oil
3 Tbsp. Za’atar Herb Blend (see recipe above)

Rinse the olives and dry them well. Put the olives and olive oil in a small saucepan, bring the olive oil to a simmer, and simmer the olives for 15 minutes. Stir in the Za’atar Herb Blend and simmer for 5 minutes. Serve warm or at room temperature.

Za'atar Bread - Mana'eeshZa’atar Flatbread (Mana’eesh bi Za’atar)
Makes 12 6” flatbreads
When I have breakfast with Marie, an Armenian friend who was born and raised in Beirut, she always serves Mana’eesh, olives, tomatoes, cucumbers, and cheese. Breakfast at Marie’s was my first introduction to za’atar; it's been a part of my repertoire. To make it from scratch, I use my Palestinian friend Salwa’s recipe for pita bread, and top it with Za’atar Herb Blend and olive oil. Although Marie serves this for breakfast, we eat it for a snack, for lunch, or as part of an appetizer spread. If you’re cooking for a small family, like I do, use half the dough for Mana’eesh and the second half for Za’atar pizza (see recipe below).

Dough:
2 1/2 cups lukewarm water
1 Tbsp. yeast (1 packet)
1 tsp. sugar
1 Tbsp. salt
6 – 7 cups all-purpose or bread flour

Topping:
1/2 cup olive oil
1/2 cup Za’atar Herb Blend (see recipe above)

Make the Dough: Place the water in a large bowl. Sprinkle the yeast over the water, sprinkle the sugar on top and let sit for 10 minutes, or until the yeast begins to foam. Mix in the salt and half the flour. Add the rest of the flour one cup at a time, just until the dough holds together. Knead the dough well (either by hand or in a standing mixer), adding flour as necessary until the dough is smooth and shiny. You may need more or less flour than called for in the recipe.

Put the kneaded dough in an oiled bowl to rise, cover the bowl with plastic wrap and a dish towel, and put it in a warm spot. Let the dough rise for 1 hour, or until it has doubled in size.


Preheat the oven to 500°F.

Divide the dough into 12 pieces and pat each piece into a 6” round flatbread. Place the flatbreads on baking sheets with rims; 6 dough rounds fit on a half-sheet pan. Use your fingers to dimple the tops of each flatbread. Let the flatbreads rest for 20 minutes.

Make the Topping: Mix together the olive oil and Za’atar Herb Blend.

Assemble and Bake the Flatbreads: Dimple the flatbreads one more time. Divide the topping between the flatbreads, about 1 Tbsp. each, and spread it evenly over the flatbreads’ tops. Bake the flatbreads, one baking sheet at a time, for 8-10 minutes, or until the flatbreads are golden. Serve immediately.

Note: Mana’eesh can be made ahead and rewarmed just before serving. To rewarm, stack the Mana’eesh, topping side to topping side, and wrap in aluminum foil. Put in a 300°F oven for 5-10 minutes, or until they are warmed through.

Za'atar with LabnehZa’atar with Labneh (Yogurt Cheese)
Makes 3/4 cup

Plain Labneh goes really well with Za’atar Flatbreads. For garlic fans, mix 1-2 cloves puréed garlic into the cheese (an easy way to purée the garlic is with a
standard Microplane rasp grater). Usually, I let the yogurt drain into the sink. If I’m feeling ambitious, I let it drain into a bowl and use the liquid to replace some of the water when I’m making bread dough.

2 cups plain yogurt, preferably whole milk
Pinch of salt
Za’atar Herb Blend (see recipe above)
Olive oil (optional)

Line a strainer with a paper towel. Mix a little salt into the yogurt and dump the salted yogurt into the paper-towel-lined strainer. Let the yogurt drain for 4 hours or overnight.

Spread the yogurt on a plate, sprinkle with Za’atar Herb Blend to taste, and drizzle with olive oil (if using). Serve with crackers, pita chips, or triangles of pita bread.

Za'atar PizzaZa’atar Pizza
Makes 12”-15” pizza
Extra Za’atar Tomato Sauce is a great way to dress up grilled chicken, lamb, or pork (see recipe below); it also may be frozen for future pizzas. The amount of Aleppo or red pepper depends on how spicy you like your food. Pick either Topping#1 or Topping #2 or, if you want to try them both, make the full amount of Za’atar Flatbread dough.

1/2 recipe Za’atar Flatbread dough (see recipe above)

Za’atar Onion Topping (Topping #1):
1/2 cup thinly sliced onions
1/4 cup chopped parsley
2 Tbsp. olive oil
2 Tbsp. Za’atar Herb Blend (see recipe above)
2 tsp. minced garlic
1/4 – 1/2 tsp. Aleppo pepper or 1/8 – 1/4 tsp. crushed red pepper (optional)
1/2 cup crumbled feta cheese

Za’atar Tomato Sauce (Topping #2) (makes enough sauce for 2 pizzas):
1 14.5 ounce can diced tomatoes, preferably fire-roasted
2 tsp. finely minced or puréed garlic
2 Tbsp. Za’atar Herb Blend (see recipe above)
1/2 – 1 tsp. Aleppo pepper or 1/4 – 1/2 crushed red pepper (optional)
1 Tbsp. olive oil
1/2 cup water or white wine
Salt
Freshly ground black pepper
1/2 cup thinly sliced onions
1/2 cup crumbled feta cheese

Shape the Pizzas: Shape the dough into a 12-15” round; the exact size depends on how thick you like your pizza crust. Place the dough on a pizza pan or baking sheet with rims. Use your fingers to dimple the top of the pizza, and let it rest for 20-30 minutes.

Preheat the oven to 500°F.

To Make Topping #1: Mix together all the topping ingredients except the crumbled feta.

To Assemble Pizza with Topping #1: Spread the topping mix over the pizza. Sprinkle the crumbled feta over the topping.

To Make Topping #2: In a saucepan, mix together the tomatoes, garlic, Za’atar Herb Blend, Aleppo pepper, olive oil, and water or wine. Bring to a boil, turn down the heat, and simmer for 15 – 20 minutes, or until the sauce is very thick. Taste and add salt or freshly ground black pepper, as needed.

To Assemble Pizza with Topping #2: Spread half the tomato sauce over the pizza to cover it (use more if you like saucy pizzas). Save any extra tomato sauce for another purpose. Evenly distribute the onions over the tomato sauce and sprinkle with crumbled feta.

Bake the Pizza: Turn the oven down to 450°F. Bake the pizza for 25-30 minutes or until the crust is nicely golden. Serve immediately.

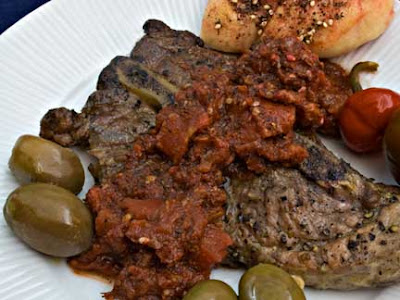
Za'atar Tomato Sauce and Grilled PorkGrilled Pork Steak with Za’atar Tomato Sauce
Serves 4

Za’atar Tomato Sauce goes equally well with grilled lamb or chicken. The sauce is identical to the one used for Za’atar Pizza (see recipe above). For the same reason that brining improves the flavor of pork chops, salting meats well in advance of grilling makes them taste much better. If you can only find large pork steaks, buy 2 and cut them in half.

Meat:
4 pork steaks
Salt
Freshly ground black pepper

Za’atar Tomato Sauce:
1 14.5 ounce can diced tomatoes, preferably fire-roasted
2 tsp. finely minced or puréed garlic
2 Tbsp. Za’atar Herb Blend (see recipe above)
1/2 – 1 tsp. Aleppo pepper or 1/4 – 1/2 crushed red pepper (optional)
1 Tbsp. olive oil
1/2 cup water or white wine
Salt
Freshly ground black pepper

Prepare the Meat: Rinse the steaks and dry well. Season both sides with salt and plenty of freshly ground black pepper. Let sit at room temperature while you make the sauce.

Make the Tomato Sauce: In a saucepan, mix together the tomatoes, garlic, Za’atar Herb Blend, Aleppo pepper, olive oil, and water or wine. Bring to a boil, turn down the heat, and simmer for 15 – 20 minutes or until the sauce is the thickness you prefer. Taste and add salt or freshly ground black pepper, as needed.

Cook the Meat: Grill the pork steak over a medium hot fire or in a grill pan on top of the stove. Turn the meat regularly until it is just done; be careful not to overcook it. Serve immediately with Za’atar Tomato Sauce spooned over.
~~~~~~~~~~~~~~~~~~~~~
This is my entry for
Weekend Herb Blogging, which I am hosting this week at Mediterranean Cooking in Alaska.

Saturday, November 22, 2008

Recipe for Pear Pecan Cake with Lemon Glaze (Κέικ με Aχλάδια και Πεκάν)
Pear Pecan CakeWhen I was growing up, cupcakes were a homey lunchbox treat. They weren’t seen in upscale bakeries or on fancy tables.

That all changed in 1996 when New York City’s
Magnolia Bakery started making cupcakes with extra cake batter. After Magnolia’s cupcakes were featured on Sex and the City, it set off a nationwide cupcake craze. Cupcakes’ popularity continues; Barack Obama recently gave Joe Biden a dozen for his birthday.

In 1999, the owners of Magnolia Bakery, Allysa Torey and Jennifer Appel, published
The Magnolia Bakery Cookbook: Old-Fashioned Recipes from New York’s Sweetest Bakery. The slim volume is filled with old-fashioned recipes for cake, cookies, and other desserts, all made with the best possible ingredients.

Last week, I had ripe pears that needed to be used immediately. Magnolia Bakery’s Pear Pecan Cake seemed a wonderful way to use them. I modified the original recipe by adding grated lemon peel to the batter and finishing the cake with a light lemon glaze. The clear lemon flavor balances the pear cake’s richness.

Pear Pecan Cake with Lemon Glaze is moist and delicious. With a cup of hot coffee or tea, it makes a decadent breakfast or mid-morning snack.

Pear Pecan CakePear Pecan Cake with Lemon Glaze (Κέικ με Aχλάδια και Πεκάν)
Adapted from
The Magnolia Bakery Cookbook
The batter for this cake is thicker than normal cake batter, so don’t worry if you can't pour it. Apples may be substituted for the pears, and walnuts may be used instead of pecans.


Cake:
2 – 3 ripe pears (2 cups chopped)
3 cups all-purpose flour
2 cups sugar
1/2 tsp. baking soda
1/2 tsp. salt
1 cup plus 2 Tbsp. vegetable oil
3 eggs
1 tsp. vanilla extract
1 Tbsp. freshly grated lemon peel
1 1/3 cups coarsely chopped pecans

Glaze:
2 cups powdered sugar
3 – 4 Tbsp. lemon juice

Preheat the oven to 350°F.

Thoroughly oil a Bundt or tube pan. After it’s oiled, if the pan isn’t nonstick, lightly flour it to ensure the cake will properly release from the pan.

Peel and quarter the pears. Remove the core, cut each quarter in half lengthwise, and then cut each slice in crosswise pieces.

Sift together the flour, sugar, baking soda, and salt. Stir the oil, eggs, and vanilla extract into the dry ingredients. Fold in the chopped pears and pecans. Evenly spoon the batter into the prepared pan, lightly smoothing out the top. Bake for 60 minutes or until a thin skewer inserted into the middle of the cake comes out clean. Let the cake cool in the pan for 20 minutes, turn the cake upside down onto a wire rack to release it, and finish cooling the cake.

Mix the powdered sugar and 3 Tbsp. lemon juice in a small bowl. If the glaze is too thick, mix in the remaining lemon juice. Spoon the glaze over the very top of the cake so that it drips down the sides and center of the cake.

Slide the cake onto a serving plate. To store, cover the cake with aluminum foil.


~~~~~~~~~~~~~~~~~~~~~~~
Nuria, who writes
Spanish Recipes from Barcelona, Spain and Maryann of Finding La Dolce Vita from the state of New York are two of the world’s nicest people. Both are excellent cooks. At their requests, I’ve completed a know-your-fellow-bloggers meme. For those whose blogs I’ve named below, if you want to complete the meme on your blog, feel free, but please don’t feel obligated, to do so. Here goes:

Who are the last 10 people who commented on your blog?

10) Peter from Souvlaki for the Soul
9) Joan from FOODalogue: Meandering Meals and Travels
8) Maria from Organically Cooked
7) MAG from Hommus & Tabbouli
6) Lydia from The Perfect Pantry
5) Maryann from Finding La Dolce Vita
4) Mariana from History of Greek Food
3) Bijoux from
Keep It Simple
2) Kalyn from Kalyn’s Kitchen
1) Susan from The Well-Seasoned Cook

Now answer the following:

1. Has number 10 taken any pictures that moved you? Peter at Souvlaki for the Soul takes some of the best pictures in the food blogosphere. His moody pictures of the Acropolis may be the best I’ve ever seen of this well-photographed site.

2. Have you ever tried something from number 9's blog? I only recently learned about Joan’s blog. As someone who grew up eating Pigs in a Blanket and who loves greens of all kinds, I want to try Joan’s recipe for “This Ain’t Yo Mama’s Pigs in a Blanket.” It looks wonderful.

3. Do you wait excitedly for number 8 to post? Yes. Maria of
Organically Cooked is one of my favorite writers; as a storyteller she is without peer among food bloggers.

4. If you could give one piece of advice to number 7 what would it be? MAG’s Lebanese recipes at
Hommus & Tabbouli are mouth-wateringly good. She doesn’t need any advice; MAG knows what she's doing!

5. Does number 6 reply to comments on her blog? Yes, Lydia does reply to comments left on
The Perfect Pantry. She also gives us a weekly peek into other people’s pantries, a series I find endlessly entertaining.

6. How did number 5's blog change your life? When
Finding La Dolce Vita had its first anniversary, Maryann did a drawing for an anniversary present that I was lucky to win. The package included a pizza chopper that has revolutionized how I cut up pizzas and tarts. Thanks Maryann!

7. How often do you comment on number 4's blog? I comment on most, if not all, posts on Mariana’s blog,
History of Greek Food.

8. What is your favorite post from number 3's blog? Bijoux of Keep It Simple helps keep me current on modern design trends. Her latest post on a
cutting-edge Japanese product is my current favorite.

9. Where is number 2 from? Kalyn of Kalyn’s Kitchen is from Salt Lake City, Utah.

10. Has number 1 blogged something that inspired you? Pretty much everything Susan of The Well-Seasoned Cook puts on her blog is inspirational. Her photographs jump off the screen and her descriptions of food are smoothly creative.

11. Do you know any of the 10 bloggers in person? Yes, I know Maria from Organically Cooked.

12. Do any of the 10 bloggers know each other in person? Yes, Kalyn and Lydia met at this year’s BlogHer conference. Maria from Organically Cooked and Mariana from History of Greek Food are friends. If others know each other, it’s news to me.

13. Out of the 10, who updates her blog most frequently? Kalyn of Kalyn’s Kitchen, Queen Mother of Weekend Herb Blogging, updates most frequently.

14. Which of the 10 makes you laugh? Maria’s quirky sense of humor is just one of the reasons I keep going back to Organically Cooked.

15. Which of the 10 makes you cry (good or bad tears)? Cry? Why in the world would I cry when reading about good food and looking at pictures that make my mouth water?
~~~~~~~~~~~~~~~~~~~~
This is my recipe for Bookmarked Recipes, hosted and created by Ruth of Ruth’s Kitchen Experiments.


Tuesday, July 29, 2008

Garden Treasure with 4 Recipes for Arugula: with Eggs, in Salads, and in Pasta Sauce (4 Συνταγές για Ρόκα)

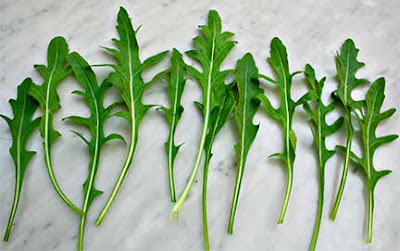
Arugula SelveticaArugula (also known as Roka, Roquette, and Rocket) wins my garden’s miracle plant of the year award.

We’ve grown arugula often over the years. We usually get a salad or two before it bolts; a common problem in Alaska. With our long days, nearly 20 hours of daylight at the solstice, many herbs and green vegetables go to seed prematurely.

Despite its tendency to bolt, we grow arugula because we enjoy its bite in salads. Last year, the arugula followed its typical pattern: two salads at the beginning of summer and it bolted. I assumed that was it. I was wrong.

This spring, after the snow melted, we noticed radicchio we’d harvested last year, but hadn’t pulled up, coming back. In the same bed, mystery plants were emerging; they had tiny green leaves growing around slender dead stalks.

We had no idea what they were (I guessed domesticated Italian dandelions we grew last year in the same bed), but let them grow so we could find out. As the plants grew larger, I realized last year’s arugula had wintered over.

I was initially confused, as I’d thought arugula was an annual (Eruca vesicaria subspecies sativa). Although I'd only grown annual arugula, it turns out “arugula,” actually refers to three separate plants: E. vesicaria ssp. sativa, Diplotaxis tenuifolia, and Diplotaxis muralis.

Last year we planted arugula seeds brought back from Greece. When I dug out the seed packet, I discovered it was Diplotaxis tenuifola, also known as wild arugula or Selvetica, an extremely cold hardy perennial (as plants must be to survive Alaskan winters). I’m thrilled to have stumbled upon it, and will give it a permanent place in my garden.

Arugula in the GardenMost commonly I use arugula in mixed green salads, or on its own with blue cheese and best quality balsamic vinegar. This year the arugula was so prolific I branched out. Arugula, briefly sautéed with shallots, adds a nice bite to omelets and frittatas. Mixed with tomatoes and anchovies, it makes a delicious pasta sauce.
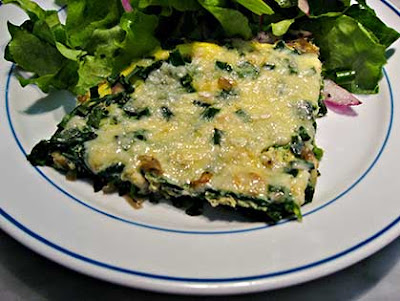
My mother, upon hearing of my arugula glut, recommended the wonderful Arugula and Tomato Salad from Carol Field’s
In Nonna’s Kitchen: Recipes and Traditions from Italy’s Grandmothers. Mother was right; arugula goes really well with tomatoes.

Anchovies are the secret ingredient that makes both the salad and pasta sauce special. When minced and incorporated into other ingredients, anchovies add flavor without overwhelming the taste buds.

More Arugula Recipes:
Grilled Radicchio and Arugula Salad with Parmesan Shavings
Watermelon, Feta, and Arugula Salad

Arugula and Eggs
Arugula and Eggs
Serves 2 – 4


4 large eggs
1 cup diced shallots, 1/4” dice
Salt
Freshly ground black pepper
1 Tbsp. olive oil
4 packed cups cleaned arugula
3/4 grated kasseri or fontina cheese
1/4 cup minced chives

Crack the eggs in a bowl, season lightly with salt and freshly ground black pepper, and whisk to combine.

Sauté the shallots, lightly seasoned with salt and freshly ground black pepper, in olive oil until they soften and start to turn golden. Add the arugula, in batches if necessary, and cook just until all the arugula has wilted.

Evenly distribute the arugula in the pan and pour the eggs over. Cover and turn the heat down to low. Keep checking the eggs and when they’re almost-but-not-quite set, sprinkle the cheese and minced chives over, cover, and cook until the cheese melts.

Sprinkle with freshly ground black pepper, cut into wedges, and serve.

Arugula and Tomato Salad
Serves 4

Adapted from In Nonna’s Kitchen: Recipes and Traditions from Italy’s Grandmothers by Carol Field (HarperCollins 1997)
Lightly salting the tomatoes helps bring out their flavor, but be careful not to overdo as anchovies can be quite salty. I made this with the smaller amount of anchovies, but we both thought it would benefit from more; next time I’ll use the larger amount. I originally made this with whole anchovies, as shown in the picture, but we prefer the salad when the anchovies are minced in the dressing. Either way, it's tasty.

8 medium tomatoes, sliced 1/2” thick
Salt
1/4 cup olive oil
2 Tbsp. red wine vinegar
Freshly ground black pepper
8 - 16 anchovy fillets (1 - 2 ounces)
2 cups thinly cut shreds of arugula

Divide the tomato slices between 4 salad plates and salt lightly. Whisk the olive oil into the red wine vinegar and season with freshly ground black pepper. Mince the anchovy fillets and mix them into the dressing. Taste and add freshly ground black pepper or salt as needed. Toss the dressing and arugula (there may be leftover dressing), and mound on the tomatoes. Serve immediately.

Arugula, Blue Cheese, and Balsamic Salad
Serves 4

I never tire of this tasty salad. Because there are so few ingredients, it’s important to use best quality balsamic vinegar.

4 packed cups arugula
1/2 cup thinly sliced red onion
1/4 crumbled Roquefort or other blue cheese
2 Tbsp. extra virgin olive oil
1 Tbsp. best quality balsamic vinegar
Salt
Freshly ground black pepper

Wash and dry the arugula and tear large leaves into pieces. Add the arugula, red onion, and half the blue cheese to a salad bowl. Whisk together the olive oil, balsamic vinegar, salt, and freshly ground black pepper. Toss the dressing with the salad ingredients. Taste and add more balsamic vinegar, if needed. Sprinkle with the remaining blue cheese, grate freshly ground black pepper over the salad, and serve.

Arugula, Anchovy, and Tomato with OrecchietteArugula, Anchovy, and Tomato Sauce with Orecchiette
Serves 4
This recipe calls for a large quantity of arugula, which I measured after it had been cleaned and roughly chopped. If you don’t have arugula, dandelions or other wild greens are the best substitute; the dish may also be made with radicchio, Swiss chard or spinach. Toast the pine nuts in a 350°F oven or dry frying pan. In either case, pine nuts burn easily and must be watched carefully as they cook. Onions cook more evenly when lightly salted before sautéing, however, anchovies are salty so be sure not to over-salt the onions.

1/2 pound dried
orecchiette or any other pasta
2 cups diced onion, 1/2” dice
2 Tbsp. extra virgin olive oil
Salt
Freshly ground black pepper
16 anchovy fillets (2 ounces)
1 Tbsp. minced garlic
1 tsp. Aleppo pepper or 1/2 tsp. red pepper flakes
1/2 pound cleaned and roughly chopped arugula or other strong-flavored greens
2 cups diced fresh tomato, 3/4” dice
1/3 cup water
1 cup chopped green onions
3/4 - 1 cup freshly grated parmesan cheese
1/4 cup toasted pine nuts

Cook the pasta in boiling, salted water and cook until it is al dente. Drain the pasta and toss with a little olive oil.

Sauté the onions, lightly seasoned with salt and freshly ground black pepper, in olive oil until they soften and start to turn golden. Add the anchovies, garlic, and Aleppo pepper and cook for one minute. Stir in the arugula, tomatoes, and water, and cook for 3 minutes. Add the cooked pasta and green onions, and cook just until the pasta is warmed through. Toss with 1/2 cup cheese and half the pine nuts. Sprinkle with the remaining cheese and pine nuts and serve immediately.

~~~~~~~~~~~~~~~~~~~~~~~~~~~~~~
This is my entry for Weekend Herb Blogging, hosted this week by Kelly from Sounding My Barbaric Gulp.

Wednesday, May 21, 2008

How to Harvest Fireweed Shoots with Recipe for Fireweed Shoot Omelet


Fireweed After the FireAfter the Fire: Destruction Bay, Yukon Territories, Canada
Photograph by Teeny Metcalfe

Fireweed shoot season is upon Southcentral Alaska.Fireweed (Epilobium angustifolium) grows along Alaska’s roadways and waste areas (and throughout North America as far south as California in the west and the Carolinas in the east). Spreading rapidly on underground runners, fireweed is one of the first plants to reestablish itself after forest fires.

Fireweed’s brilliant magenta flowers brighten Alaska’s summer landscape and, in the kitchen, are an attractive salad garnish. The flowers are also the source of fireweed honey, a popular Alaskan sweetener.


Fireweed Shoots


Mediterranean Cooking in Alaska has moved as of March 2011. To read this post please go to


http://www.laurieconstantino.com/how-to-use-and-harvest-fireweed-shoots/


Please click on over and visit my new site. Thank you!


(Coming Soon: I just checked the woods and, as of today, the Devil’s Club is ripe for picking.) UPDATE: My post on harvesting and preparing Devil's Club is here.


Fireweed Shoot OmeletFireweed Shoot OmeletServes 2
For 2 people, I prefer making 1 omelet in a large pan and cutting it in half, but you can also make 2 individual omelets in a smaller pan. To clean fireweed shoots, trim off any browned or damaged bits, and cut into 1” lengths. Taste, and if the fireweed shoots are bitter, blanch them in boiling, salted water before starting the recipe.


Mediterranean Cooking in Alaska has moved as of March 2011. To read this post please go to


http://www.laurieconstantino.com/how-to-use-and-harvest-fireweed-shoots/


Please click on over and visit my new site. Thank you!

Sunday, May 18, 2008

Recipe: Eggs Rockefeller with Dandelion Greens and Hollandaise

Living so far from our families, we’re nostalgic on Mother’s Day. We call and send flowers, but always wish we could be together in one place. To feel closer to our mothers, we do something special on Mother’s Day.

Last Sunday, we celebrated by making Eggs Rockefeller with Dandelion Greens and Hollandaise. To toast our mothers, we had
Bloody Marys (one of them virgin, one not), the perfect drink for eggs served with buttery hollandaise.

If you’ve never tried
dandelion greens, they have wonderful flavor when picked before the flower buds form. For information about gathering dandelions and other wild greens, go to my How to Harvest Wild Greens post.

For those who don’t have the time or inclination for dandelions, use spinach instead, the green used in many “Rockefeller” preparations. If you don’t like spinach, use Swiss chard. Or nettles. Or whatever leafy greens strike your fancy.

Hollandaise sauce is a breeze to make in a blender. For as long as I’ve been cooking, I’ve used the blender hollandaise recipe in The Joy of Cooking (a classic American cookbook) that was given me when I first moved out on my own. This recipe has never failed; it makes perfect hollandaise every time.

Eggs Rockefeller with Dandelion Greens and Hollandaise
Serves 2

Well-flavored greens, flavored with a hint of fennel, are a terrific counterpoint to runny egg-yolks and rich hollandaise. Any tender greens, wild or domesticated, may be used instead of dandelions.For special occasions, serve with a Bloody Mary or Mimosa.

1 pound dandelion greens (uncleaned) or 1 bunch spinach
1 cup diced onions, 1/4” dice
Salt
Freshly ground black pepper
2 Tbsp. olive oil
2 tsp. minced garlic
1/2 tsp. freshly crushed fennel seed
4 slices artisan-style bread or 2 English muffins
4 eggs
Blender Hollandaise Sauce (see recipe below)
Pinch of cayenne pepper

Wash the dandelions very carefully. Discard any tough or damaged leaves, stems, roots, and the tiny flower bud often found in the very center of even young dandelions.

Bring a pot of salted water to a boil. Stir in the cleaned dandelions and cook for 1 minute. Using a slotted spoon, remove the greens into a bowl of cold water. (Reserve the hot cooking water for poaching the eggs.) Drain the greens. Pick up a handful of drained greens and, using your hands, squeeze as much water out of them as you can. Continue with the remaining greens. Chop the greens.

Sauté the onions, lightly seasoned with salt and freshly ground black pepper, in olive oil until they soften and start to turn golden. Stir in the garlic and crushed fennel; cook for 1 minute. Stir in the chopped greens and toss to thoroughly combine. Cook for 5 minutes, stirring occasionally, until the liquid in the greens has evaporated. Keep warm while you make the eggs.

[For the hollandaise, put the egg yolks etc. in the blender container, and start melting the butter.] Toast the bread or English muffins.

Bring the greens cooking water to a simmer. Crack the eggs into 4 separate small bowls. Slip the eggs into the simmering water. [While the eggs are cooking, finish the hollandaise by blending hot bubbling butter into the egg yolks.]

When the simmering eggs are just set (be sure not to cook the yolks hard), remove them from the water with a slotted spoon. Drain the eggs briefly on paper towels.

Assemble: Place two slices of toast on a plate. Top each piece of toast with the cooked dandelion greens. Put a poached egg on top of the dandelions and pour a ribbon of hollandaise on top of the eggs. Sprinkle with a pinch of cayenne and serve immediately.

Blender Hollandaise Sauce
Makes 1 cup
Adapted from
The Joy of Cooking by Irma S. Rombauer and Marion Rombauer Becker (1964 edition)
The sauce must be hot when served; either make it at the very end or keep it warm by putting the blender container in warm (not hot) water. This makes enough for 3 servings of Eggs Benedict or Rockefeller and I usually only make it for 2. I’ve tried making a smaller amount and it doesn’t work; without the full amount of bubbling hot butter, there isn’t enough heat to cook the eggs. Leftover hollandaise makes a terrific sauce for asparagus or other green vegetables. To use leftover hollandaise, slowly reheat the sauce in a water bath.

3 egg yolks
2 Tbsp. lemon juice
Pinch of cayenne pepper
1/4 tsp. salt
1/2 cup butter (1 stick)

Put the egg yolks, lemon juice, cayenne, and salt in a blender. Melt the butter until it is hot and bubbling (this is easiest to do in a microwave). Blend the egg yolks on high for a few seconds, and then pour in a steady stream of hot bubbling butter. The hollandaise should now be done; if it isn’t thick enough, continue to blend for a few more seconds. If the sauce is too thick add a tiny amount of lemon juice or water. Taste and add salt, cayenne, or lemon juice as needed.

~~~~~~~~~~~~~~~~~~~
This is my entry for Weekend Herb Blogging, hosted this week by Gay from A Scientist in the Kitchen.