Friday, November 30, 2007

Recipe: Wild Greens with Celery-Mint Tomato Sauce (Tsigareli / Τσιγαρέλι)

On Corfu, one of Greece's Ionian Islands, residents enjoy wild greens cooked with hot peppers. The spicy greens are called Tsigareli and are served hot (in Greece, many dishes using wild greens are served at room temperature). The dish is so beloved that Corfiot restaurants attract customers by bragging about their Tsigareli.

Located off the southwestern coast of Albania, Corfu was for many years a Venetian colony, and a stop on Venetian trade routes from the Middle East. That heritage is reflected in Corfu’s traditional dishes, including Tsigareli.


Most peasant dishes are made without formal recipes. As a result, a single, correct way to make them doesn't exist. So it is with Tsigareli, whose name comes from the Greek verb “tsigarizo” (τσιγαρίζω) meaning to sauté or brown.

Greens for TsigareliToday in Corfu, Tsigareli is usually made with a selection of blanched wild greens and spicy tomato sauce. Traditionally, tomatoes were not used, and the dish got its color from dried red peppers
. Some recipes for Tsigareli include ground meat, some ignore tomato sauce and use potatoes and cayenne pepper for flavor, and still others sweeten the tomato sauce with carrots.

Aglaia Kremezi, a respected Greek cookbook author, suggests adding rice to Tsigareli, or serving it over Polenta with Currents and Onions. Either would make a hearty main course.
Another well-known Greek writer, Diane Kochilas, suggests flavoring it with fennel bulb and fennel seeds.

In all recipes, the major components of Tsigareli are mixed greens, hot spices, and abundant herbs. These ingredients can be adjusted with the seasons, or to suit personal tastes. The dish can be served as an appetizer, a side dish, or an entree. Tsigareli is best made with wild greens, but when they aren’t available, it is delicious made with supermarket greens.

For a tasty vegan main course, follow Aglaia Kremezi’s recommendation and serve Tsigareli with a starch like rice or polenta. To accompany fish, make it with less tomato sauce and sweeter greens. Lamb is complemented by strong-flavored greens in a rich, hearty tomato sauce.

Leaf (Chinese) celery enhances Tsigareli, and I add it in two stages to better accentuate its flavor. Ordinary supermarket celery is fine for this dish, although it has a milder taste than leaf celery. For more information about leaf celery, go
here.

Aleppo pepper is a fruity and moderately spicy red chili pepper sold in crushed flakes. It originally came from Syria, but now may be imported into the United States from Turkey. Supermarket crushed red pepper is a spicier and less flavorful substitute for Aleppo pepper; one-half teaspoon of crushed red pepper substitutes for one teaspoon Aleppo pepper. Aleppo pepper is available from
Penzey’s, The Spice House, and World Spice Merchants.
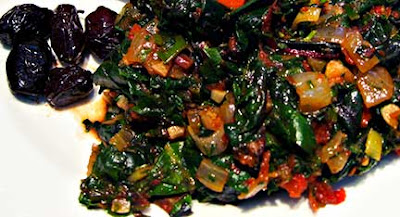

TsigareliWild Greens with Celery-Mint Tomato Sauce (Tsigareli / Τσιγαρέλι)
Serves 4 - 6
Tsigareli tastes best when made with a mixture of different kinds of greens. Use the larger amounts of Aleppo or crushed red pepper only if you enjoy spicy food. The tomato sauce used in this recipe is excellent when

served over ravioli or other stuffed pasta, instead of with greens.

Greens:
4 bunches of various greens (kale, spinach, Swiss chard, escarole, mixed wild greens) to equal 4 cups of blanched, chopped greens
Salt
Freshly ground black pepper

Tomato Sauce:
4 cups diced onions, 1/4” dice
3/4 cup finely sliced stalks from leaf celery (or 3/4 cups diced celery, 1/4” dice)
1/3 cup olive oil
Salt
Freshly ground black pepper
1 – 2 tsp. Aleppo pepper or 1/2 – 1 tsp. crushed red pepper
2 Tbsp. minced garlic
1 14.5-ounce can crushed tomatoes
3/4 cup dry white wine
1 cup water
3/4 cup finely shredded leaves from leaf celery (or 3/4 cup minced parsley)
3 Tbsp. minced mint

Prepare the Greens: Wash the greens and remove any damaged portions. If using greens with sturdy but edible stems, like beet greens or chard, cut off the stems and chop them into bite-sized pieces. Tough stems, like those on kale, should be discarded.

Blanch the stems and greens in boiling, salted water, adding the stems first, then sturdy greens like beets or kale, and finally tender greens like spinach or escarole. As soon as the tender greens wilt, pour the greens into a colander to drain and cool. Roughly chop the greens when they are cool enough to handle.

Make the Tomato Sauce: Sauté the onions and celery stalks in olive oil, lightly seasoned with salt and freshly ground black pepper, until the onion starts to turn golden. Stir in the Aleppo pepper and garlic and cook for one minute. Stir in the crushed tomatoes, wine, and water and bring to a boil. Cook rapidly for five minutes, stirring constantly. Turn down the heat to medium, stir in the celery leaves (or parsley) and mint, and simmer for 15 minutes.


Finish the Tsigareli: Add the drained, chopped greens to the tomato sauce, and simmer for 10 - 15 minutes or until the sauce is the thickness you desire and no longer watery. Taste and add salt and freshly ground black pepper, if needed.


Serve with crusty bread and Kalamata olives.
~~~~~~~~~~~~~~~~~~~~~~~~~~~~~~~~~~
This is my entry for Vegan Ventures organized by Tasty Palettes.

Thursday, November 29, 2007

Recipe: Baked White Beans with Tuna and Sage (Φασόλια με Τόννο και Φασκόμηλο)


We all have kitchen standbys: recipes we’ve cooked a hundred times and can throw together without thinking. Standbys are delicious and turn out well even when we’re tired or inattentive.

Tuna & Beans IngredientsOne of my standbys is white beans, baked with olive oil, garlic, sage, tuna, and lemon juice. I’ve never been disappointed by baked tuna and beans, and rely on it when refrigerator shelves are bare. It is made entirely with pantry staples and takes 10 minutes to put together and less than an hour to bake.

I usually make Baked White Beans with Tuna and Sage using canned cannellini beans, but have also made it with Great Northern or navy beans. For tuna, I prefer canned albacore packed in water, but any kind of tuna will do. The only ingredients I use each and every time are fresh lemons and fresh garlic; their bright flavors are necessary to the recipe’s success.

During winters past, I’ve relied on dried rubbed sage to enhance the tuna and beans, but this year we brought sage in from the garden. It’s growing in the bedroom along with parsley, rosemary, thyme, and the geraniums that have been blooming since late May.

Growing Bedroom PlantsWhen people hear we live in Alaska, they want to know how we survive the cold. For me, the cold is a minor inconvenience; short winter days and too much darkness take more of a toll.

To combat winter blues, I moved live herbs and flowers into the bedroom. They reside on stainless shelves, with grow lights on a timer set for 6:30 in the morning. I wake up to bright lights and green plants, starting my day in a better mood than when I used to wake in a pitch black room. The bonus is having fresh herbs for cooking. It’s well worth the extra electricity.

Baked White Beans with Tuna and Sage (Φασόλια με Τόννο και Φασκόμηλο)
Serves 3 – 4

2 15.5-ounce cans cannellini or other white beans
2 6-ounce cans albacore or other tuna
2/3 cup olive oil
1 Tbsp. minced garlic
3 - 4 Tbsp. minced fresh sage, or 1 – 2 Tbsp. dried rubbed sage
Salt
Freshly ground black pepper
1/3 cup fresh lemon juice

Preheat the oven to 400°F.

Drain the beans into a strainer and rinse them well. Drain any oil or water from the tuna.

In a 10” x 10” glass baking pan, mix the beans, olive oil, garlic, half the sage, salt, and freshly ground black pepper. Cover the pan with foil, and bake for 20 minutes. Remove the foil, and bake for 10 minutes. Remove the beans from the oven.

Stir the tuna, lemon juice, and remaining sage into the hot beans; break the tuna into bite-sized pieces as you stir. Return the pan to the oven and bake for 10 minutes. Taste, and add sage, lemon juice, salt, or freshly ground black pepper, as needed. Bake for 5 more minutes.

Serve with olives, feta cheese, pickled peppers, and crusty bread.


~~~~~~~~~~~~~~~~~~~~~~~~~~~~~

This is my entry to the "Grow Your Own" event hosted by Andrea's Recipes.

Tuesday, November 27, 2007

Onion Day Recipes: Winter Squash with Onions (Κολοκύθι Κόκκινο με Κρεμμύδι) and Leek Pilaf (Πρασόρυζο)

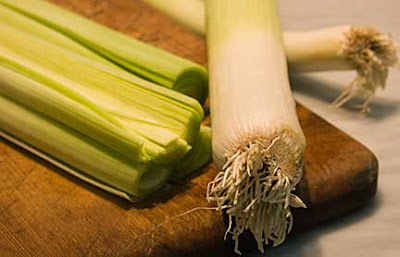
LeeksBetween Thanksgiving feasting, leftovers, and dinner out at a steakhouse, we’ve been eating entirely too much meat. Or at least more meat than normal.

I’m ready for vegetables. Thanks to my CSA box from Full Circle Farm, all I had to do for inspiration was open the refrigerator.

Delicata SquashGiant leeks caught my eye first: four leeks, weighing a little over a pound each. I also noticed Delicata squash, a mild-tasting, thin-skinned heirloom variety that had been in the refrigerator a couple weeks. The skin was shiny and the flesh was firm, but it was time to cook the Delicata.

The traditional onion market (Zibelemärit) opens November 26 in Berne, Switzerland. Zorra of Kochtopf blog decreed the 26th to be Onion Day, and challenged cooks around the world to use onions in honor of the market. I decided to take up the challenge and showcase Delicata squash, onions, and leeks, a member of the onion family.

Kimolos, a tiny Greek island in the Aegean Sea, is part of the Cyclades island group. In 2001, less than 800 people lived on its 20 square miles. That year, Filena Venardou, who came to Kimolos as a teacher, published a book of traditional recipes from Kimolos: Η Κουζίνα της Κιμώλου (The Cuisine of Kimolos).

Winter Squash with Onions (Κολοκύθι Κόκκινο με Κρεμμύδι) is one of the traditional recipes Venardou collected. She says winter squash is much tastier than summer squash, and the Kimolos method of cooking it in hot oil gives the squash a crispy crust and seals in its juices.

I adapted Venardou’s recipe using Delicata squash and finished the fried squash and onions with a dusting of the dried wild thyme we collected last summer in Greece. The resulting dish, which must be served hot, was robust and filling. It would be a good side dish for any kind of meat or poultry, although Venardou suggests serving it as an appetizer and we enjoyed it as an Onion Day main course.

Chopping LeeksTo round out the meal, I made Leek Pilaf (Πρασόρυζο), an easy and flavorful Greek dish enjoyed during the many fasting periods that fill the Greek Orthodox calendar. The light, herby flavors of dill and mint contrasted nicely with the rich flavors of fried squash and onions.

Since it is difficult for me to cook without using onions or garlic, it is fitting that Onion Day closes my first month of serious food blogging. It is also the day on which the thousandth visitor stopped by my blog. Happy Onion Day!

Squash&Onions and PrasorizoWinter Squash with Onions (Κολοκύθι Κόκκινο με Κρεμμύδι)
Serves 4 - 6
Delicata squash is easily peeled with a sturdy vegetable peeler. After peeling the squash, cut it in half, use a spoon to scrape out the stringy centers and seeds, and dice the flesh.

3 cups diced Delicata or other winter squash, 3/4” dice (approximately one squash)
4 cups diced yellow onions, 3/4” dice
3/4 cup flour
Salt
Freshly ground black pepper
1 tsp. dried thyme, crushed
Oil for frying

Put the diced squash and onions in a bag with the flour, salt, and freshly ground pepper. Shake the bag around so the flour evenly coats the vegetables. Dump the floured vegetables into a strainer and shake the strainer to remove the excess flour.

Heat 1/2” of olive oil in a large frying pan until it is very hot, but not smoking. Add 1/3 of the floured squash and onions to the hot oil, and fry until the undersides are browned. Turn the vegetables over, and brown the other side. Using a slotted spoon, remove the vegetables from the oil and place on paper towels to drain. Repeat with the remaining vegetables, being careful not to crowd them in the frying pan, or they will steam rather than brown.

Sprinkle the crushed dried thyme over the browned vegetables, taste and add salt or freshly ground black pepper, as needed.

Leek Pilaf (Πρασόρυζο)
Serves 6
Leek pilaf is good on its own, or as a tasty accompaniment to any kind of fish, seafood, or poultry. Before dicing leeks, be sure to slit them lengthwise and clean thoroughly under running water to remove the dirt and grime that often is trapped between the leek’s layers.

6 cups diced leeks, white and pale green parts only, 1/2” dice (2 – 3 leeks)
1/4 cup olive oil
Salt
Freshly ground black pepper
1 cup rice
1 Tbsp. tomato paste
2 cups water
1/3 cup minced fresh dill
1/3 cup minced fresh mint

Sauté the leeks, lightly seasoned with salt and freshly ground black pepper, in olive oil until they soften and start to turn golden around the edges. Add the rice and sauté for one minute, stirring constantly to evenly distribute the leeks and oil. Add the tomato paste, and thoroughly mix it into the rice. Stir in the water, dill, and mint, bring to a boil, cover, and turn the heat down as low as possible. Cook for 20 minutes, or until the rice absorbs all the water. Turn off the heat, and let the pilaf sit covered for 15 minutes before serving. Taste and add salt or freshly ground black pepper, as needed.


Monday, November 26, 2007

Cookbook: Greek Village Bread (Χωριάτικο Ψωμί) with Recipe: Dipping Sauce for French Dip Sandwiches


On the wheat-growing Greek island where we have a home, farmers grind their crop at local mills to produce rustic, fragrant, gold-colored flour. Bread made from this is slightly sweeter and has a grainier texture than bread made with America’s gluten rich flour.

Greek Village Bread Ready for OvenYou can come close to replicating the taste of Greek Village Bread by mixing commercial semolina and bread flours. Semolina provides the flavor, and bread flour helps the bread rise and improves its structure.

The bread is wonderful fresh or toasted. When it gets stale, Greek Village Bread works well as an ingredient in Fattoush (Tomato and Bread Salad) or Skordalia (Garlic Spread).

Sunday I made French Dip Sandwiches using fresh-from-the-oven Greek Village Bread and leftover roast prime rib from Thanksgiving, shaved thin and warmed through. For the dipping sauce, I used a mixture of minced shallots, dried wild thyme, dried chipotle peppers, red wine, and beef stock.

The dipping sauce was excellent, and much better than the too-salty “jus” often served with French Dips in restaurants. Even so, fresh, flavorful Greek Village Bread is what made the sandwich special.

Greek Village BreadThe recipe for Greek Village Bread is in Tastes Like Home: Mediterranean Cooking in Alaska, as are the recipes for Fattoush and Skordalia. Tastes Like Home can be ordered here.

Dipping Sauce for French Dip Sandwiches
Makes enough dipping sauce for two sandwiches
I’ve been making this dipping sauce for so many years, I no longer remember where I originally got the idea. My husband minces the chipotles cooked in the dipping sauce, mixes them with cooked shallots left in the saucepan after pouring off the liquid (and sometimes a little horseradish), and spreads the mixture on his sandwich.

2 1/2 cups beef stock
1 cup red wine
1/2 cup minced shallots
1 tsp. dried thyme, crushed
2 dried chipotle peppers
Freshly ground black pepper
Salt

Put all the ingredients except the salt in a small saucepan. Bring to a boil, then turn down the heat to medium and cook at a slow boil until the liquid has reduced by half. Taste, and add salt or freshly ground black pepper, as needed. Remove the chipotles, and pour the dipping sauce into wide-mouth cups.

Serve the dipping sauce with thinly sliced roast beef sandwiches made with crusty bread or rolls.

Sunday, November 25, 2007

Cookbook: Giving Thanks


I spent the days after Thanksgiving selling Tastes Like Home: Mediterranean Cooking in Alaska at the Anchorage Museum’s annual craft and book fair. I saw lots of old friends and made some new ones.

Writing a cookbook and having it published can be unnerving; you send your recipes out in the world and don’t have any idea whether purchasers use and enjoy them. The feedback I received this weekend dispelled my worries.

A surprising number of people stopped by our table to say they had previously purchased Tastes Like Home and very much liked the book. I was particularly happy to hear people found the recipes clear and easy to follow.

It was a good weekend, for which I give great thanks. Ο Θεός είναι Μεγάλος.

Thursday, November 22, 2007

Thanksgiving Variations (with Recipes for Rosemary and Garlic Roasted Sweet Potatoes and Frozen Meyer Lemon Yogurt)

Thanksgiving dinners are studies in brown and white: brown turkey, brown dressing, white potatoes, brown gravy, white rolls, brown fried onions on green beans, white marshmallows on sweet potatoes. Even the pies are brown: dark brown pecan pie, beige apple pie, burnt sienna pumpkin pie, all topped with dollops of white whipped cream. Cranberry sauce can be the only vivid color on the table.

This year we decided to opt out of brown and white, and instead made a rainbow of colorful food, the brighter, the better. Orange sweet potatoes roasted in the oven with rosemary and garlic, blood red prime rib roasted at 200°F to retain its color, green beans sautéed with shallots, green lettuces and red radicchio dressed with aged balsamic vinegar and best quality olive oil. For dessert we had yellow Meyer lemon frozen yogurt topped with fresh deep fresh blueberries.

No one missed our traditional Thanksgiving dinner.

The best part about the meal is how easy it was to make. The dishes were straightforward and simple. Without complex sauces, or the need to brine a bird too big for its own good, we spent our Thanksgiving enjoying each other. Instead of stressing over getting the turkey in early enough, or whether it would dry out, or prepping ingredients for convoluted recipes, we sat by the fire counting our blessings and reminiscing about our families.

I churned the frozen yogurt during the 3 1/2 hours it took the roast to reach 130°F. When it was done, the prime rib rested for 20 minutes while I finished the meal. Since all the ingredients were trimmed and washed ahead of time, this was plenty of time to make salad, green beans with shallots, and roasted sweet potatoes.

The Meyer lemon frozen yogurt was a particular treat. Seven years ago, my husband’s brother and his wife planted a Meyer lemon tree in their South Carolina yard. This year, the tree had a profusion of lemons.


Meyer lemonsMy mother-in-law packed four of the surprisingly large, tree-ripened lemons and shipped them to Alaska. Meyer lemons I’ve seen in the past have been smaller than regular lemons; these were so large I doubted their pedigree. The largest of the lemons weighed one half pound.

We cut one of the Meyer lemons to squeeze over fresh halibut. It was heavy with juice, and had the characteristic sweet-scented flavor of mandarin and lemon that complimented, but did not overpower, the halibut. With the remaining three lemons, I wanted to make something special. When I read Lucy's recipe for frozen lemon yogurt on Nourish Me, I found an ideal use for the Meyer lemons -- and my Thanksgiving dessert.

Frozen Lemon Yogurt showcases the complex flavors of Meyer lemon, and contrasts nicely with fresh ripe blueberries. It is light, slightly tart, and a terrific end to a filling meal.


Roasted Sweet Potatoes with Garlic and RosemaryRosemary and Garlic Roasted Sweet Potatoes
I prefer using small garnet “yams” for this dish.

1 small garnet yam per person
1 tsp. minced rosemary per garnet yam
1 tsp. minced garlic per garnet yam
Salt
Olive oil

Preheat oven to 475°F.

Slice the sweet potatoes 1/8” thick. Toss with rosemary, garlic, salt, and sufficient olive oil to coat the potato slices. Spread out in a single layer on a rimmed baking sheet. Roast for 10 – 15 minutes, or until the potatoes are cooked through and the edges are starting to turn dark brown.

Frozen Lemon YogurtFrozen Meyer Lemon Yogurt with Fresh Blueberries
Adapted from a recipe by Lucy at Nourish Me. This makes 1 quart of ice cream. If you don’t have a food processor, you can mix it by hand. If you do mix by hand, make sure to grate the lemon peel as finely as possible and to fully dissolve the sugar before pouring the mixture into the ice cream maker.

1 cup granulated sugar
3 Tbsp. finely grated Meyer lemon peel
1 1/2 cups plain whole milk yogurt
1 1/2 cups half-and-half
3/4 cup Meyer lemon juice
1 cup fresh blueberries

Process the sugar and Meyer lemon peel in a food processor until the peel is very fine. Add the remaining ingredients, except the blueberries, and process until the mixture is smooth. Freeze the mixture in your ice cream maker, according to the manufacturer’s instructions.

Scoop into bowls and top with fresh blueberries.

~~~~~~~~~~~~~~~~~~~~~~~~~~~~~~~~~~~

This is my entry for Antioxidant Rich-Foods/5 a Day Tuesday hosted by Sweetnicks.

Greek Cookbooks: A Festival of Recipes (Dayton, OH) with Recipes for Chicken with Toursi and Cinnamon-Scented Rice Pilaf / Κοτόπουλο με Τουρσί και Πιλάφι)

On holidays and other special occasions, most of us want the familiar foods of our childhoods. So it was with the Greeks who abruptly left Saranda Ecclessias in the 1920s. On Thanksgiving, the most American of holidays, they combined turkey with Toursi and Cinnamon-Scented Rice Pilaf, a dish redolent with the smells and flavors of their former homes in Eastern Thrace.

Evanthia Valassiades described the dish in A Festival of Recipes: A Collection of Recipes from the Annunciation Greek Orthodox Church in Dayton, Ohio: "This combination may sound unusual but it is really wonderful. Families from Saranta Ecclessias enjoy this meal at Thanksgiving. The stuffing and sauerkraut portions would be doubled for turkey. We don’t stuff the turkey, but bake the rice accompaniment separately.”


For a rich and hearty winter meal, holiday or not, here is my version of Evanthia Valassiades’ recipe. Cinnamon-Scented Pilaf served with sweetened sauerkraut and flavorful chicken is an exotic, and compelling, flavor combination. The sugar renders the sauerkraut sweet rather than sour. I modified Evanthia’s recipe by significantly reducing the amount of sugar (the original recipe called for one cup), and by adding onion and thyme to round out the flavors.

Chicken and Toursi (Κοτόπουλο με Τουρσί)
Serves 6
The recipe is adapted from A Festival of Recipes: A Collection of Recipes from the Annunciation Greek Orthodox Church, Dayton, Ohio, sponsored by G.A.P.A. Women, 2001


Mediterranean Cooking in Alaska has moved as of March 2011. To read this post please go to

http://www.laurieconstantino.com/traditional-east-thracian-fare/


Please click on over and visit my new site. Thank you!


Tuesday, November 20, 2007

In a Greek Village: Opening Lessons (with Recipes for Hilopites and Trahanas / Χιλοπίτες και Τραχανάς) (for Apples & Thyme)

Froso and Kyria Fani Shaping TraxanasWorking Together: Froso and Kyria Fani Shaping Traxanas

The day Froso and Kyria (Mrs.) Fani were going to teach me the art of making hilopites (skinny egg noodles) and trahanas (tiny granular pasta), there was no milk to be found in the village. Several days later, enough sheep’s milk had been located and I was instructed to appear at Kyria Fani’s house at 7 a.m. sharp the next morning for my lesson.

The weather had been hot the afternoon before, but that morning the sky was overcast and a light sprinkle of rain fell. The cobblestone streets were empty of traffic, and the village was quiet, save for the sounds of roosters crowing and birds singing.

Taciturn men sat silently in front of the kafenion having their morning coffee. The bakery was closed and dark. A woman at work in the dim sweet-shop was rearranging trays of cookies and pastries.

When I arrived at Kyria Fani’s, it appeared no one was home. I gave the door a good tock-tock. After a long delay, Kyria Fani opened the door, welcoming me warmly and enthusiastically, as is her way. She quickly ushered me to the garage-turned-storeroom in the back of the house.


Froso Rolling HilopitesFroso and Kyria Fani had begun making hilopites an hour earlier. The women had already mixed and kneaded the dough. Froso was deftly “opening” the dough (opening is the word Greeks use instead of “rolling out”). Her hands moved with skill and speed over the dowel she used as a roller.

Opening dough with a dowel is harder than it looks. I started using the stick like a rolling pin, pressing down as I rolled. This did not work. Froso explained the dough needs to be stretched, not rolled.

I tried again. I thought I was doing it right. Kyria Fani came over and began roughly massaging my shoulders. I jerked up, startled. “When your husband touches you,” said Kyria Fani, “you want him to be gentle and tender.” She changed her motion from a brisk massage into a soft caress. “You don’t want him to be aggressive or rough. It’s the same with opening dough.”

Kyria Fani’s advice helped me get the amount of pressure correct, but as I moved the stick back and forth over the dough, it still wasn’t opening. Froso patiently explained my technique was the problem, and would never work to stretch the dough sufficiently.

She demonstrated. Instead of keeping her hands in one position as she moved the stick back and forth, she moved her hands quickly forward and then to the sides of the stick, using a motion similar to the breast stroke. This motion stretched the dough out to the sides, as it finally began to get thinner.

Kyria Fani Laying Out DoughEach time Froso rolled the dough up on the stick, she gave it a quarter turn before she laid it back on the table. By doing this, she ensured the dough opened evenly, and the hilopites would be of uniform thickness.

As each round of dough was finished, Kyria Fani carried it on the dowel and laid it on a bed covered with a clean sheet. When all the dough had been opened, it was time to start cutting the hilopites.

Froso Cutting HilopitesUp until ten years ago, Froso and Kyria Fani had painstakingly cut the hilopites by hand, but now a pasta machine helps with the task. The rounds of dough are hand-cut into one inch strips, and then to the width of the pasta machine. These strips are run through the machine and cut into hilopites. After they are cut into skinny pieces, the hilopites are returned to the sheet-covered bed to dry.

Kyria Fani Cutting HilopitesFroso said it takes about a week for hilopites to dry, depending on the weather (if there is a lot of humidity, it takes longer). Kyria Fani said she lets her hilopites dry for two weeks: “Why not get them good and dry?” she asked.

The women next turned their attention to trahanas, a tiny traditional pasta usually used in soups or savory pies. On the island, trahanas dough is made with fresh milk and either hard-wheat flour (similar to semolina) or cracked wheat. Chunks of dough are dried in the sun if the weather cooperates, or in the oven set at 200°F if it doesn't.

At Kyria Fani’s house, chunks of trahanas dough had been drying all day, but were still a little soft. Froso mixed in more flour to get it the consistency she desired. Once the consistency was correct, the dough was ready to shape into trahanas. A large sieve called a koskino is used for this task.

Froso and Kyria Fani Shaping TraxanasKyria Fani and Froso rapidly rubbed the dough back and forth across the koskino’s screen, breaking the chunks into tiny pieces of pasta. Like the hilopites, the trahanas was laid out on a sheet-covered bed to dry.

Hilopites and trahanas are usually made once a year, between July and September, when the weather is hot enough to dry the dough, and there is plenty of eggs and milk. Froso and Kyria Fani make enough hilopites and trahanas to last a year for themselves, their children, their grandchildren and, luckily, for my family.

HilopitesHilopites (Χιλοπίτες)
10 eggs
1 cup sheep’s milk
2 Tbsp. salt
Yellow hard-wheat flour (or semolina)
Olive oil for oiling hands and bowl
Cornstarch for opening dough

Mix the eggs, milk, and salt together. Add enough flour to make a stiff, but not dry, dough. Knead the dough 10 - 15 minutes, until it is very elastic. Cut the kneaded dough into three pieces. With oiled hands, shape the pieces into balls; knead each ball again for one minute. Place the balls into an oiled bowl and cover with a dish cloth. Let them rest, unrefrigerated, for 30 minutes.

Lightly sprinkle a clean table with cornstarch, flatten a dough ball, and sprinkle it with cornstarch. Open the dough with a clean dowel into a large thin round, and place it on a bed covered with a clean cotton sheet while you roll out the remaining dough balls.

When all the dough is rolled, fold one of the rounds in half, and then in half again, and cut it into one-inch-wide strips. Open up the strips, and cut them into lengths the width of a pasta machine. Cut into hilopites, and spread the cut hilopites on the bed to dry. When dry, store in an air-tight glass container.

TraxanasTrahanas (Τραχανάς)
5 eggs
1/2 cup sheep’s milk
2 Tbsp. salt
Yellow hard-wheat flour (or semolina)

Mix the eggs, milk, and salt together. Add enough flour to make a stiff, but not dry, dough. Break the dough into large chunks and let them dry in the sun, or in a 200°F oven. If the dough is too soft when you are ready to begin working with it, mix in more flour. Use a sieve to break the dry dough chunks into tiny pieces. Spread the trahanas on a bed covered with a clean cotton sheet. When dry, store in an air-tight glass container.

NOTE: Trahanas may also be made with cracked wheat. Cook the cracked wheat with milk until it is thick and the consistency of rice pilaf. Break this mixture into large chunks and proceed in the same manner as for traxanas made with flour.

~~~~~~~~~~~~~~~~~~~~~~~~~~~~~~~
The first picture is my entry for Click - this month's theme is noodles. The round-up of Click entries is here.

This is my entry for Apples & Thyme #2 co-hosted by Passionate Palate and Vanielje Kitchen.

Monday, November 19, 2007

Recipe: Pan-Fried Scallops with Caramelized Onions and Spinach (Χτένια με Σπανάκι Σύβραση)

Long, slow cooking renders onions sweet and tender.

The French use them in soups and savory tarts, and Middle Easterners use them in Majderah to top lentils and rice, as do Greeks living throughout the Dodecanese Islands. On Rhodes, one of the Dodecanese, caramelized onions are called Sivrasi, and are used to enhance a variety of vegetables, not just lentils.

I first read about Sivrasi in Susie Atsaides book: Greek Generations: A Medley of Ethnic Recipes, Folklore, and Village Traditions. She calls Sivrasi “an island secret,” and her recipe calls for a whopping one cup of oil for every two cups of onions. Diane Kochilas includes a recipe for Sivrasi in The Glorious Foods of Greece, and says it is served “over pasta, flour-based creams, greens, legumes, and even cheese pies.” Internet recipes include Sivrasi with meatballs and with fish and tomato sauce, as well as over lentils and rice.

Fresh scallops from Kodiak, Alaska were in the market this week, and I had a gorgeous bunch of spinach from my Full Circle Farm CSA box. Caramelized onions go well with both, and it was long past time I tried Sivrasi.

The result was splendid. The sweet, caramelized onions, the earthy spinach, the nicely browned scallops, and their rich, salty juices, all combined to form a dish I will make over and over again.

Pan-Fried Scallops with Caramelized Onions is fast, easy, and worthy of being served to the most discerning diners. There’s not much more you can ask of a recipe.

Recipe: Pan-Fried Scallops with Caramelized Onions and Spinach (Χτένια με Σπανάκι Σύβραση)
Serves 2
This recipe can easily be doubled or tripled, and the caramelized onions made well in advance, for a painless company meal. Although scallops are used here, spinach and caramelized onions go well with any kind of seafood or poultry.

Spinach Sivrasi:
4 cups thinly sliced onions
1/3 cup olive oil
Salt
Freshly ground black pepper
1 tsp. Aleppo pepper, or 1/2 tsp. crushed red pepper
1/2 pound cleaned spinach, roughly chopped

Scallops:
10 large sea scallops (about 1 pound)
Salt
Freshly ground black pepper
1 Tbsp. olive oil

For the Spinach Sivrasi: Heat the olive oil in a large frying pan. Add the onions, lightly seasoned with salt and freshly ground black pepper, and cook over medium low heat for 25 - 35 minutes, stirring regularly, until the onions soften and caramelize. Halfway through the cooking time, add the Aleppo pepper.

As soon as the scallops are in the frying pan, stir the spinach into the caramelized onions and cook just until the spinach is done, stirring regularly. Serve surrounded by Pan-Fried Scallops.

For the scallops: Wash the scallops, removing any tough muscle clinging to the side of the scallop. Dry and season them on both sides with salt and freshly ground black pepper.

Heat the olive oil over high heat in a frying pan large enough to hold the scallops. If you are serving more than two people, you may need to use two frying pans for this task; scallops too close together in a pan will steam rather than pan-fry.

When the oil is very hot, add the seasoned scallops, and cook for 2 – 3 minutes, depending on the size of the scallops. Turn the scallops over and cook for 2 – 3 minutes more. Except for turning them over the one time, do not move the scallops or fidget with them while they cook. Serve with the Spinach Sivrasi.

UPDATE: 1/09/08: Playswithfood made and enjoyed this dish, and posted a lovely picture of it here.

~~~~~~~~~~~~~~~~~~~~~~~~~~~~~~~
This is my entry for Weekend Herb Blogging #110, this week hosted by Truffle from What's On My Plate. Truffle's round-up of all WHB#110 can be found here.

Sunday, November 18, 2007

Recipe: Clams with Onions and Dill (Όστρακα “της Πλώρης”)


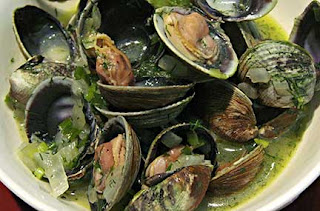
Clams with Onion and DillOne of the dishes we enjoyed
during our recent visit to restaurant Logia tis Ploris in Athens was Clams with Onions and Dill (Όστρακα “της Πλώρης”). The mixed clams were steamed in wine, and seasoned with green onions and dill, wonderful flavors to enjoy outside on a balmy evening. Although the flavors seem summery, when we had this dish last Friday in snowy Alaska, it was hearty, warming, and satisfying.


Mediterranean Cooking in Alaska has moved as of March 2011. To read this post please go to


http://www.laurieconstantino.com/recipe-from-athens-seafood-restaurant-logia-tis-ploris/


Please click on over and visit my new site. Thank you!

Saturday, November 17, 2007

Seafood in the Heart of Athens (with Recipe for Beet-Yogurt Spread / Σαλάτα με Παντζάρια και Γιαούρτι)

BeetsTraveling provides opportunities to encounter new foods, new ingredients, and new preparations. I’m always on the lookout for eateries run by talented chefs. I’m thrilled when I find a dish I’ve never heard of before, and order it immediately, just to discover what I’ve been missing.

As a visitor, it can be daunting to choose from all the offerings in cities with vibrant culinary scenes, like Seattle, London, San Francisco, and Athens. Yes, Athens. Some imagine the only restaurant food in Athens is moussaka, souvlaki, and vegetables swimming in olive oil. That stereotype is no longer true.

Starting about ten years ago, and continuing to today, Athens has experienced a culinary renaissance. Young Greek chefs have been opening restaurants in seedy run-down industrial neighborhoods. The chefs are exploring the depth and breadth of traditional Greek cuisine, using the freshest local ingredients. Many of these chefs apply culinary insights they brought home from working in restaurants around the world.

Some of my best restaurant finds are by happenstance, strolling through changing neighborhoods, peering through doorways, and scanning posted menus. This is how I recently found my new favorite restaurant in Athens, Logia tis Ploris.

Logia tis Ploris is a fish taverna, on a narrow pedestrian walkway, in a quiet, aging, residential neighborhood one block off busy Peiraios Street. The young owners have tastefully renovated a neoclassical house, and serve food one is more likely to encounter at a table near than sea than in downtown Athens.

The seafood at Logia tis Ploris is, without exception, delicious, impeccably fresh, and skillfully cooked. The preparations are simple and straightforward, and properly allow the high-quality ingredients to shine. The prices are reasonable; we paid 20€ per person for our meals, including wine.

We ate at Logia tis Ploris two nights in a row, and would have gone for a third and a fourth had we more time in Athens. Each meal started with a complementary bowl of Beet and Yogurt Spread, accompanied by tiny glasses of tsipouro and crunchy croutons. Though composed from simple ingredients, the flavor of the spread was complex and addictive.

Both nights we gorged on a variety of appetizers (mezedes), all of which were excellent, including:
Mezedes--Fava Pantremeni (pureed yellow split peas with capers, tomatoes, and onions)
--Octopus Fritters (minced octopus in batter, deep-fried)
--Grilled Crab (large, meaty crab, cracked and lightly dressed with olive oil)
--Cheese Pies from Milos (small, crunchy pastries, filled with fresh cheese and seasoned with mint)
--Sea Urchin Salad (a bowl of salty-sweet sea urchin roe and their juices, with country bread to spoon it over)
--Fish “Pastourma” (thinly sliced cod, lightly smoked over beech, and seasoned with paprika and salt)
--Shrimp Simiotika (crispy, dry-fried, sweet, baby shrimp to be eaten shells and all)
--Shellfish “tis Ploris” (three varieties of Greek bivalves – cockles, Venus clams, and razor clams -- cooked with white wine, onions, and dill).

To accompany the food, we ordered seafood-friendly house white wine by the carafe – which turned out to be bottomless. As soon as our carafe was empty, the owner quickly refilled it – at no charge to us, an example of Greek hospitality at its finest.


When we finished eating our mezedes, the owner brought out what appeared to be white after-dinner mints. He poured lemon water over the white tablets, which dramatically expanded into two-inch tall cylinders. We laughed with glee when we discovered the cylinders were lovely lemon-scented towelettes for cleaning our seafood soaked hands.

Logia tis Ploris is near the new Kerameikos metro stop, and within easy walking distance of Plaka, where many visitors to Greece stay during their Athens’ vacations. It is well worth the trip.

Now we are back in Alaska, and haven’t stopped thinking about our meals at Logia tis Ploris. We can’t recreate the flower-scented night air at Logia tis Ploris, or the graciousness of our host, but I’ve done my best to recreate some of the flavors we enjoyed there.

My version of Logia tis Ploris’ Beet and Yogurt Spread has a startling, deep color, and strong, refreshing flavors. The spread made a festive addition to our holiday buffet. The garlic in it wakes up taste buds jaded by too much rich food, and helps digesting Thanksgiving-sized portions of turkey and gravy.

Beet-Yogurt SpreadBeet-Yogurt Spread (Σαλάτα με Παντζάρια και Γιαούρτι)
The intense color of this spread may initially be intimidating, but the flavor is delicious.


1 c. plain, whole-milk yogurt
2-3 cloves garlic
Salt
2/3 c. cooked and coarsely grated beets
2 Tbsp. olive oil
2 tsp. red wine vinegar

Line a strainer or colander with paper towels. Dump the yogurt into the lined strainer and let the liquid drain out of the yogurt for 30 – 60 minutes.

Puree the garlic by mashing it into the salt. This is easiest to do with a mortar and pestle.

Mix the strained yogurt, pureed garlic, salt, grated beets, olive oil, and red wine vinegar. Taste and adjust the seasoning by adding garlic, salt, or vinegar, as needed.

Serve with artisan-style bread, and raw vegetables such as carrots, leeks, or celery.

NOTE on Roasting Beets: Preheat the oven to 400°F. Wash the beets, cut off the greens leaving an inch of stem (don't cut into the beet itself), rub the beets with olive oil, and wrap tightly in a foil packet (or place in a tightly covered baking dish). Bake for 40 minutes to 1 1/2 hours, depending on the size of the beets and how fresh they are. The beets are done when they're tender if poked with a knife or skewer. Let the beets cool, and slip off their skins (I wear gloves when I do this to protect my hands from staining). (These can be made ahead and kept in the refrigerator for about a week.)

~~~~~~~~~~~~~~~~~
This is my entry for Heart of the Matter #9, hosted this month by Accidental Scientist.

Thursday, November 15, 2007

I Swear I Was Sleepwalking (with Recipes for Pear and Apple Tarte Tatin and Salted Honey Caramels)

I rarely eat sweets. I don’t make them (except for Christmas presents, of course). I don’t buy them.

It’s not that I don’t want them; it’s that when they are in my house, they won’t shut up. They talk to me. They say, “Please eat me. Please, now. I want to be eaten now. Please don’t abandon me in the kitchen. Please eat me.”

So what can I do? Who wants to be cruel to a cookie? Or a tart? Not me, that’s for sure. So I do. Eat them, that is. Eat them until they are gone. I’m the ultimate can’t eat just one girl. My sister is the same way.

I can’t explain what happened today. One minute I was reading the Apples & Thyme round-ups here and here, and the next thing I knew there were honey caramels bubbling on the stove and a Pear and Apple Tarte Tatin in the oven. The power of the recipes that cooks had submitted to Apples & Thyme was too much for me.

I may have to extend the “don’t make them, don’t buy them” rule to include a new proviso: don’t read about them. I'm too suggestible.

As soon as they were done, I bundled up the Pear and Apple Tarte Tatin (minus one piece) and the Salted Honey Caramels (honest, I only had one) and delivered them to my husband's office. The cacophony of pleading coming from the kitchen overwhelmed me. The sweets had to get out of the house before I succumbed.

The worst part is, both items tasted absolutely delicious. But they had to go, so they did.


Pear and Apple Tarte TatinPear and Apple Tarte Tatin
Adapted from Riana Ligarde’s recipe for Tarte Tatin at Garlic Breath.
Tarte Tatin is a tart cooked upside down, usually made with apples. In this variation, I’ve combined apples with pears for a lovely fall dessert.

Crust
1 1/3 cups flour
1/3 cup sugar
1/4 tsp. salt
6 Tbsp. butter
1/3 cup milk

Filling
1/3 cup dark brown sugar
4 Tbsp. butter
2 apples
3 pears

Preheat the oven to 350°F.

Crust: Combine the flour, sugar, and salt in a food processor (if doing by hand, whisk the dry ingredients together). Cut the butter into cubes, add the cubes to the dry ingredients, and pulse until the mixture looks like coarse cornmeal (if doing by hand, cut the butter into the dry ingredients). Add the milk and pulse (or stir) just until the dough starts to come together. Form the dough into a disk, wrap in plastic wrap, and refrigerate while you make the filling.

Filling: Peel and core the apples and pears. Slice into eighths. Put the sugar in a dry cast iron frying pan, and cook over medium low to medium heat just until the sugar starts to melt. Quickly whisk in the butter. Evenly distribute the melted butter and sugar over the bottom of the cast iron pan. Arrange the apples and pears over the butter and sugar, alternating slices of apples and pears. (If you don't have a cast iron pan, you can make the Tarte Tatin in a 10-inch buttered cake pan, make the caramel in a saucepan, and pour the caramel into the bottom on the cake pan.)

Roll out the dough until it is slightly larger than the frying pan. Place the rolled-out dough over the apple and pear slices. Tuck the edges under. Place in the oven and bake for 45 – 50 minutes, until the dough is nicely golden brown.

Take the pan out of the oven and run a knife or spatula around the edges of the Tarte Tatin to make sure the dough won’t stick to the pan when you turn it over. Place a serving plate over the frying pan, and flip the pan so the Tarte Tatin is fruit side up on the serving plate. If any fruit sticks to the bottom on the pan, return it to where it belongs on the Tarte. Serve warm.

Salted Honey CaramelsSalted Honey Caramels
Makes 18 1 1/2” square caramels
Adapted from Pille at Nami Nami’s version of Heidi’s Honey-Espresso Caramels. I wanted to emphasize the flavor of the excellent thyme honey I brought back from Greece, so made the caramels using only honey, cream, and coarse Greek sea salt. These are very easy and quite delicious, although it takes about an hour for them to reach the proper temperature.

1 cup heavy cream
1 cup thyme honey (or other strong-flavored honey)
1 tsp. coarse sea salt, plus extra to sprinkle over

Mix the cream, honey, and salt in a heavy-bottomed, deep-sided saucepan. Bring to a boil, then lower the heat (or else the pan will boil over; trust me, I know what I'm talking about here), and cook at a low boil until the mixture reaches 245 - 250°F or the firm ball stage (firm ball is when a tiny bit of the caramel is dropped in cold water it will form a firm, but pliable, ball). Remove the pan of caramels from the heat.

Shaping CaramelsLightly butter a piece of parchment paper, and pour the caramels onto the paper. Lightly sprinkle with salt. I placed boxes of plastic wrap and waxed paper under the parchment paper, and against the edges of the candy, to square up the sides. When the caramels firm up, cut into squares and, if you desire, wrap them in parchment paper.

Wednesday, November 14, 2007

Anatomy of a Recipe (with Recipe for Savory Fish Cakes / Ψαροκεφτέδες)

Before I wrote Tastes Like Home: Mediterranean Cooking in Alaska, I rarely wrote down recipes, though I occasionally made a few notes about what I had prepared. If I ever went back to the notes, and I rarely did, they were incomprensible, full of half sentences and incomplete thoughts. I could sometimes read my handwriting, but too often the content was less than clear.

“Butter, golf.” read one such note. “4 dill.” read another. “Don’t table.” Don’t table? The mysterious scribblings meant nothing to me.

When I began work on Tastes Like Home, I knew I had to do better, to write more clearly, to be more precise. As I worked my way through the dishes that I ultimately included in the book, I typed up the details of that day’s effort as soon as dinner was over. I thought I was being disciplined. I thought I was writing recipes. I thought that what I had written would make it simple to put the book together.

I was wrong, very wrong. When I went to organize the book that became Tastes Like Home, I discovered my dutifully typed writings were merely more refined versions of the handwritten notes to myself, albeit slightly more intelligible. To go in a book, everything needed to be completely rewritten, and then rewritten again.

Doing a project the size of Tastes Like Home taught me many things, among them the need to write complete and finished recipes contemporaneous with cooking a dish. I promised myself that if I ever thought about doing another book, I would reform my ways, and discipline myself to write finished and complete recipes in small bites, day by day, as the food came out of my kitchen.

Tastes Like Home, The Blog is how I am keeping that promise.

So what goes into writing a recipe?

Inspiration comes first. Inspiration from glorious ingredients, inspiration from restaurants or other people’s cooking, inspiration from conversations about food, inspiration from reading or research, or inspiration that springs mysteriously into my mind at odd moments, or during nights of insomnia. Inspiration is the easy part.

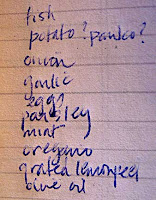
Recipe PlanOnce inspiration strikes, I plan the recipe in my mind. I carefully think through the components that make up the particular flavor I’m after. What ingredient is the focus of the dish? What are the high notes, or the subtle background flavors? As I think these things through, I often make a list of ingredients most likey to create the taste experience I’m after.

At this point, I enter the kitchen and start cooking, but a kind of cooking that is unlike my normal style. Normally, I don’t measure my ingredients. Normally, if I taste what I’m making and add something to give the dish a flavor boost, I won’t remember a day later what exactly I added. I’ll remember being happy with how my dish tasted, but exactly recreating it is impossible.

In contrast to my normal free-form style, when I intend to share a recipe with others, I measure everything, a task that requires a high degree of discipline (not my strong suit). I frequently stop myself mid-air as I’m about to add an ingredient, having realized it has not yet been weighed or measured. I add flavorings in smaller increments than normal, so I can find the exact point at which a recipe has enough, but not too much, of a particular flavoring.

Recipe Notes on EnvelopeAnd most importantly, I write down everything while I’m cooking. At least I try to do this, I really try. Sometimes I succeed. But not always, so my back-up strategy is to write the recipe in finished form within hours after I have finished cooking. At this stage, I remember exactly how I prepared the dish, and what went into it, and in what order.

If I don’t take notes while I’m cooking and don’t finalize a recipe the same day I cooked it, I make the dish again before I put its recipe in writing. I want to make sure I didn’t leave anything out, so that anyone who uses the recipe will enjoy its flavors, just as I did when I originally decided it was worth passing on to others.

A couple days ago, I finalized a recipe for Savory Fish Cakes, called Psarokeftedes in Greek. I once enjoyed this dish in a seaside taverna in Greece, and wanted to make it using ingredients available in Alaska. The day before I made the fish cakes, we had fresh halibut for dinner; the leftovers were perfect for fish cakes. (Note: The Alaska halibut season closes tomorrow -- 11/15 -- at noon, so there is no time like the present to buy halibut.)

The Savory Fish Cake recipe turned out well. My husband pronounced them the best he’d ever had (and he is not shy about telling me when a dish could be better or that he never wants to eat it again). My friend Teeny had been over to take pictures of me cooking and I gave her some raw fish cakes to cook at home; both her and her husband pronounced them excellent. I loved them and ate too many.

Having succeeded in achieving the taste I wanted, I only had to write down the recipe, which I did immediately. My work is done. The recipe is complete and final and ready to be made again, in your kitchen and mine.


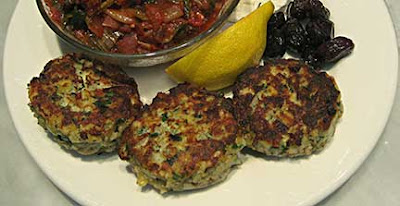
Savory Fish Cakes/ΨαροκεφτέδεςSavory Fish Cakes (Ψαροκεφτέδες)
Serves 4 – 6 (makes 12 fish cakes)
Savory Fish Cakes are an ideal way to use up leftover fish. However, if you don’t have any leftovers, you can quickly poach the fish needed for the cakes: cook 3/4 pounds of raw fish until done in simmering water, a little wine, a few peppercorns, 3 bay leaves, and salt. The shaped fish cakes can be made hours ahead of time, and refrigerated until ready to use. Although it is not absolutely necessary to chill the fish cakes before cooking them, doing so helps them hold together as they brown.

2 cups flaked, cooked halibut, rockfish, cod, or other white fish (5/8 pound)
2 cups cooked, peeled, and grated potatoes
1 1/2 cups diced onion, 1/4” dice
2 tsp. finely minced garlic
2 eggs
1 Tbsp. finely grated lemon peel
1/3 cup minced fresh parsley
1 tsp. dried oregano, crushed
2 Tbsp. minced fresh mint
2 Tbsp. olive oil
Salt
Freshly ground black pepper
1/4 cup olive oil for frying

Fish Cake IngredientsThoroughly mix all the ingredients together in a bowl; this is easiest to do with your hands. Divide the mixture into 12 portions; a 1/4 cup scoop or measuring cup works well for this task. Shape into flat cakes, and place them on a waxed paper lined baking sheet, cover with plastic wrap, and refrigerate until you are ready to cook.

Fish Cakes Ready for RefrigeratorHeat the olive oil in a large frying pan. Fry the fish cakes, in batches if necessary (don’t crowd the fish cakes or they won’t brown properly). The fish cakes are done when they are golden-brown on both sides and cooked through. Drain on paper towels and serve.
~~~~~~~
This is my entry for Leftover Tuesdays, sponsored this month by Pam at Project Foodie.


Tuesday, November 13, 2007

Recipe: Roasted Beets with Celery Root Skordalia (Παντζάρια με Σελινόριζα Σκορδαλιά) (#109)

My latest CSA box from Full Circle Farm included beets and celery root. Although I prepare them a variety of ways, seeing fresh beets in pristine condition always brings to mind two of my favorite foods: oven-roasted beets and skordalia (pronounced skor-thal-YAH), an intensely flavored Greek garlic spread. The sweetness of roasted beets and the piquancy of skordalia make one of those perfect food combinations in which each flavor improves and completes the other.

Skordalia typically uses pureed bread, potatoes, or nuts as the vehicle for carrying garlic to the palate. The juxtaposition of beets and celery roots in the CSA box started me thinking about basing skordalia on celery root instead of the more traditional starches. Celery root’s subtle flavor, with hints of both celery and parsley, seemed as if it would combine perfectly with garlic. Two root crops, served together at the peak of their season, appealed to my sense of seasonality.

Celery root skordalia turned out just as I imagined: delicious and a terrific accompaniment for roasted beets. In addition to the pungent taste of garlic that is the hallmark of correctly prepared skordalia, the herby flavors of celery root added complexity and interest to one of my favorite dishes. Yesterday my skordalia was made only with celery root; it would also be good had I used a combination of celery root and pureed potatoes.
Celery RootOne of the challenges celery root presents for the cook is that it is not uniformly shaped, and can look like a misshapen ball of tangled roots. Many people avoid buying celery root because they are not sure how to reach the edible portion of the vegetable. If you are one of those people, don’t worry, prepping celery root is easy.

Here’s how to do it: 


This post has moved to
 
http://www.laurieconstantino.com/how-to-prep-celery-root/

Please visit my new website!!

Sunday, November 11, 2007

Recipe: Tomato Sauce with Celery and Mint (Σάλτσα με Σέλινο και Δυόσμο)


Tomato Sauce with Celery and Mint is for days when you want a quick meal, with lots of flavor, that doesn’t take much effort. From start to finish, this full-flavored sauce is finished in about 30 minutes.

The sauce can be used in any recipe that calls for tomato sauce, and is a good topping for all kinds of pasta. I particularly like it with cheese stuffed ravioli or tortelloni. Costco now carries organic ravioli stuffed with spinach and cheese that pairs well with the sauce; the ravioli is made by Monterey Pasta Company.

Cut Leaf Celery Leaves and StalksTomato Sauce with Celery and Mint is made with leaf celery, which is the only celery available in the village where we live in Greece. I add the celery in two stages to better accentuate its flavor. The sauce can also be made with ordinary supermarket celery, although the celery flavor will be milder if this type is used. For more information about leaf celery, go here.

Aleppo pepper is a moderately spicy red chili pepper sold in crushed flakes. Its sharp but fruity taste pairs well with Mediterranean food. I’m never without it.

Aleppo pepper originally came from Syria, near the city of Aleppo, but now may be imported into the United States from Turkey due to trade embargos with Syria. Supermarket crushed red pepper is a fine, but spicier and less flavorful, substitute for Aleppo pepper. One-half teaspoon of supermarket crushed red pepper should be used in lieu of one teaspoon Aleppo pepper.

Aleppo pepper is available from Penzey’s, The Spice House, and World Spice Merchants.


Tomato Sauce with Celery and Mint on RavioliTomato Sauce with Celery and Mint (Σάλτσα με Σέλινο και Δυόσμο)
Serve over pasta with fresh goat cheese. A watercress and curly endive salad, lightly dressed with vinegar and olive oil, goes well with pasta and this sauce.

2 cups diced onions, 1/4” dice
3/4 cup finely sliced stalks from leaf celery
3 Tbsp. olive oil
Salt
Freshly ground black pepper
1 tsp. Aleppo pepper or 1/2 tsp. crushed red pepper
1 14.5-ounce can crushed tomatoes
3/4 cup dry white wine
3/4 cup finely shredded leaves from leaf celery
2 Tbsp. minced mint
1 Tbsp. minced garlic
1 tsp. sugar (optional)

Sauté the onions and celery stalks, lightly seasoned with salt and freshly ground black pepper, in olive oil until the onion starts to turn golden. Stir in the Aleppo pepper and cook for one minute. Stir in the crushed tomatoes and wine and bring to a boil. Cook rapidly for five minutes, stirring constantly. Turn down the heat to medium, stir in the celery, mint, and garlic and simmer for 10 minutes. Taste and add the optional sugar if the sauce is too acidic. Simmer for 5 minutes or until the sauce is the thickness you desire. Taste and add salt and freshly ground black pepper, if needed.