Showing posts with label sauce. Show all posts

Wednesday, October 13, 2010

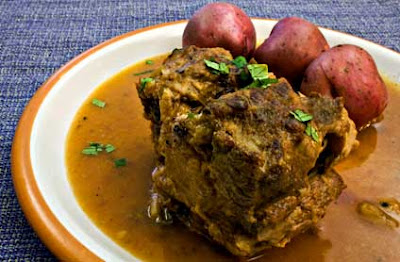
Triqui Family Makes Life in Alaska,Violence Grips Triqui Region in Oaxaca (with recipe for Reyna's Oaxacan Chicken Mole)


Reyna Martinez DeJesus stood before a line of smoking grills at the back of “Ricos Tostaditos,” a Mexican food stand at the Northway Mall Farmers’ Market. Tall pots, tightly covered and steaming, crowded two of the grills. On another, flank steaks cooked over flame, sending their tantalizing aromas out into the market.

The irresistible smell of grilled meat drew me over. I ate some in a tostada, dressed with fresh homemade salsa and hot sauce. I wanted more of Reyna’s food. I ordered pozole, traditional Mexican soup made with hominy corn and finished with red chile sauce, intending to take it home for lunch. I tried taking just one bite, to see how the chile sauce tasted. It was amazingly good. Before I knew it, I’d powered down every bit of the pozole.

During repeat visits to Ricos Tostaditos, I learned Reyna, 35, her husband Lorenzo DeJesus Flore, 40, and their six children are Triqui, an indigenous people from the mountains of Oaxaca, a southern Mexican state. Triqui, not Spanish, is their primary language.

So how did a family of Triqui end up in Anchorage, Alaska? It started with Lorenzo’s decision to leave his violent region for the United States.

Lorenzo and Reyna told me their story when I was at their house learning how to make Reyna’s Chicken Mole. I wanted a cooking lesson. Lorenzo wanted somebody, anybody, to know what is happening to his friends and family in San Juan Copala.

As for Reyna’s Chicken Mole, like every bite of food that Reyna makes, it’s delicious.


Mediterranean Cooking in Alaska has moved as of March 2011. To read this post please go to


http://www.laurieconstantino.com/triqui-family-makes-life-in-alaska-leaves-oaxacan-violence-behind/


Please click on over and visit my new site. Thank you!


Sunday, August 15, 2010

Gathering Wild Mushrooms in Alaska, Drying Wild Mushrooms, and 5 Recipes for Wild Mushrooms


Perfect 1 pound 10 ounce Boletus edulis

Steve arrived home from work last Friday, a briefcase in one hand and a massive Boletus edulis in the other. A smile of pure joy lit his face. “It’s time to go mushrooming.”

He handed me the mushroom, a king bolete, also known as porcino in Italy and cep in France. I weighed it: 1 pound 10 ounces. When I cut into it, the flesh was firm and pure white, untouched by worm, fly, slug, squirrel, or rot. I’d never seen anything like it. Normally, porcini this big have been heavily predated upon and are chock full of worms.

“Where’d you get this?” “Right in front of the house.” “Whataya mean, right in front of the house?” “Let me show you.” Steve brought me to a spot twenty feet from our front door.

“It’s definitely time to go mushrooming,” I said, thoughts of dinner already a distant memory. “Let’s get changed.”


Leccinum subglabripes

It’s been raining for weeks, so on went rain coats, rain pants, and waterproof hiking boots. Going mushrooming involves tromping through woods, pushing through understory, going up and down hillsides, seeking out terrain where desirable mushrooms thrive. Staying dry is key to maintaining proper enthusiasm.

Mediterranean Cooking in Alaska has moved as of March 2011. To read this post please go to


http://www.laurieconstantino.com/gathering-wild-mushrooms-in-alaska-drying-wild-mushrooms-and-5-recipes-for-wild-mushrooms/


Please click on over and visit my new site. Thank you!


Rules for Gathering and Handling Wild Mushrooms
The first and most important rule for mushroom foragers is: “When in doubt, throw it out.” Do not gather mushrooms that you can’t absolutely, positively identify.
Leave all unknown or questioned mushrooms alone, even if it means walking past many mushrooms of every color and shape before finding one you recognize.

1. The best way to learn about mushrooms is to have someone show you the edible species; spending time studying field guides also helps. The perfect field guide for Alaska doesn’t exist.


The books I like best are...

Mediterranean Cooking in Alaska has moved as of March 2011. To read this post please go to


http://www.laurieconstantino.com/gathering-wild-mushrooms-in-alaska-drying-wild-mushrooms-and-5-recipes-for-wild-mushrooms/


Please click on over and visit my new site. Thank you!


Wild Mushroom Pasta Sauce


Fresh Porcini Salad with Shaved Fennel and Parmesan Cheese


Pasta with Wild Mushroom and Clam Sauce


Wild Mushroom Ragu (Pasta Sauce)


Port Duxelles

Mediterranean Cooking in Alaska has moved as of March 2011. To read this post please go to


http://www.laurieconstantino.com/gathering-wild-mushrooms-in-alaska-drying-wild-mushrooms-and-5-recipes-for-wild-mushrooms/


Please click on over and visit my new site. Thank you!


Sunday, November 15, 2009

Recipe for Kale Puttanesca (Μακαρονάδα Πουτανέσκα με Κατσαρό Λάχανο)

Kale added to spicy puttanesca sauce makes a surprisingly delicious topping for chewy pasta. We recently enjoyed Kale Puttanesca for dinner and spent the whole meal alternating sounds of satisfaction with “this is really good” and “mmmmm -- I want this again.”

My recipe calls for more capers, garlic, and anchovies than are often used in puttanesca recipes; kale and chewy pasta balance the strong flavors.  Even so, Kale Puttanesca is best served to those, like us, who like assertively seasoned food.


To complement Kale Puttanesca sauce, I used Maccheroni al Ferratto, rustic artisanal pasta, originally from Calabria, that was traditionally shaped around iron umbrella spokes.

Lately, I’ve been comparing regular dried pasta from the supermarket with more expensive “artisanal” pastas found in specialty stores and upscale markets.  All dried pasta is made using extrusion dies, metal patterns that create unique pasta shapes.  However, the dies used to make regular and artisanal pastas differ: regular pasta is made using dies with a Teflon insert and artisanal pasta is made with bronze dies.

Regular pasta has a hard, slick finish, while artisan pasta is rough and uneven: “Traditional dies made entirely of bronze make the pasta surface rough [and more porous], which helps to capture the sauce, whereas the Teflon insert gives the product an even surface and a smoother texture,” according to food scientists. On the other hand, makers of Teflon-die pasta claimthe rougher surface [of bronze-die pasta] allows cooking water to penetrate too quickly, making for less-than-ideal quality.”

The two types of pasta also differ in how they’re dried. Regular pasta is dried in ovens “the size of a football field” for 2-4 hours over high heat.  Artisanal pasta is dried for 24 to 50-plus hours “in very warm (but never hot), humid environments in which moisture can be reduced slowly, without damaging the texture of the finished product.”

I prefer artisanal pasta with very simple pasta sauces, such as oil and garlic, where the texture of the pasta makes a significant difference. I also prefer artisanal pasta in dishes, like Kale Puttanesca, that call for thicker, chewier pastas.  For all other purposes (and when I don’t want to spend the money on artisanal pasta) I happily use regular dried pasta from the supermarket.

No matter what type of pasta you use, be sure to cook it al dente; soft, overdone pasta is the bane of even the best pasta sauce.


Kale Puttanesca  (Μακαρονάδα Πουτανέσκα με Κατσαρό Λάχανο)
Serves 4
Any sturdy green, wild or domesticated, can be substituted for kale. The amount of crushed red pepper depends on how spicy you like your food.

Sauce:
1 bunch kale
3 Tbsp. capers, preferably salt-cured
3 Tbsp. olive oil
2 Tbsp. minced garlic
10 anchovy fillets, minced
1/2-1 tsp. crushed red pepper flakes
2 14.5 ounce cans diced tomatoes, with juice
1/2 cup oil-cured black olives or throumbes, pitted and roughly chopped
Freshly ground black pepper

12-16 ounces Machheroni al Ferratto or other chewy-style pasta

Wash the kale to remove any dirt.  Strip the greens from the tough center kale stems. Shred the kale greens and discard the stems (or save them for another use).

Rinse the capers well. If using salt-cured capers, soak them in a bowl of cold water for at least 10 minutes.

Fill a large pot with enough water to cook the pasta, salt it well, and put on a burner over high heat.

Heat the olive oil until it's just warmed though, using a pan large enough to hold all the ingredients. (If oil is too hot, garlic will burn; it’s best to warm the oil over medium heat.) Stir in the garlic, anchovies, and red pepper flakes and cook, stirring, for 1 minute. Stir in the tomatoes, olives, freshly ground black pepper, shredded kale, and drained capers. Bring to a boil, cover, turn down the heat, and simmer for 20-30 minutes, or until the kale is tender.

While the sauce is cooking, and when the salted water reaches a full boil, cook the pasta until it’s al dente (exact cooking time depends on the type of pasta).  Reserve 1 cup of pasta cooking water. Drain the pasta.

When the kale is tender, stir in the cooked pasta, making sure all of it is coated with sauce. Taste and add freshly ground black pepper, as needed. If the sauce is too thick for your taste, thin it with a little pasta cooking water. 

Serve immediately with plenty of crusty bread and a crisp green salad.
~~~~~~~~~~~~~~~~~~~~~~~~~~~~~~~
This is my entry for Weekend Herb Blogging, sponsored by Haalo and hosted this week by Winnie from Healthy Green Kitchen.

Friday, February 27, 2009

All About Za'atar with Recipe for Za'atar Herb Blend and 5 Recipes for Using Za'atar

Za'atar Bread and LabnehIf za’atar is within reach, anyone can make delicious food at the drop of a hat. The possibilities are endless: Za’atar Olives, Za’atar and Labneh, Za’atar Tomato Sauce with Grilled Meat, Za’atar Bread, and Za’atar Pizza are only a few ways to use this versatile ingredient. I almost have my Za'atar Chicken recipe ready to post.

Za’atar is
valued for more than great taste. “Who for forty days eats powdered dried leaves of za'tar fasting can be harmed by no serpent.” If the worst happens and you’re bitten by an asp or stung by a scorpion, za’atar cures “the bitings and the stings of venomous beasts." A Bethlehem proverb teaches, “Thyme and oil lead to the prosperity of the home.” Even more importantly, “eating za'atar improves your memory and makes you more intelligent.”

So what is za’atar?
A. An herb blend
B. Savory
C. Thyme
D. Oregano
E. Biblical hyssop
F. All of the above

The answer is “(F) All of the above.”

Za’atar (ZAHT-ar) is a class of herbs, and includes members of the thyme, oregano, and savory families. Za’atar is also a Middle Eastern herb blend, containing one or more of the za’atar herbs. As with many centuries-old dishes, za’atar blend has many regional and familial variations.

Disparity in za’atar’s spelling is pervasive; za’atar, za’tar, zatar, zahtar, satar, zahatar, and za’ater are all used. The spelling confusion is easy to explain. Za’atar is an Arabic word (الزعتر). Like Greek and other languages that don’t use the Roman alphabet, Arabic is inconsistently transliterated into English.

Some experts claim the herb za’atar is only one specific type of savory; others claim with equal vehemence it’s one specific type of oregano. Both may be right, but only for the region or family they’re writing about.

No matter its local or historical usage, “za’atar” has come to be a generic term used in the Middle East for a group of similarly-flavored members of the herb genus
Lamiaceae. Za’atar herbs grow in the same habitat and have similar appearances. These practical factors may have led Middle Easterners to use one word for all the plants.

Linguistic confusion over “za’atar” is not unique to Arabic.
In Turkish, the plant groups Origanum, Thymbra, Coridothymus, Satureja, and Thymus, generically called za’atar in Arabic, are all referred to as “kekik.”

Scientific analysis supports the pragmatic use of one word to refer to a plant group rather than a single plant. Gas chromatography and mass spectrometry show “the chemical profiles of the specific chemotypes of Satureja thymbra L. and Thymbra spicata L [a]re very similar. They are also very similar to those of the chemotypes of Coridothymus capitatus and Origanum syriacum.” [These four herb species are all called za’atar.]

Adding to the confusion, each za’atar herb is known by more than one name:

· Coridothymus capitatus aka Thymus capitatus aka Satureia/Satureja capitata (conehead thyme, headed savory, Persian hyssop, za’atar parsi, Spanish oregano)
· Origanum maru aka Origanum syriacum/cyriacum aka Marjorana syriaca (Biblical hyssop, Lebanese oregano, Syrian oregano, Egyptian marjoram)
· Satureja/Satureia thymbra (Roman za’atar, za’atar rumi, pink savory, barrel sweetener; in Greek, Θρούμπι, Τραγορίγανη)
· Thymbra spicata (spiked thyme, donkey hyssop, desert hyssop)

There are also several varieties of commercially available za’atar blends. For example,
according to Paula Wolfert, “The taste of a za’atar mixture can be herbal, nutty, or toasty. …’Israeli’ is a pale green blend of pungent herbs that includes the biblical hyssop, along with toasted sesame seeds and sumac. The ‘Syrian’ blend, the color of sand, has a decidedly toasty flavor. The ‘Jordanian’ blend is dark green and very herbal, with some turmeric.” These aren’t the only za’atar blends; each spice merchant and family has a unique formula.

Before creating my own za’atar blend, I bought and tasted several commercially available varieties. I experimented with diverse combinations of herbs trying to best approximate the flavor of my favorite commercial brand. I also read as many English-language za’atar recipes as I could find.

For the herbal flavor in za'atar blend, many North American recipes use only dried domestic thyme, or a mixture of domestic thyme and domestic marjoram. These recipes, when tasted side by side with imported za’atar blends, tasted bland to me. I discovered that Greek oregano (preferably, but not necessarily, wild-harvested and sold on the stem) is key to creating flavorful za’atar in Alaska. Greek oregano’s spicy flavor, when tempered by combining it with dried wild or domestic thyme, approximates the flavor of authentic za’atar blend.

For anyone interested in growing their own, the various plants referred to as za’atar can be purchased from
Well Sweep Herb Farm or Mountain Valley Growers. Although they’re tasty, keep in mind that most domestically grown herbs don’t have the flavor of their wild progenitors. There’s nothing like scarce water, poor soil, and hot sun for developing flavor.

For those who live where there are Middle Eastern markets or specialty stores, by all means buy ready-made, preferably imported, za’atar. You can also
order za’atar blends online.

In Anchorage, you can buy sumac, a key ingredient in my za’atar blend, at
Sagaya, City Market, and Summit Spice. Summit Spice sells its own Anchorage-made za’atar blend in tiny packets using marjoram, thyme, sumac, and sesame seeds. Summit also has a product labeled “Greek oregano,” which they tell me may be grown on farms in Greece or Turkey, depending on the shipment.
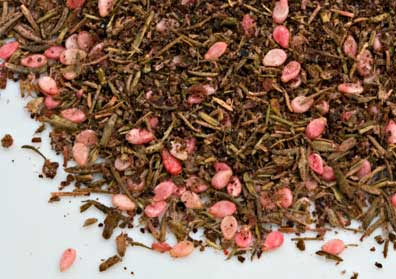
Za'atarZa’atar Herb Blend
Because za’atar has so many uses, I make a lot at one time: 1/2 cup oregano, thyme, and sumac, 1/4 cup sesame seeds, and 1 Tbsp. salt. The sumac, which has a sour taste akin to lemon, is what gives za'atar its red color.

1 part dried Greek oregano, preferably wild-harvested
1 part dried thyme
1 part ground sumac
1/2 part white sesame seeds
Salt to taste

Grind the oregano and thyme in a spice grinder or blender, making sure it’s free of sticks and stems. Put the herbs in a glass jar with a tight sealing lid. Add the sumac, sesame seeds, and salt and shake well to thoroughly combine. Put on the lid and close it tightly. Store away from heat and light.

Za'atar OlivesZa’atar Olives
Made entirely with pantry staples, Za’atar Olives are easy to prepare and make a great last-minute appetizer. Especially when warm, Za’atar Olives are an addictive treat.

2 cups Kalamata olives
1/2 cup olive oil
3 Tbsp. Za’atar Herb Blend (see recipe above)

Rinse the olives and dry them well. Put the olives and olive oil in a small saucepan, bring the olive oil to a simmer, and simmer the olives for 15 minutes. Stir in the Za’atar Herb Blend and simmer for 5 minutes. Serve warm or at room temperature.

Za'atar Bread - Mana'eeshZa’atar Flatbread (Mana’eesh bi Za’atar)
Makes 12 6” flatbreads
When I have breakfast with Marie, an Armenian friend who was born and raised in Beirut, she always serves Mana’eesh, olives, tomatoes, cucumbers, and cheese. Breakfast at Marie’s was my first introduction to za’atar; it's been a part of my repertoire. To make it from scratch, I use my Palestinian friend Salwa’s recipe for pita bread, and top it with Za’atar Herb Blend and olive oil. Although Marie serves this for breakfast, we eat it for a snack, for lunch, or as part of an appetizer spread. If you’re cooking for a small family, like I do, use half the dough for Mana’eesh and the second half for Za’atar pizza (see recipe below).

Dough:
2 1/2 cups lukewarm water
1 Tbsp. yeast (1 packet)
1 tsp. sugar
1 Tbsp. salt
6 – 7 cups all-purpose or bread flour

Topping:
1/2 cup olive oil
1/2 cup Za’atar Herb Blend (see recipe above)

Make the Dough: Place the water in a large bowl. Sprinkle the yeast over the water, sprinkle the sugar on top and let sit for 10 minutes, or until the yeast begins to foam. Mix in the salt and half the flour. Add the rest of the flour one cup at a time, just until the dough holds together. Knead the dough well (either by hand or in a standing mixer), adding flour as necessary until the dough is smooth and shiny. You may need more or less flour than called for in the recipe.

Put the kneaded dough in an oiled bowl to rise, cover the bowl with plastic wrap and a dish towel, and put it in a warm spot. Let the dough rise for 1 hour, or until it has doubled in size.


Preheat the oven to 500°F.

Divide the dough into 12 pieces and pat each piece into a 6” round flatbread. Place the flatbreads on baking sheets with rims; 6 dough rounds fit on a half-sheet pan. Use your fingers to dimple the tops of each flatbread. Let the flatbreads rest for 20 minutes.

Make the Topping: Mix together the olive oil and Za’atar Herb Blend.

Assemble and Bake the Flatbreads: Dimple the flatbreads one more time. Divide the topping between the flatbreads, about 1 Tbsp. each, and spread it evenly over the flatbreads’ tops. Bake the flatbreads, one baking sheet at a time, for 8-10 minutes, or until the flatbreads are golden. Serve immediately.

Note: Mana’eesh can be made ahead and rewarmed just before serving. To rewarm, stack the Mana’eesh, topping side to topping side, and wrap in aluminum foil. Put in a 300°F oven for 5-10 minutes, or until they are warmed through.

Za'atar with LabnehZa’atar with Labneh (Yogurt Cheese)
Makes 3/4 cup

Plain Labneh goes really well with Za’atar Flatbreads. For garlic fans, mix 1-2 cloves puréed garlic into the cheese (an easy way to purée the garlic is with a
standard Microplane rasp grater). Usually, I let the yogurt drain into the sink. If I’m feeling ambitious, I let it drain into a bowl and use the liquid to replace some of the water when I’m making bread dough.

2 cups plain yogurt, preferably whole milk
Pinch of salt
Za’atar Herb Blend (see recipe above)
Olive oil (optional)

Line a strainer with a paper towel. Mix a little salt into the yogurt and dump the salted yogurt into the paper-towel-lined strainer. Let the yogurt drain for 4 hours or overnight.

Spread the yogurt on a plate, sprinkle with Za’atar Herb Blend to taste, and drizzle with olive oil (if using). Serve with crackers, pita chips, or triangles of pita bread.

Za'atar PizzaZa’atar Pizza
Makes 12”-15” pizza
Extra Za’atar Tomato Sauce is a great way to dress up grilled chicken, lamb, or pork (see recipe below); it also may be frozen for future pizzas. The amount of Aleppo or red pepper depends on how spicy you like your food. Pick either Topping#1 or Topping #2 or, if you want to try them both, make the full amount of Za’atar Flatbread dough.

1/2 recipe Za’atar Flatbread dough (see recipe above)

Za’atar Onion Topping (Topping #1):
1/2 cup thinly sliced onions
1/4 cup chopped parsley
2 Tbsp. olive oil
2 Tbsp. Za’atar Herb Blend (see recipe above)
2 tsp. minced garlic
1/4 – 1/2 tsp. Aleppo pepper or 1/8 – 1/4 tsp. crushed red pepper (optional)
1/2 cup crumbled feta cheese

Za’atar Tomato Sauce (Topping #2) (makes enough sauce for 2 pizzas):
1 14.5 ounce can diced tomatoes, preferably fire-roasted
2 tsp. finely minced or puréed garlic
2 Tbsp. Za’atar Herb Blend (see recipe above)
1/2 – 1 tsp. Aleppo pepper or 1/4 – 1/2 crushed red pepper (optional)
1 Tbsp. olive oil
1/2 cup water or white wine
Salt
Freshly ground black pepper
1/2 cup thinly sliced onions
1/2 cup crumbled feta cheese

Shape the Pizzas: Shape the dough into a 12-15” round; the exact size depends on how thick you like your pizza crust. Place the dough on a pizza pan or baking sheet with rims. Use your fingers to dimple the top of the pizza, and let it rest for 20-30 minutes.

Preheat the oven to 500°F.

To Make Topping #1: Mix together all the topping ingredients except the crumbled feta.

To Assemble Pizza with Topping #1: Spread the topping mix over the pizza. Sprinkle the crumbled feta over the topping.

To Make Topping #2: In a saucepan, mix together the tomatoes, garlic, Za’atar Herb Blend, Aleppo pepper, olive oil, and water or wine. Bring to a boil, turn down the heat, and simmer for 15 – 20 minutes, or until the sauce is very thick. Taste and add salt or freshly ground black pepper, as needed.

To Assemble Pizza with Topping #2: Spread half the tomato sauce over the pizza to cover it (use more if you like saucy pizzas). Save any extra tomato sauce for another purpose. Evenly distribute the onions over the tomato sauce and sprinkle with crumbled feta.

Bake the Pizza: Turn the oven down to 450°F. Bake the pizza for 25-30 minutes or until the crust is nicely golden. Serve immediately.
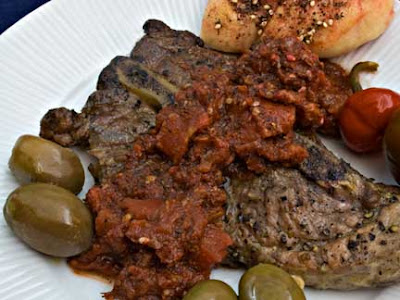
Za'atar Tomato Sauce and Grilled PorkGrilled Pork Steak with Za’atar Tomato Sauce
Serves 4

Za’atar Tomato Sauce goes equally well with grilled lamb or chicken. The sauce is identical to the one used for Za’atar Pizza (see recipe above). For the same reason that brining improves the flavor of pork chops, salting meats well in advance of grilling makes them taste much better. If you can only find large pork steaks, buy 2 and cut them in half.

Meat:
4 pork steaks
Salt
Freshly ground black pepper

Za’atar Tomato Sauce:
1 14.5 ounce can diced tomatoes, preferably fire-roasted
2 tsp. finely minced or puréed garlic
2 Tbsp. Za’atar Herb Blend (see recipe above)
1/2 – 1 tsp. Aleppo pepper or 1/4 – 1/2 crushed red pepper (optional)
1 Tbsp. olive oil
1/2 cup water or white wine
Salt
Freshly ground black pepper

Prepare the Meat: Rinse the steaks and dry well. Season both sides with salt and plenty of freshly ground black pepper. Let sit at room temperature while you make the sauce.

Make the Tomato Sauce: In a saucepan, mix together the tomatoes, garlic, Za’atar Herb Blend, Aleppo pepper, olive oil, and water or wine. Bring to a boil, turn down the heat, and simmer for 15 – 20 minutes or until the sauce is the thickness you prefer. Taste and add salt or freshly ground black pepper, as needed.

Cook the Meat: Grill the pork steak over a medium hot fire or in a grill pan on top of the stove. Turn the meat regularly until it is just done; be careful not to overcook it. Serve immediately with Za’atar Tomato Sauce spooned over.
~~~~~~~~~~~~~~~~~~~~~
This is my entry for
Weekend Herb Blogging, which I am hosting this week at Mediterranean Cooking in Alaska.

Wednesday, February 18, 2009

Recipe for Artichoke Pastitsio with Basil Béchamel (Παστίτσιο με Αγκινάρες και Κρέμα Βασιλικό)

Artichoke Pastitsio with Basil BechamelIs it possible to make vegetarian Pastitsio with more zest than its traditional namesake? The answer is an emphatic yes. Artichoke Pastitsio with Basil Béchamel is so alive with flavor it will make your tastebuds stand up and sing the Greek national anthem.

Pastitsio is a traditional Greek dish. As with most foods that’ve been around for a long time, there’s a million and one ways to make Pastitsio. Family and regional variations are the norm rather than the exception. A typical Pastitsio recipe has layers of tube pasta surrounding a meat-based tomato sauce and is topped with creamy béchamel.

When Tony Tahhan and Peter Minakis
laid down a challenge to recreate Pastitsio using my own individual style, at first I was stumped. I’d already created a wonderful recipe for Pastitsio with Greens and was doubtful I could come up with anything better.

For nearly a week, I laid in bed at night coming up with Pastitsio ideas, and rejecting them all as uninspired. Then I went to Costco, lost my shopping list, and found my inspiration.

Losing the list forced me to go up and down every Costco aisle, something I rarely do, in hopes that seeing what was there might remind me of what we needed at home. Roaming the aisles helped, but also led to impulse buys (the exact reason I avoid wandering around without a list).

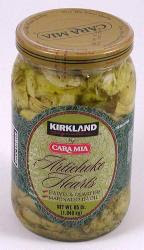
Marinated Artichoke HeartsOne of my impulse buys was a 65-ounce jar of Kirkland/Cara Mia marinated artichoke hearts. That’s right – a jar of artichokes weighing just over 4 pounds. I didn’t have any particular plans for the artichokes; even so, I had to have them.

That evening when I went to bed for my nightly game of Pastitsio, Pastitsio, What Kind of Pastitsio, a partial answer came almost immediately. I’d make my Pastitsio with marinated artichoke hearts.

In 1982, I bought the
ground-breaking Silver Palate Cookbook. The day I bought it, before I had time to crack the book, I went to a friend’s house for dinner. She served tortellini and a spicy tomato sauce full of artichoke hearts. It was love at first taste. I asked for the recipe; she’d made it from the very cookbook I’d just purchased.

Pasta Sauce Raphael, the recipe I’d fallen in love with, was named after a cook at the Silver Palate, the New York City take-out shop that gave its name and recipes to the cookbook. Recently, I read an interview with one of the owner/authors, on the occasion of the Silver Palate Cookbook’s 25th anniversary. She said Pasta Sauce Raphael is one of the all-time most requested Silver Palate recipes. I understand why; it’s delicious.

Since I first encountered it, I’ve never stopped making Pasta Sauce Raphael, a blend of tomatoes, marinated artichoke hearts, herbs, and lots of black pepper. It’s always a hit, no matter to whom I serve it. Best of all, it’s made with pantry staples.

My well-used Silver Palate Cookbook has a notation that I made Raphael Sauce in July 1987 for Alaska Governor Steve Cowper when he visited our home in
Bethel, Alaska. I also made it in 1990 when I catered a fundraising dinner in Juneau, Alaska for not-then-but-later Alaska Governor Tony Knowles. Both Governors loved Pasta Sauce Raphael. At least, they said they did and Alaska Governors never lie, right?

After settling on a Raphael Sauce variation for the Pastitsio filling, I needed a topping that would stand up to its robust flavors. I started with béchamel, the standard topping for Pastitsio, and enhanced it with fresh ricotta cheese and lots of fresh basil.

The end result, Artichoke Pastitsio with Basil Béchamel, was everything I wanted: spicy, but not overwhelming; layers of distinct flavors that taste good on their own and even better blended together; vegetarian, with no compromise on flavor; a recipe for slow evenings at home or rollicking dinner parties; creative fare that fits the traditional Pastitsio mold.

Most importantly, Artichoke Pastitsio with Basil Béchamel is distinctly my own style of food: colorful and bold tasting, using Mediterranean flavor principles and simple techniques. This is a recipe I’ll make again and again.

Artichoke Pastistio with Basil Bechamel
Artichoke Pastitsio with Basil Béchamel (Παστίτσιο με Αγκινάρες και Κρέμα Βασιλικό)
Serves 12 as a main course or 24 as a side dish
Be sure to crush all the peppercorns; most eaters won’t want to bite into large peppercorn chunks. Though 2 tablespoons of crushed peppercorns sounds like a lot, it's balanced by the mild pasta, cheese, and topping. (The original recipe for Raphael Sauce calls for a whopping 3 tablespoons of freshly crushed black peppercorns.) Don't cut up the artichoke pieces, leaving them large protects the flavor of artichokes from being lost in the spicy sauce. Instead of small jars of marinated artichoke hearts, it’s more cost-effective to buy large jars.

Sauce:
3 6-ounce jars marinated artichoke hearts (or 24 artichoke pieces and 3/4 cup of marinade from a giant jar of artichokes)
4 cups diced yellow onions, 1/2” dice
2 Tbsp. olive oil
Salt
1 tsp. Aleppo pepper or 1/2 tsp. crushed red pepper flakes
28-ounce can crushed tomatoes
14.5-ounce can diced tomatoes, preferably fire-roasted
1 Tbsp. dried oregano, crushed
2 Tbsp. freshly crushed black peppercorns

Béchamel:
1/2 cup butter
1/2 cup flour
4 cups whole milk
Salt
3 ounces parmesan cheese, freshly grated
1 cup ricotta cheese, preferably whole milk
1 packed cup fresh basil leaves

Pasta:
1 pound Pastitsio pasta, small penne, or other hollow pasta
1 cup freshly grated parmesan cheese

Make the Sauce: Separate the artichoke pieces from the marinade. Remove as much oil from the marinade as possible; a fat separator makes this task easy. Discard the oil and reserve the rest of the marinade.

Sauté the onions, lightly seasoned with salt, in olive oil until the onions soften and start to turn golden. Add the Aleppo pepper and cook for 1 minute. Stir in the crushed tomatoes, diced tomatoes, oregano, and crushed black peppercorns, bring to a boil, turn down the heat, and simmer uncovered for 30 minutes.

Add the reserved artichoke marinade and simmer for 30 minutes.

Add the artichoke pieces and simmer until the sauce is very thick, about 30 minutes. (The sauce may be made ahead to this point.)

Make the Béchamel: While the artichoke sauce is cooking, make the béchamel. Warm the milk over low heat or in the microwave; don’t bring the milk to a boil. Melt the butter in a large saucepan, thoroughly mix in the flour and cook for 2 minutes, stirring constantly. Slowly stir in the warm milk and cook, stirring, until the sauce is smooth and the thickness of heavy cream. Season with salt to taste. Stir in the 3 ounces of freshly grated parmesan cheese and take the béchamel off the heat.

Measure out 1 1/2 cups of béchamel and set aside to mix into the pasta. Thoroughly mix the ricotta into the remaining 2 1/2 cups béchamel. In a blender or food processor, purée the basil and one cup of the béchamel-ricotta mix; stir this purée back into the remaining béchamel-ricotta mix.

Cook the Pasta: Bring a large pot of salted water to a boil, and cook the pasta until it’s al dente (the length of cooking time depends on the size of the pasta). Drain the pasta in a colander, and mix it with the reserved 1 1/2 cups béchamel.

Assemble the Pastitsio: Preheat the oven to 375°F. Place half the pasta in the bottom of a well-oiled 9” x 13” baking pan. Sprinkle the pasta with 1/3 cup freshly grated parmesan cheese. Spread the artichoke sauce over the cheese, making sure the artichoke pieces are evenly distributed. Top with the remaining pasta and another 1/3 cup freshly grated parmesan cheese. Spread the Basil Béchamel over the pasta and top with the remaining 1/3 cup freshly grated parmesan cheese.

Bake at 375°F for 20 minutes. Reduce the heat to 350°F and cook for 40-45 minutes, or until the top of the Pastitsio is golden and set. Let cool for at least 15-20 minutes before cutting into squares and serving (if you cut Pastitsio immediately after removing it from the oven it will fall apart).

Monday, February 16, 2009

The Language of Baklava by Diana Abu-Jaber with Recipe for Jordanian Kofta and Yogurt Sauce (Ιορδανικό Γιαουρτλού Kεμπάπ)
Diana Abu-Jaber grew up in the environs of Syracuse, New York during the 1960s and 1970s. She shares the dominant cultural references of all Americans her age. Her mother and influential maternal grandmother are Americans, their distant heritage “Irish, German, maybe Swiss?”

Abu-Jaber’s father is from Jordan; his heritage Bedouin and Palestinian. His large, loud, exuberant family, many of whom lived in or near Syracuse, was a constant in Abu-Jaber’s life. At home and in her lunchbox, Abu-Jaber ate Middle Eastern food. This food and her Arabic name, so unlike her pale skin and murky green eyes, set her apart from her schoolmates.

When Abu-Jaber was in grade school, her family moved to Jordan. In Jordan, it was her pale skin that set her apart. The smells and sounds and experiences of life in a crowded Middle Eastern city woke up senses Abu-Jaber hadn’t known in America. Just as her heart began to beat with the rhythm of Jordanian life, Abu-Jaber’s family moved back to America.

“America is a cold breeze that snaps us awake … We’ve left Jordan, with its lush winds, dust, and sun-stained air. When I wake in a hotel bed on the first morning back in America, I’m dazed by a blankness around me: the sleekly painted walls, the air slack without the scents of mint, olive, and jasmine, and an immobilizing silence. I close my eyes and conjure the songbirds Mrs. Haddadin kept in a gold cage hanging from a tree branch; the wobble of Munira’s singing as she dashed a broom through the courtyard. … We’ve returned to Syracuse, to a split-level house that does not have another family living in the upstairs apartment or a communal courtyard or thick hedges of mint.”

In her 2005 memoir, The Language of Baklava, Abu-Jaber describes her rootless journey to adulthood. She struggles to connect with her American and Jordanian cultures, often standing as an outsider to both.

Abu-Jaber
grew up in a family of storytellers: “To me, the truth of stories lies not in their factual precision, but in their emotional core. Most of the events in this book are honed and altered in some fashion, to give them the curve of stories. Lives don’t usually correspond to narrative arcs, but all these stories spring out of real people, memories, and joyously gathered and prepared meals.”

The essential truths and complexities of Abu-Jaber’s relationships to her family and twin cultures, as revealed through her stories
, are captivatingly real. By book's end, we understand Abu-Jaber’s American and Jordanian heritages are inseparably bound in her heart and soul.

In telling her family's stories, Abu-Jaber reveals universal truths about the immigrant experience in America. Like millions upon millions of immigrants who've given strength and diversity to their adopted homeland, Abu-Jaber’s family, many of whom are Arab and some of whom are Muslim, is inextricably woven into the fabric that makes up America. None of these immigrants, or their descendants, can be categorically ejected or rejected without leaving an irreparable hole.

In other words, there is no “us” and there is no “them.” As Abu-Jaber wrote in the Washington Post,
The world is a place of nuance, flux, hardship and complexity: We all live together in it. The real safety will come from learning how to live together better, not from trying to push others out.”

For me, Abu-Jaber’s book had special resonance.
The Language of Baklava is, in many ways, a love letter to Abu-Jaber’s father. I began reading it in a nursing home, by the bedside of my ill father who, briefly and terrifyingly, didn’t recognize me. The veil of sadness through which I read The Language of Baklava made its message of paternal love particularly poignant.

I returned home from visiting my father emotionally drained. That night, I cooked some of Abu-Jaber’s recipes for my husband. As we greedily piled our plates with Jordanian Kofta and garlicky Yogurt Sauce, I experienced anew the relationship between food and love that inspired The Language of Baklava.

Jordanian Kebab and Yogurt SauceJordanian Kofta and Yogurt Sauce (Ιορδανικό Γιαουρτλού Kεμπάπ)
Serves 4 as a meal or more as an appetizer
Adapted from The Language of Baklava by Diana Abu-Jaber
These taste best when cooked over a grill (in winter, we grill in our fireplace), but can also be made on a stovetop grill pan. To serve as an appetizer, make smaller kebabs by dividing the meat into 16 equal pieces rather than 8. Serve with Tomato, Cucumber, and Onion Salad, feta cheese, Kalamata olives, and warm pita bread.

Sausage:
1 pound ground lamb or beef
1 egg
1 cup finely diced onion, 1/8”dice
2 Tbsp. minced fresh parsley
2 tsp. ground turmeric
1 tsp. freshly crushed cumin
1 tsp. chile powder, preferably Ancho
1/2 tsp. ground cinnamon
1/2 tsp. ground allspice
Salt
Freshly ground black pepper
Bamboo skewers

Yogurt Sauce:
3 cloves garlic
1/2 tsp. salt
1 1/2 cups plain yogurt, preferably whole milk
1/4 – 1/3 cup fresh lemon juice

Make the Sausage: Put all the sausage ingredients in a bowl, and knead everything together with your hands. Divide the seasoned meat into 8 equal pieces. Roll each piece of meat around a bamboo skewer into a long sausage shape. Refrigerate until you’re ready to cook the Kofta. (The recipe may be made ahead to this point.)

Make the Yogurt Sauce: Purée the garlic and salt with the flat of a chef's knife or using a mortar and pestle. Mix the garlic purée with the yogurt and 1/4 cup lemon juice. Taste and add salt or the remaining lemon juice, as needed.

Cook the Sausages: Grill over a hot fire, turning regularly, and being careful not to overcook. Serve immediately, the hotter the better, with a generous dollop of Yogurt Sauce on the side.

To cook on the stove, heat a cast iron grill pan until it’s very hot, cook the sausages until they are well-browned on one side, turn them over, immediately turn down the heat, and cook until they are done on the other side. Serve immediately.
~~~~~~~~~~~~~~~~~~~~~~~~~~
This is my entry for Cook the Books Club, founded by Rachel at
The Crispy Cook, Ioanna from Food Junkie, Not Junk Food, and Deb from Kahakai Kitchen. Cook the Books is an online book club; this month’s selection is The Language of Baklava by Diana Abu-Jaber.

Thursday, February 12, 2009

Easy Recipe for Roast Rack of Lamb with Red Wine Sauce (Αρνίσια Παϊδάκια με Σάλτσα Κόκκινου Κρασιού)

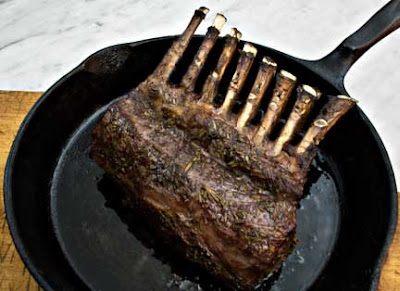
Roast Rack of Lamb with Red Wine Sauce is quick and easy to make, but it’s rich with flavor and perfect for days when you don’t want to fuss with dinner.

Roast Rack of LambThe lamb is washed, trimmed, put in a simple marinade for 30 minutes, browned on the stove, and oven-roasted. The marinade is boiled and turned into red wine sauce. That’s pretty much it. The sauce’s intense flavor is balanced by the lamb, which cooks to perfection in 15-20 minutes.

Oven-roasted potatoes go really well with Roast Rack of Lamb. They’re also easy to make: cut the potatoes in 2” chunks, brown one cut-side of each chunk in a little olive oil using an oven proof skillet, turn each chunk browned-side up, and put the pan of potatoes in the oven with the lamb for about 15 minutes to finish cooking.

Roast Rack of Lamb with Red Wine SauceRoast Rack of Lamb with Red Wine Sauce (Αρνίσια Παϊδάκια με Σάλτσα Κόκκινου Κρασιού)
Serves 3 - 4

I use cabernet sauvignon, or a cabernet-merlot mix, for the marinade. No matter the variety, use wine you’re willing to drink, otherwise the sauce won’t turn out well (don’t use anything labeled “cooking wine”). Be sure not to marinate the meat for longer than an hour. After that, dry red wine’s acidity (3.4 to 3.7 ph) begins to “cook” the meat and break down its texture, neither of which are desirable for tender lamb chops. The ribs in a
Frenched rack of lamb are completely exposed; the blade and chine bones are removed. In Anchorage, Costco sells good quality, pre-Frenched racks of lamb.

1 8-rib rack of lamb, Frenched
Salt
Freshly ground black pepper
2 cups dry red wine
2 Tbsp. minced fresh rosemary
1 Tbsp. minced fresh garlic
1/4 cup minced shallots
2 cups chicken stock
2 Tbsp. butter cut in 4 pieces
1 Tbsp. olive oil

Wash the rack of lamb and
remove the silver skin and as much fat as possible. Season the lamb on both sides with salt and freshly ground black pepper. In a gallon-size ziplock bag or bowl large enough to hold the lamb, mix the red wine, rosemary, garlic, and shallots. Put the lamb in the bag, meat side immersed, and let marinate for 30 – 60 minutes at room temperature.

Preheat the oven to 400°F.

Remove the lamb from the marinade and dry well with paper towels (don’t remove any seasoning that’s sticking to the meat).

Put the marinade in a saucepan and bring to a rapid boil. Continue to boil until the marinade is reduced by half. Strain the reduced marinade and discard the solids. Return the liquid to the saucepan, add the chicken stock, and bring to a rapid boil. Continue to boil until the sauce is reduced to 1/2 – 3/4 cup; watch carefully at the end because the sauce can go from perfect to burnt very quickly. Remove from the heat and stir in the butter, one piece at a time. Taste and add salt or freshly ground black pepper, as needed.

After you first put the marinade on to boil, heat the olive oil in an oven-proof skillet. Brown the lamb, meat side down. When the meat side is nicely browned, turn the rack over and put it in the preheated oven. Cook for 15 – 20 minutes, depending on how done you like your lamb and the size of the rack. Remove from the oven, cover with aluminum foil, and let rest for 5 minutes.

Cut the lamb into chops and plate. Drizzle with red wine sauce and serve immediately.
~~~~~~~~~~~~~~~~~~~~~~~~~~~~~~~~~~~~
This is my entry for Original Recipes, an event hosted and created by Culinarty.

Wednesday, February 11, 2009

Recipes for Oxtail Braised in Sherry & Oxtail Ravioli in Leek-Mushroom Broth

Anchorage Pond in WinterYesterday the sun was shining and the temperature a balmy 15°F (-9°C).

I came in from my walk invigorated, but wanting something that would warm me from the inside out. Luckily, I had some leftover Oxtail Ravioli in Leek-Mushroom Broth, a remarkably delicious dish I’d made with leftover Oxtail Braised in Sherry.

As I’ve mentioned before, using leftovers as an ingredient is one of the easiest ways to create full-flavored food. Instead of eating the same dish twice in a row, try using all the flavors you worked hard to put in the original dish to create something new and exciting.

Although no longer the bargain it used to be,
oxtail (actually, beef tail) is ideal for braising in sherry or other wine. The cartilage, marrow, and tendons in the tail dissolve into the braising liquid when oxtails are cooked long and slow. The meat becomes meltingly tender and the sauce rich and unctuous.

On a recent evening, we feasted on Oxtail Braised in Sherry. There were only two pieces of oxtail left over. That night, I lay in bed scheming and planning how best to use the luscious leftovers. I decided to stuff the meat into Oxtail Ravioli and to enrich the already wonderful braising liquid with earthy mushrooms and sweet leeks.

The next day, I hesitated. Making homemade ravioli seemed like too much of a hassle. But I didn’t have any other ideas, so I persevered and discovered, as I do anew each time I make ravioli, they are easy to make and way less trouble than I always anticipate.

The key to making ravioli is having the right equipment. The dough takes 2 minutes to make in a food processor. A
pasta machine quickly rolls out perfect sheets of pasta. Because the machine can roll pasta so thinly, the resulting ravioli are light and tender. If you don’t have the equipment to make your own pasta, store-bought wonton or gyoza wrappers make tasty ravioli.

For another take on ravioli making with leftovers, check out Maria's recipe for Ravioli with Parsley-Pesto.

Oxtail Braised in SherryOxtail Braised in Sherry
Serves 6 - 8

Oxtail is sold cut into 1” thick slices; buy the meatiest pieces you can find. You will inevitably have a few slices from the tail’s end that have no meat on them. Be sure and add these pieces to the stew; their cartilage adds richness to the broth. Oxtail is delicious braised in any kind of dry wine; I use sherry because I enjoy its subtle flavor. I like the soupy sauce this recipe makes, in part because it leaves me more sauce for playing with leftovers. However, if you want thicker sauce, remove the lid when the meat is done and cook the stew at a medium boil until the sauce is the thickness you prefer.


Braised Oxtail is a good recipe to make ahead. Refrigerating the cooked oxtail hardens any excess fat and makes it easier to remove. As with most braised meats, Oxtail Braised in Sherry freezes well. I make the full recipe, even though I’m cooking for 2, and freeze the leftovers in serving size containers. Other ways of using the leftovers are in Oxtail Ravioli (see recipe below) or for soup (cut up the meat, add it, diced leftover potatoes, and beef stock to the oxtail broth and vegetables, and simmer for 15 minutes).

6 pounds oxtail slices
1 Tbsp. olive oil
Salt
Freshly ground black pepper
1/4 pound diced
thick-cut pancetta, 1/4” dice
4 cups diced onions, 1/2” dice
1 cup diced carrots, 1/2” dice
1 cup diced celery, 1/2” dice
1 Tbsp. minced fresh garlic
1 750ml. bottle dry Sherry
2 cups beef stock
1 14.5 ounce can diced tomatoes, preferably fire-roasted, juices included
3 bay leaves
Fresh parsley, minced, for garnish

Wash and dry the oxtails. Cut off as much fat as you can. Season the oxtails with salt and freshly ground black pepper on both sides. Heat the olive oil in a Dutch oven and, cooking the oxtails in batches, thoroughly brown them on all sides. Remove the browned oxtails from the pot and set them aside.

Add the pancetta to the same pot and cook until it is nicely browned. Add the onions, carrots, and celery, seasoned lightly with freshly ground black pepper, and cook until the onions are translucent, being sure to scrape up any browned bits from the bottom of the pot as you cook the vegetables. Add the garlic and cook for 1 minute.

Stir the Sherry, beef stock, tomatoes, and bay leaves into the vegetables. Return the browned oxtails to the pot. Bring the liquid to a boil, cover, turn down the heat to low, and simmer for 2 1/2 – 3 1/2 hours, or until the meat is very tender and falling off the bone. (The recipe may be made ahead to this point.)

Remove as much fat as possible from the sauce (a
fat separator works well for this task or, if you have time, separate the meat and sauce and refrigerate to harden the fat, which makes it easier to remove from the liquid). If the oxtails have been refrigerated, cook over low heat until the sauce is liquid and the oxtails warmed through. Taste and add salt or freshly ground black pepper, as needed.

Sprinkle with minced fresh parsley and serve with boiled or roasted potatoes.

Oxtail Ravioli in Leek-Mushroom BrothOxtail Ravioli in Leek-Mushroom Broth
Serves 4 – 6 as a main course (makes 12 ravioli, 3 - 4” diameter)
I make this with leftover oxtail because its unctuousness is well-suited for ravioli. However, any leftover braised beef, such as pot roast or stew, may be used instead. Oxtail broth gels when cold, so you need to warm the leftovers to separate the liquids and solids. Use the oxtail liquids, supplemented with rich beef or chicken stock as needed, to make 4 cups of stock for the Leek-Mushroom Broth. Bone enough oxtails to make 1 cup of chopped meat; one large oxtail slice makes about this amount. You can substitute the vegetable-pancetta mix from the oxtails for up to half the meat. Ravioli freezes well uncooked, so if I’m making ravioli, I usually double the pasta and filling recipes so I can freeze some for another day. As for the truffle cheese and truffle oil, they add satisfying
umami to the dish, but neither is necessary; the dish will be very tasty even without them. If you have access to wild mushrooms, by all means use them. Be sure to carefully rinse off any dirt that is trapped between the leeks' many layers.

Pasta:
3/4 cup plus 2 Tbsp. all purpose flour
1 large egg
1/8 tsp. salt
1/2 - 1 Tbsp. water, if needed


Ravioli Filling:
1 cup chopped oxtail meat
3/4 cup grated
sottocenere al tartufo (truffle cheese) or Italian fontina (about 4 ounces)

Leek-Mushroom Broth:
4 cups sliced cremini or wild mushrooms (about 1/2 pound), 3/8” slices
1 Tbsp. olive oil
3 Tbsp. butter, divided
1 Tbsp. minced garlic
1 Tbsp. minced rosemary
4 cups sliced leeks, white and light green parts only, 3/8” slices (2-3 leeks)
4 cups beef stock (or oxtail broth and beef stock to make 4 cups)
1 tsp. white truffle oil
1/2 cup freshly grated parmesan cheese

Make the Pasta: Put the flour, eggs, and salt in a food processor. Process until the ingredients are thoroughly mixed and the dough starts forming clumps. If the dough is too dry, add water in 1 Tbsp. increments and process again. Dump the dough out onto plastic wrap and knead for 1 minute, adding a small amount of flour if the dough is sticky. When you’re done, the dough should be smooth and firm. Divide the dough into two portions, wrap with plastic wrap, and let sit at room temperature for at least 30 minutes. (The dough can be made ahead to this point.)


Run each portion of dough through the rollers of a pasta machine, starting with the thickest setting. Fold the dough in thirds as if folding a letter, turn it 45 degrees, and again run it through the thickest setting. Repeat the folding, turning, and rolling at least three more times, or until the dough is smooth and shiny. Lay the sheets of dough out on dish cloths while they're waiting their turn to be rolled.

Set the pasta machine at the next thinnest setting. Run the sheets of pasta through, dusting with flour as necessary. Continue reducing the setting of the pasta machine and running the pasta through until you reach the machine’s lowest setting. When the sheets of pasta become too long to comfortably handle, cut them into manageable lengths.

Oxtail RavioliForm the Ravioli: Put 2 tsp. chopped meat on a sheet of pasta in clumps far enough apart so you can cut out 3”- 4” round ravioli. Top each clump with 1 tsp. truffle cheese or fontina. Brush water all around the pasta sheet where there isn’t stuffing (use a pastry brush for this task). Top with a second sheet of pasta. Press down to seal the top pasta sheet onto the bottom sheet, being careful to squeeze all the air out from around the stuffing. Cut out the ravioli and place them on a dishcloth while you boil water.

Cook the Ravioli: Bring a large pot of salted water to a rapid boil, then adjust the burner so the water boils slowly. Gently slide in the ravioli and cook until the pasta is tender, about 4 minutes. Remove the ravioli from the water with a slotted spoon and spread out on parchment paper while you make the Leek-Mushroom Broth.

Make the Leek-Mushroom Broth: Sauté the mushrooms, lightly seasoned with salt and freshly ground black pepper, in the olive oil and 2 Tbsp. butter until they’re well browned on all sides. Add the garlic and rosemary and cook, stirring regularly, for 2 minutes. Remove the mushrooms and seasonings from the pan with a slotted spoon and set aside.

Stir the leeks into the same pan, scraping up any browned bits on the pan’s bottom; add oil or butter, as needed. Sauté the leeks until they’re soft and tender. Stir in the stock, bring to a boil, turn down the heat and simmer for 10 minutes. Stir in the mushrooms and simmer for 10 minutes. Taste and add salt or freshly ground black pepper, as needed.

Stir in the truffle oil, and gently add the cooked ravioli to the broth. Spoon some broth over the ravioli (I use a turkey baster for this task) and simmer until the ravioli are warmed through.

Serve: Divide the ravioli between 4 – 6 warmed pasta bowls. Divide the broth and vegetables between the bowls, sprinkle with freshly grated parmesan cheese, and serve immediately.
~~~~~~~~~~~~~~~~~~~~~~~~~~~
This is my entry for the 100th post celebration of
Presto Pasta Nights, created and hosted by Ruth of Once Upon a Feast.

Bob in a Blanket Bob in a Blanket

Saturday, February 7, 2009

Recipe for Seafood and Vegetable Stew with Rouille (Red Pepper Sauce)

Fish Stew with Vegetables and RouilleFish and Vegetable Stew with Rouille

The discovery of a new dish does more for human happiness than the discovery of a new star.
John Anthelme Brillat-Savarin, Physiologie du Gout (Physiology of Taste) (1825)

Where do recipes come from? Family, community, tradition, and serendipitous accident are easy but incomplete answers.

The primary source of recipes has always been an individual cook’s imagination and palate. Over time, original recipes are modified by other cooks’ imaginations and adjusted by yet more cooks’ palates, to infinity and without limitation.

The food articles I enjoy most are ones that explain how a dish was developed or why a cook chose to combine certain flavors. Although its authors’ cooking styles and skills are quite different from my own, Ideas in Food is one of my favorite blogs. It focuses on the techniques and thought processes that go into creating unique flavor combinations.

I recently made Seafood and Vegetable Stew with Rouille. Here's how it came into being:

My kitchen counter was overflowing with
garnet yams, bounty from more than one Full Circle Farms CSA box. I wanted to do something other than oven-roasting the yams or making oven fries. Looking for inspiration, I randomly pulled cookbooks off the shelves.

Barbara Kafka’s book
Soup: A Way of Life had an interesting recipe for Fall Fish Stew that included sweet potatoes. I decided to try it.

My first version of the stew was similar to Kafka’s, though I substituted sautéed sweet potatoes for boiled and edamame beans for limas. After tasting the broth, I wanted more flavor.

In my next version, I added sautéed onions and red bell peppers, and used a different Rouille recipe than Kafka’s. I seasoned the Rouille with dried, ground red Moroccan pepper (poivron rouge). This version was tasty, but I thought it could be better.

In my final version, I added crushed fennel seeds and shelled shrimp. This combination was exactly what I wanted. Although inspired by Kafka, the final stew is uniquely my own.

Map of High Atlas MountainsI internet-ordered poivron rouge from World Spice Merchants in Seattle, one of my favorite herb and spice purveyors. World Spice describes poivron rouge as “sweet red pepper … produced from sweet round red niora peppers grown in the lush valleys at the foot of the High Atlas Mountains to the northeast of Marrakech.“

Poivron Rouge and PaprikaPoivron Rouge and Sweet Hungarian Paprika

Although Moroccan recipes often call for paprika, niora peppers are what Moroccans use for “paprika.” The flavor of ground niora differs significantly from sweet Hungarian paprika. Niora is spicier and has a fruitier flavor than its Hungarian counterpart, which has a slightly bitter aftertaste.

Moroccan niora peppers are likely the same as the ñora peppers used in
Romesco sauce and other Spanish and Catalonian dishes. In addition to having similar names, nioras and ñoras look the same. Most texts refer to nioras and ñoras only as members of the Capsicum annuum family; in other words, as domesticated peppers. However, in Catalan Cuisine, Colman Andrews says pepper scholar Charles Perry “thinks the nyora [ñora] pepper is the variety scientifically called Capsicum annuum grossum/provar. Pomiforme/sub-var. Conc. Humilirotundum Haz."

No matter what its scientific designation might be, poivron rouge has wonderful flavor and a permanent place in my spice cupboard. Its mildly spicy and fruity tastes make distinctively delicious Rouille and a mouth-wateringly good Seafood and Vegetable Stew.

Seafood Stew with Vegetables and RouilleSeafood and Vegetable Stew with Rouille (Red Pepper Sauce)
Serves 4
The stew may also be made with just fish or just shrimp; if so, use 1 pound of either ingredient. Although not necessary, steamed rice is a nice complement to the spicy, aromatic broth. Serve the rice on the side so eaters can stir the amount they desire into the stew.

1 cup peeled, diced garnet yams or sweet potatoes, 1/2” dice (1 garnet yam)
2 Tbsp. olive oil
Salt
Freshly ground black pepper
1 cup diced red bell pepper, 1/2” dice (1-2 peppers)
1 cup diced yellow onion, 1/2” dice
1 tsp. freshly crushed fennel seed
4 cups fish stock or clam broth (nectar)
1 recipe Rouille (see below)
1 cup shelled edamame beans (thawed) or fresh fava beans
1/2 pound skinless fillets of halibut, rockfish, cod, or other white-fleshed fish, cut in 3/4” pieces
1/2 pound shelled and cleaned shrimp,
16-20 count, halved crosswise
1/4 cup fresh lemon juice (1 lemon)

Minced parsley for garnish

Sauté the garnet yams in olive oil, lightly seasoned with salt and freshly ground black pepper, until they start to brown around the edges. Stir in the red bell peppers and onions, and continue to sauté until the onions soften. Add the crushed fennel seed and sauté for 1 minute. Stir in the fish stock, bring to a boil, turn down the heat and simmer for 15 minutes. (The recipe may be made ahead to this point.)

In a small bowl, whisk one cup of the hot broth into the Rouille. Stir this mixture into the simmering stew pot, along with the edamame beans, fish, and shrimp. Do not let boil or the Rouille may curdle. Simmer for 3-4 minutes, or until the seafood is cooked through. Stir in the lemon juice. Taste and add salt or lemon juice, as needed.

Sprinkle with minced parsley and serve immediately with steamed rice and wedges of lemon.

Rouille
Recipe adapted from
In the Hands of a Chef by Jody Adams
Rouille goes well with all fish, and is a tasty addition to fish salads. The recipe may be doubled or tripled and keeps for a week in the refrigerator.

1 egg yolk
1/2 tsp. Dijon mustard
1 Tbsp. fresh lemon juice
1/4 cup vegetable oil
1/4 cup best quality extra virgin olive oil
2 tsp. chopped garlic
1/2 tsp. salt
4 tsp.
poivron rouge or sweet Hungarian paprika
1/4 tsp. cayenne pepper

Put the egg yolk, mustard, and lemon juice in a blender and mix well. While the blender is running, add the vegetable oil drop by drop so that it emulsifies with the other ingredients. While the blender is running, pour in the olive oil in a steady stream. Add the remaining ingredients and blend until the Rouille is very smooth, scraping down the sides of the blender to ensure all ingredients are thoroughly incorporated.
~~~~~~~~~~~~~~~~~~~~~~
This is my recipe for
Weekend Herb Blogging, hosted this week by Dee from The Daily Tiffin.